CH19-NGC6992 Complete ImagesPlus 5.75 Processing
Complete work flow for processing CH19-NGC6992 RGB data from the DSLR_Astro_Image_Processing Yahoo Group is shown below.
Processing Summary:
- ArcSinH stretch with color decompression to preserve color saturation and nth power HDR prestretch scale to minimize star size.
- Multi-point gradient removal.
- Reduce image scale by 1/2 for smoothing and also display on the web.
- Split nebula and stars into two color images using the Feature Mask© tool. This step makes it simple to apply different custom processing to the stars and nebula.
Feature Mask is Copyright © August 1, 2013 MLUnsold Digital Imaging. All Rights Reserved.
- Merge the split star and nebula image using combine image layers with merge split blend mode. This allows you to enhance the star and nebula images using different functions and to quickly merge the enhanced images to check the result.
- Apply star size reduction to the split star image.
- Apply micro curves with screen blend mode and luminance mask to the nebula image to increase its brightness. Mild decovolution is applied next to sharpen the nebula.
- Merge the enhanced star and nebula images using combine images layer with merge split blend mode that was setup in step 5.
- Mild saturation increase is applied to the merged image.
- Set black point to 0 using the histogram and levels tool.
Each step uses normal blend mode and 100% opacity unless otherwise noted. Many steps are explained in detail by links to additional tutorials. See ImagesPlus 5.0 Processing Tutorials for a list of all tutorials by function.
Processing Detail:
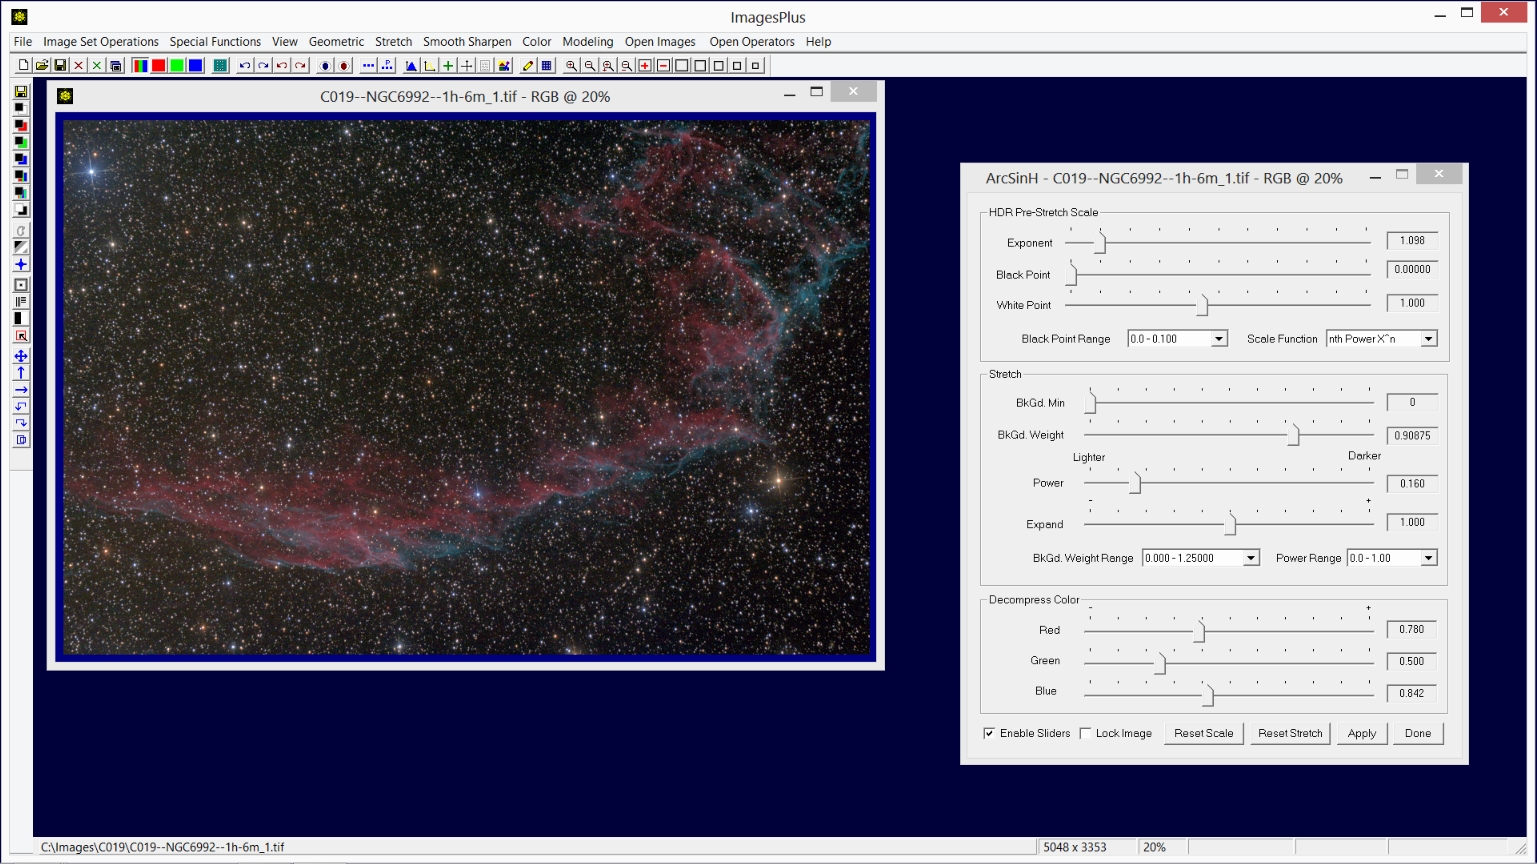
Step 1) ArcSinH stretch with color decompression to preserve color saturation and nth power HDR prestretch scale to minimize star size.
The Stretch | ArcSinH tool is used for the initial image stretch. First the Power and BkGd. Weight sliders are moved to the left to increase brightness and set the background level, respectively. Next the Exponent slider of the nth Power HDR Pre-Stretch Scale control group is moved to the right to adjust contrast. The Red and Blue sliders of the Decompress Color control group are moved to the right to adjust red and blue saturation. Careful adjustment of the initial stretch parameters greatly simplifies processing that follows.
 |
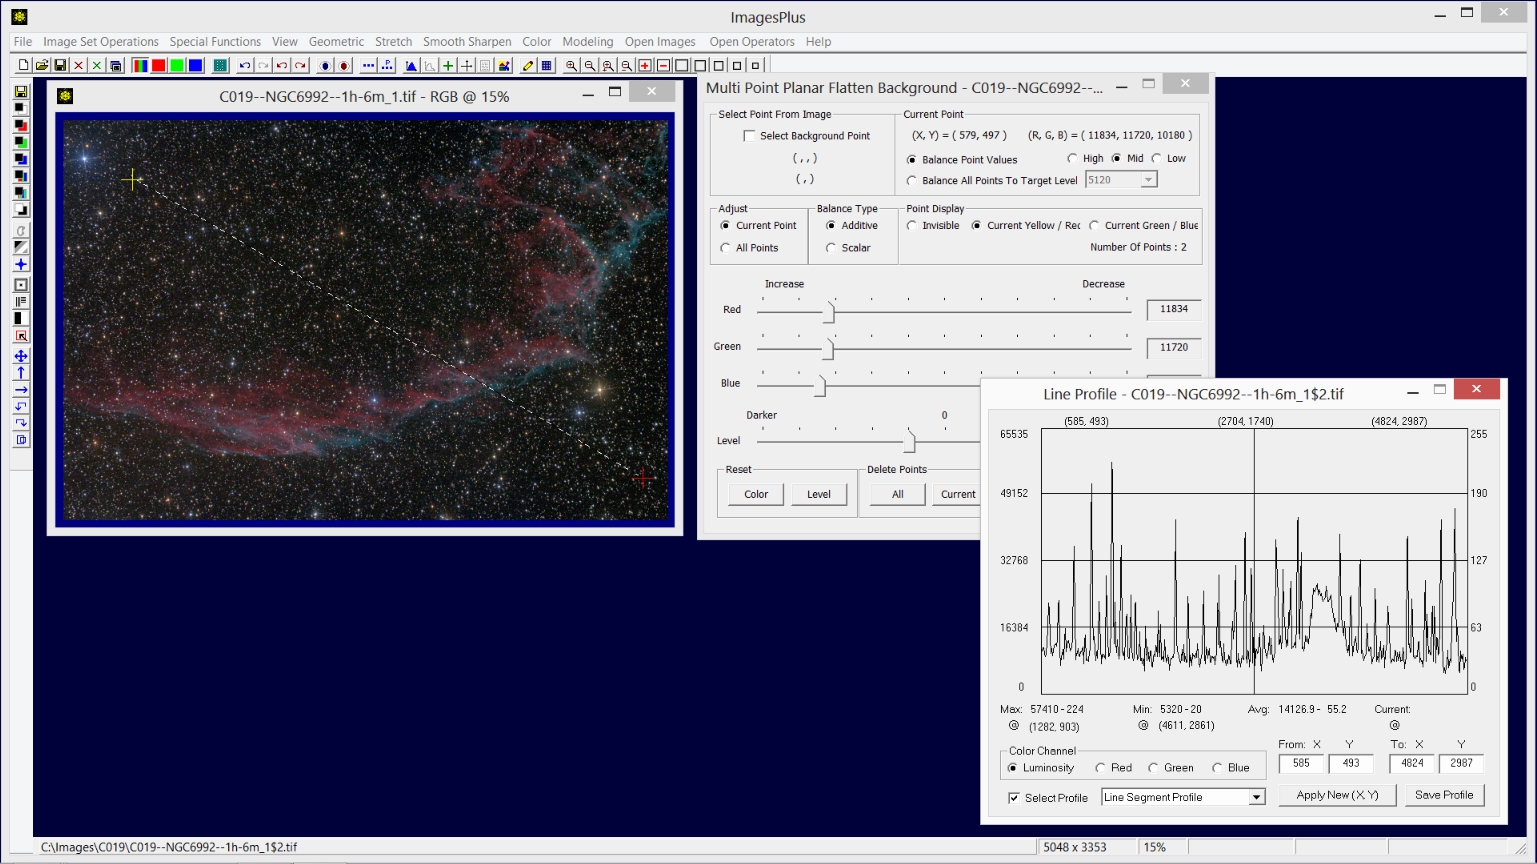
Step 2) Multi-point gradient removal.
The Special Functions | Multi-Point Planar Flatten Background tool can be used to select multiple points from the image and use the points to flatten the background. In this case just two points are selected from the image as shown by the red and yellow plus signs. The Line Profile tool is used to draw a line segment from the top left yellow control point to the bottom right red control point. The line profile along the line segment is used to control adjustment of the active yellow control point. The Level slider on the Multi-point tool is moved to the left to darken the image area around the yellow active control point until the line profile has the same base height on its left and right side. At this point the gradient from top left to lower right has been removed. Details for using the Multi-point Flatten tool can be found at the
Multiple Point Background Color Balance & Flatten Tool tutorial.
 |
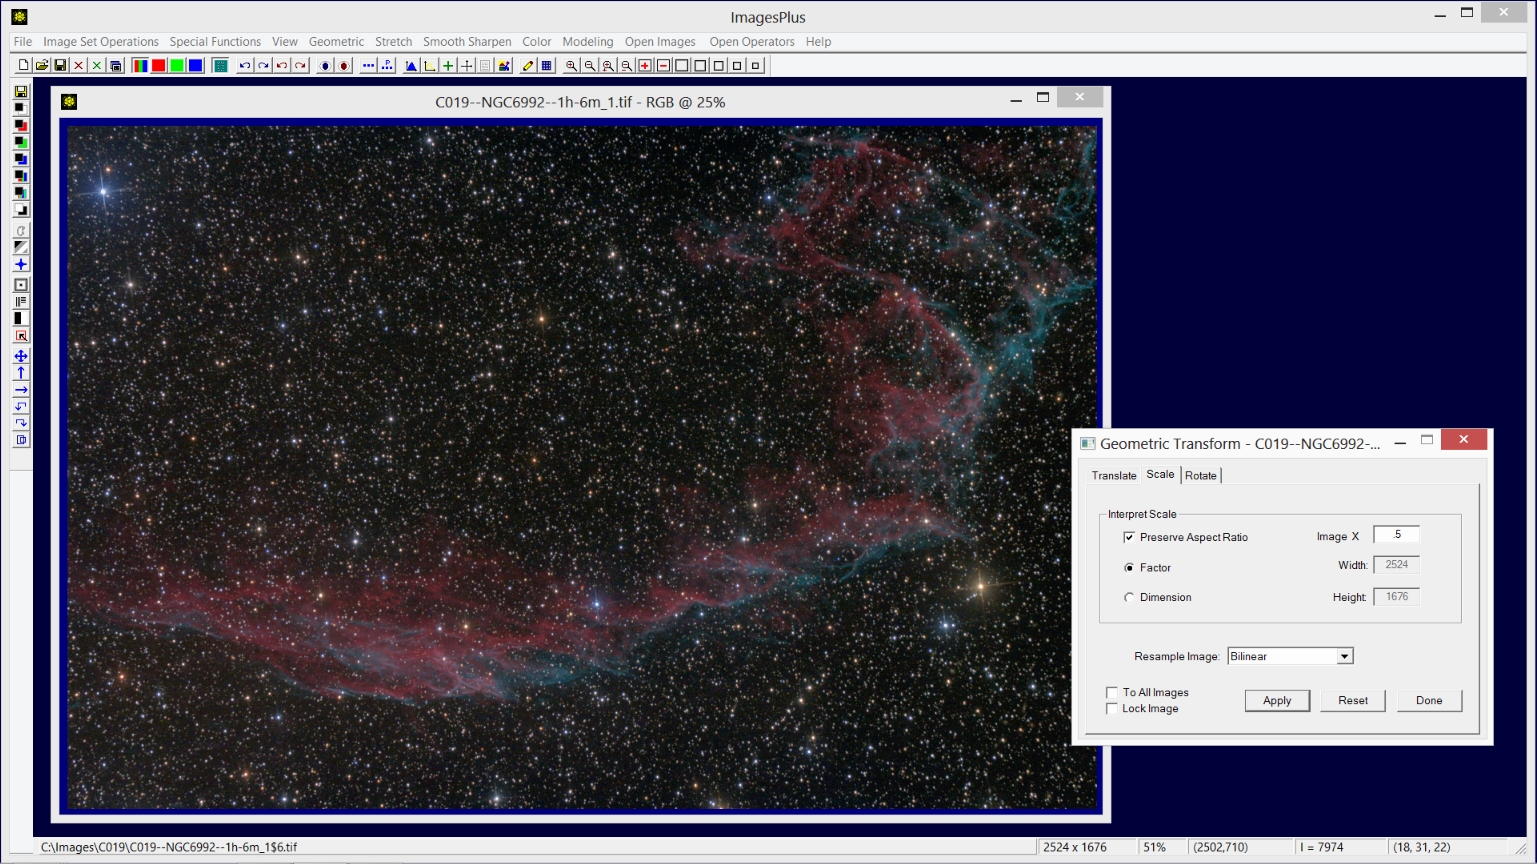
Step 3) Reduce image scale by 1/2 for smoothing and also display on the web.
The Geometric | Transforms | Scale tool is used to reduce image size by 1/2. So .5 is entered in the Factor Image X text box on the Scale tool. This steps smooths the image and also make it a good size for display on the internet.
 |
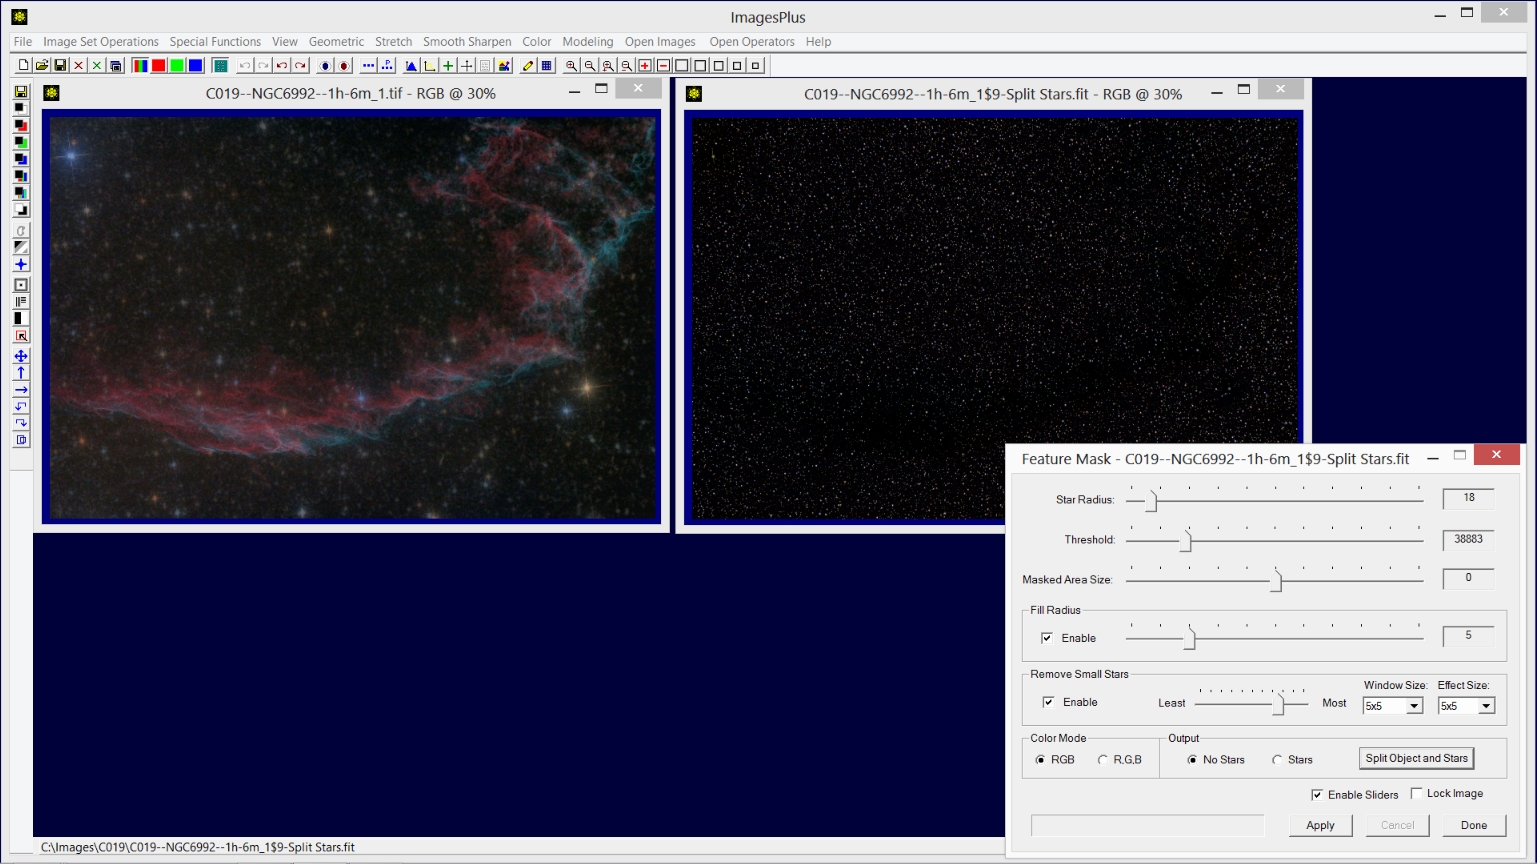
Step 4) Split nebula and stars into two color images using the Feature Mask© tool. This step makes it simple to apply different custom processing to the stars and nebula.
Feature Mask is Copyright © August 1, 2013 MLUnsold Digital Imaging. All Rights Reserved.
The Feature Mask© tool is opened using the 11th button from the top on the left vertical toolbar. Feature Mask© parameters are adjusted to maximize nebula detail while at the same time minimizing stars as shown by the nebula image on left. After the Feature Mask© parameters for the nebula are adjusted the Split Object and Stars button on the Feature Mask© tool is pushed to create a star only image shown on right. It is now simple to apply different custom processing to the stars and nebula images. See
Using the Feature Mask© to Create an Object Image, Star Image, and Masks for details.
 |
Step 5) Merge the split star and nebula image using combine image layers with merge split blend mode. This allows you to enhance the star and nebula images using different functions and to quickly merge the enhanced images to check the result.
The Special Functions | Combine Images Using | Blend Mode, Opacity, and Masks tool is used to layer all open images. Since only the split stars and split nebula images are open thery are the only images in the layer stack. Left click on the top image layer in the layer tree then set its blend mode to merge split. The merged split star and nebula image is shown on the right. Now minimize the Combine Images window while the nebula and star images are enhanced in the next few steps.
 |
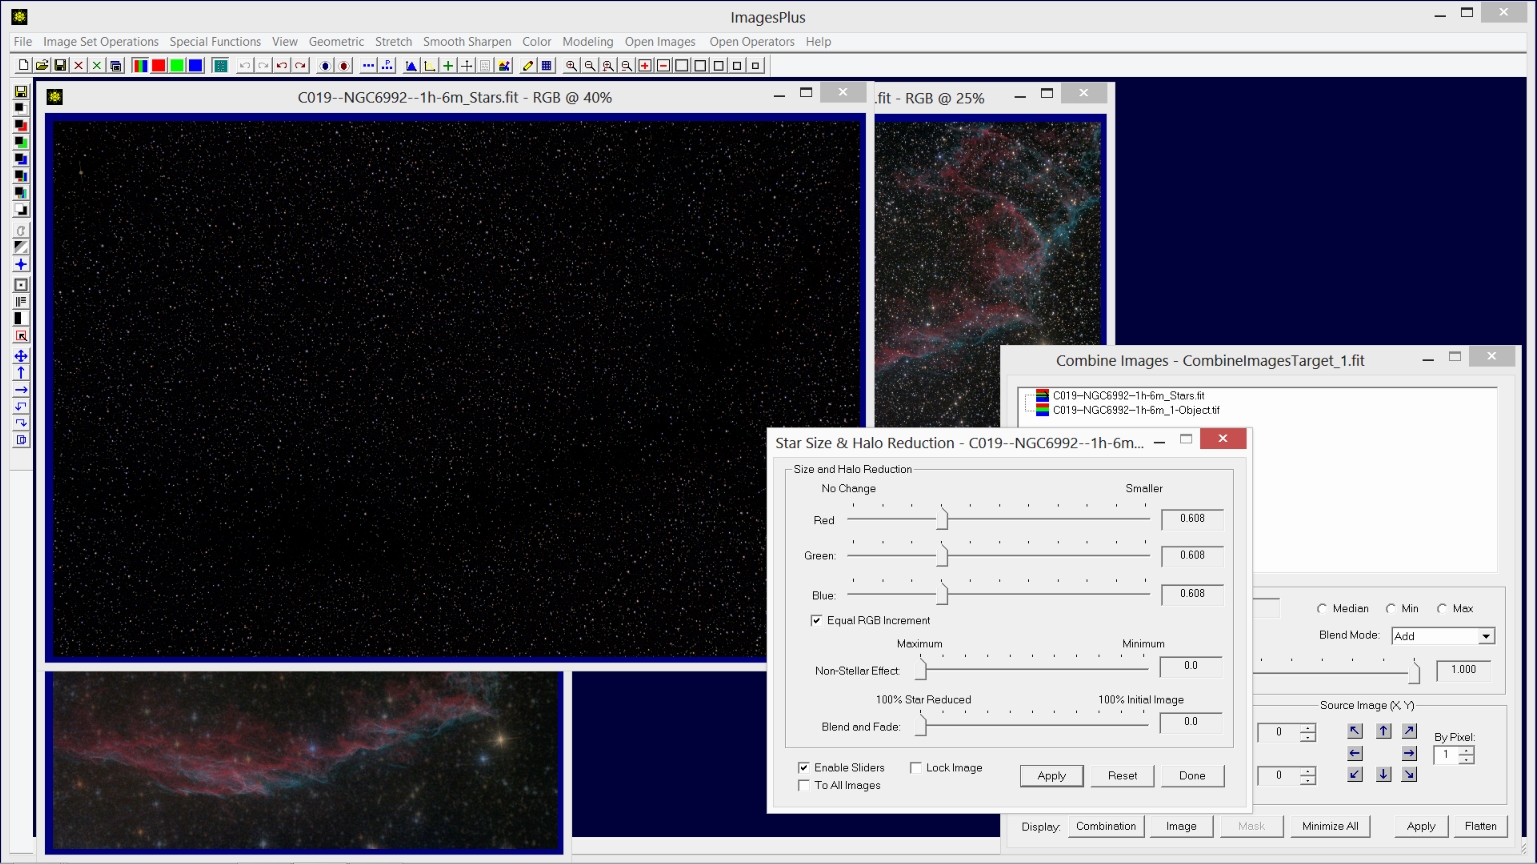
Step 6) Apply star size reduction to the split star image.
The Special Functions | Star Size and Halo Reduction tool is used to reduce size size of the spit star image.
 |
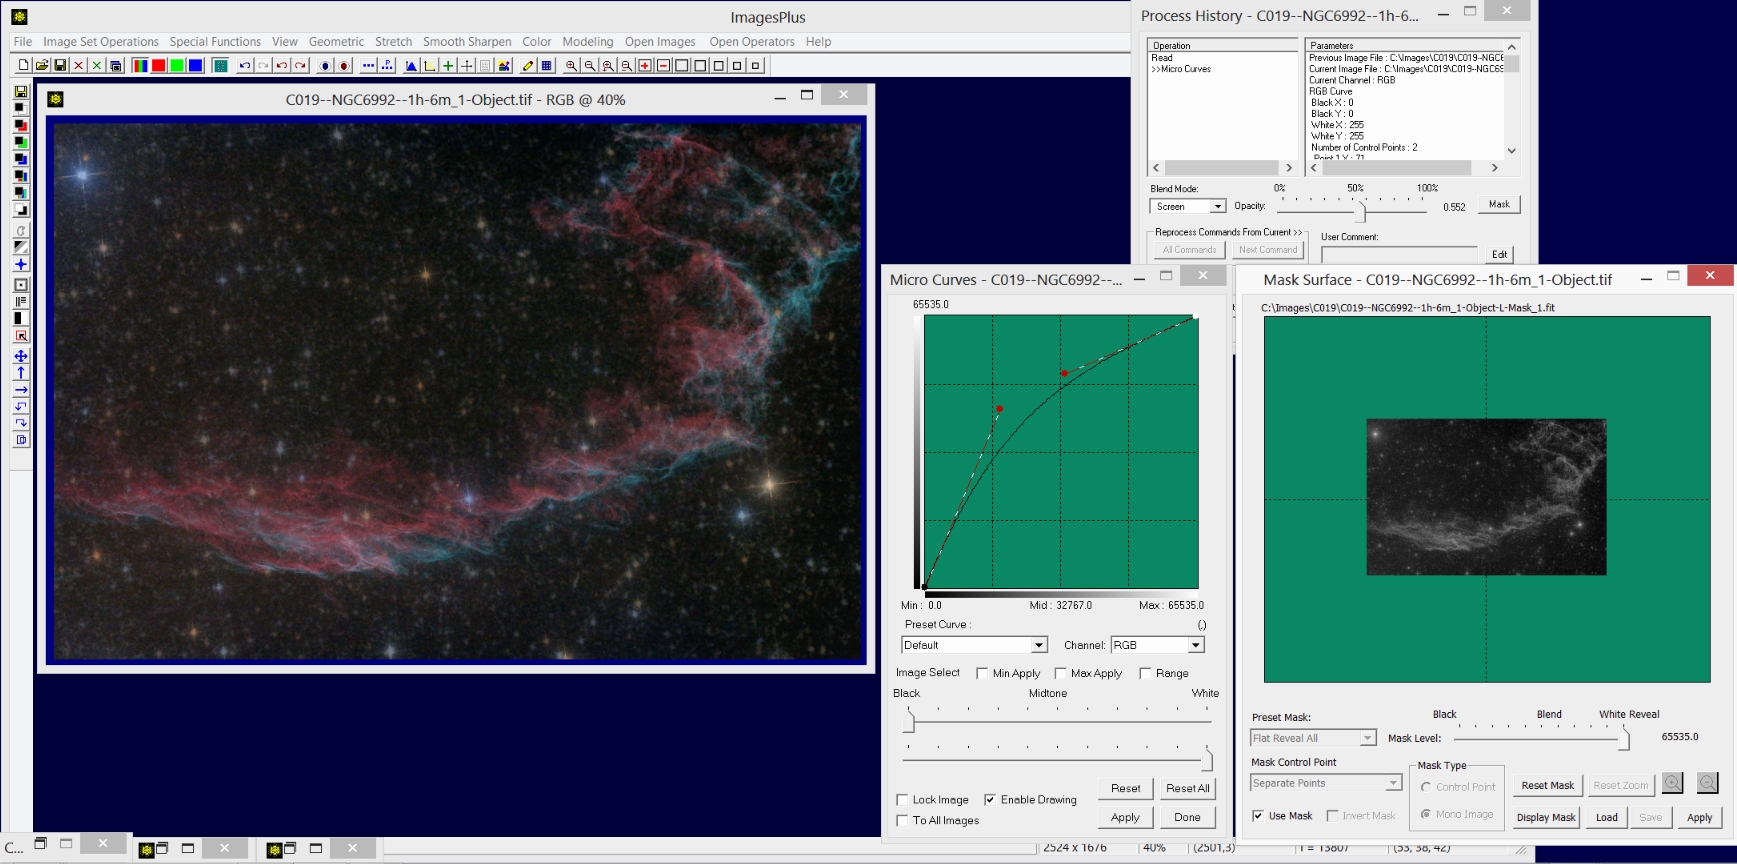
Step 7) Apply micro curves with screen blend mode and luminance mask to the nebula image to increase its brightness. Mild decovolution is applied next to sharpen the nebula.
The Stretch | Micro Curves tool is used with a luminance mask to increase brightness of the nebuala and its faint outer area. Blend mode is set to screen with opacity = 0.552 on the Process History window of Micro Curves. Several tutorials that show many different ways to create and use masks with any of the stretch, smooth, sharpen, decovolution, and color adjustmnet tools can can be found at the main ImagesPlus processing tutorial page.
 |
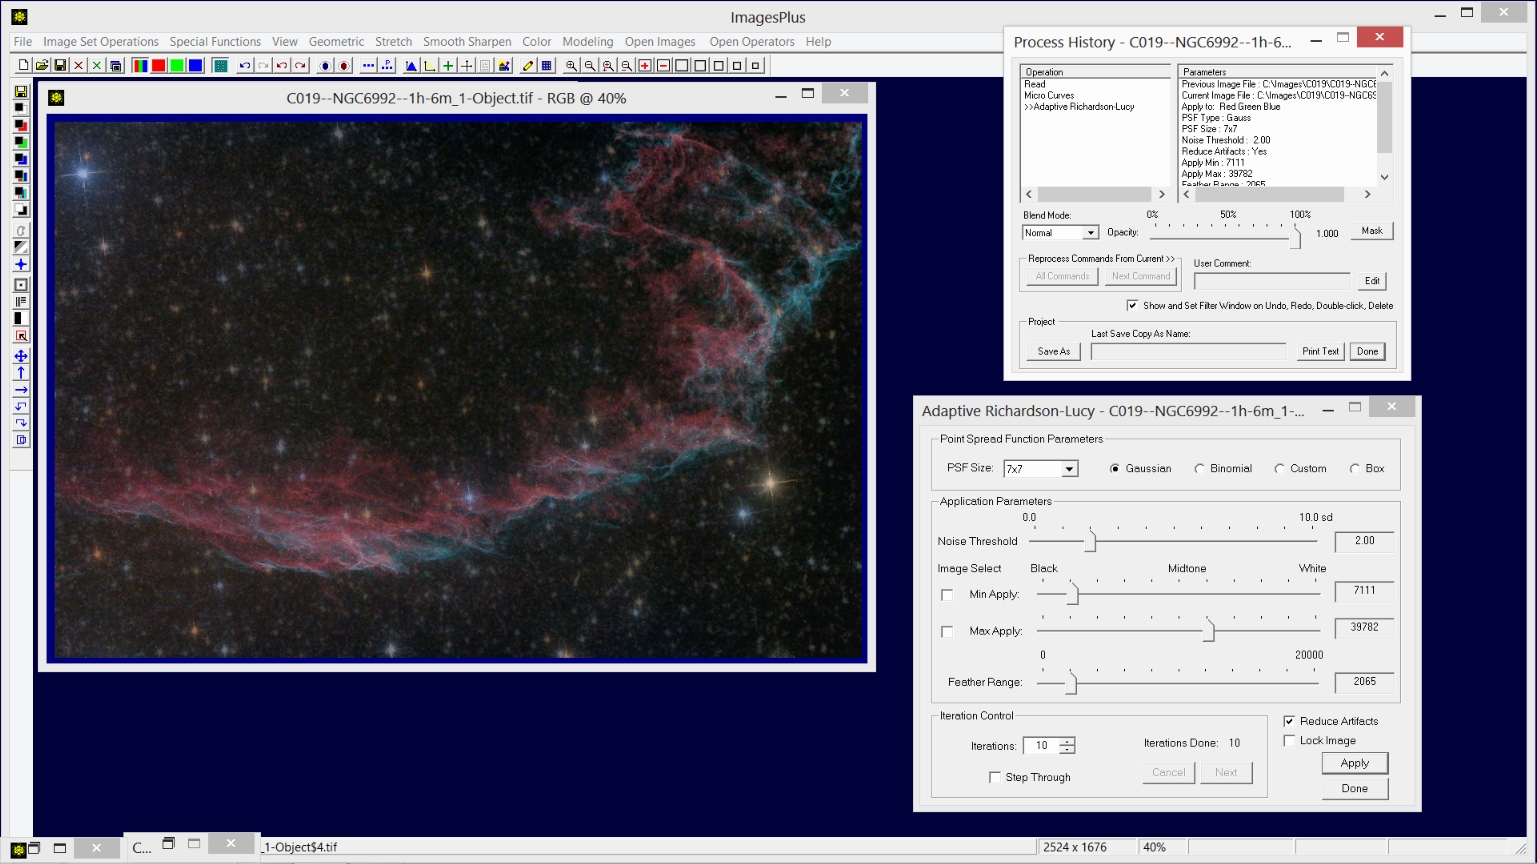
The Smooth Sharpen | Adaptive Richardson-Lucy (ARL) deconvolution tool is used to sharpen the nebula. A luminance apply range min = 7111, max = 39782, and feather radius of 2065 is used to control the application of ARL deconvolution. The luminance range can be set by checking the Min Apply or Max Apply box on the ARL window then left-click on an area of the image.
 |
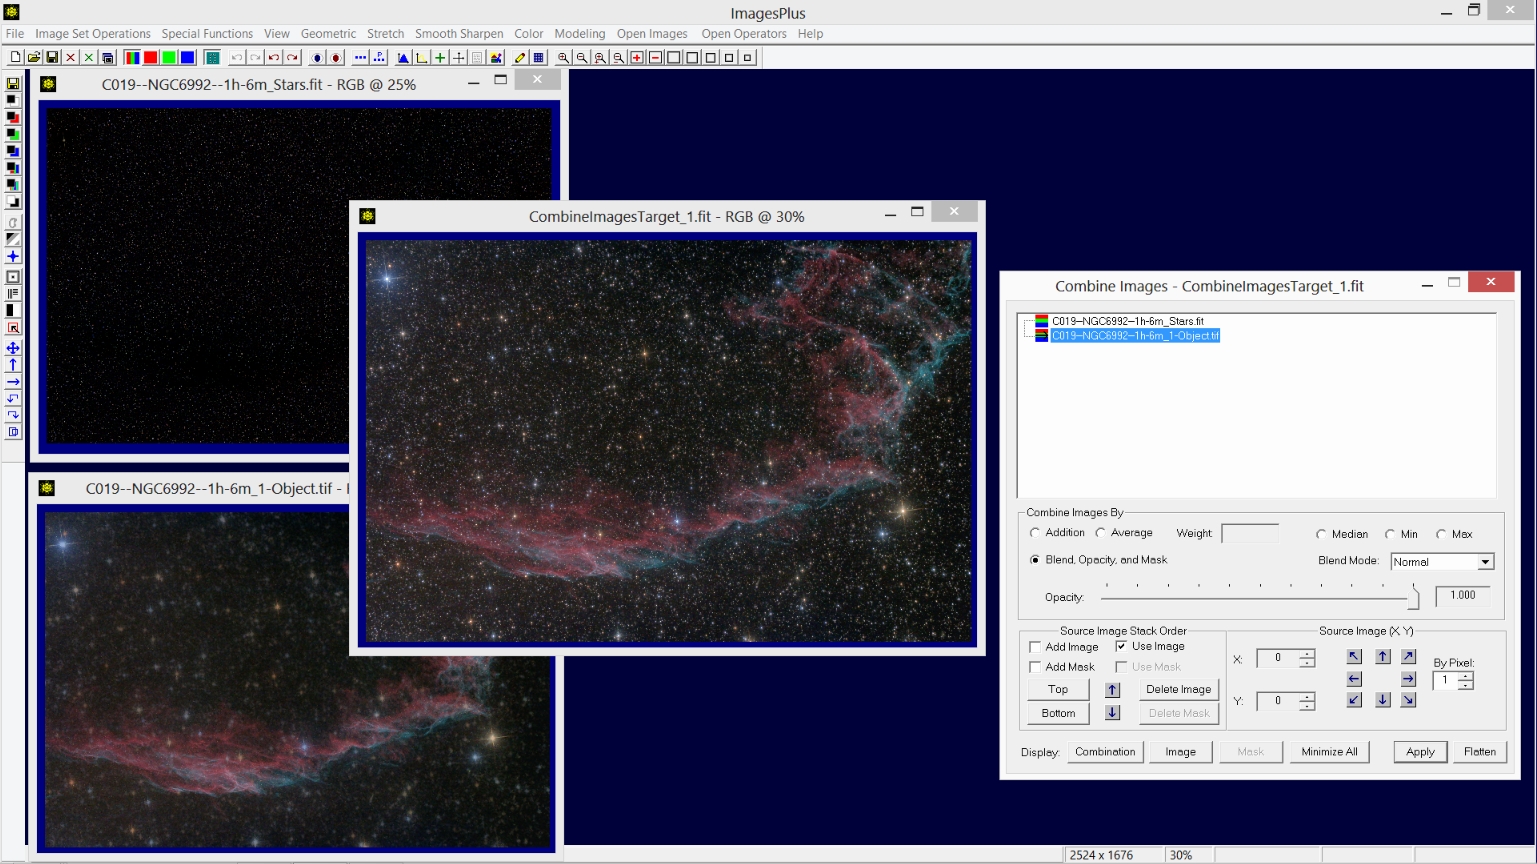
Step 8) Merge the enhanced star and nebula images using combine images layer with merge split blend mode that was setup in step 5.
The Combine Images layer tool which was minimized in step 5 after etup is now restored. Press Apply on the Combine Images tool to merge the enhanced neubuka and reduced star sizes images using merge split blend mode. Several tutorials that show many different uses of Combine Images layers with blend modes, opacity, and masks can be found at
the main ImagesPlus processing tutorial page.
 |
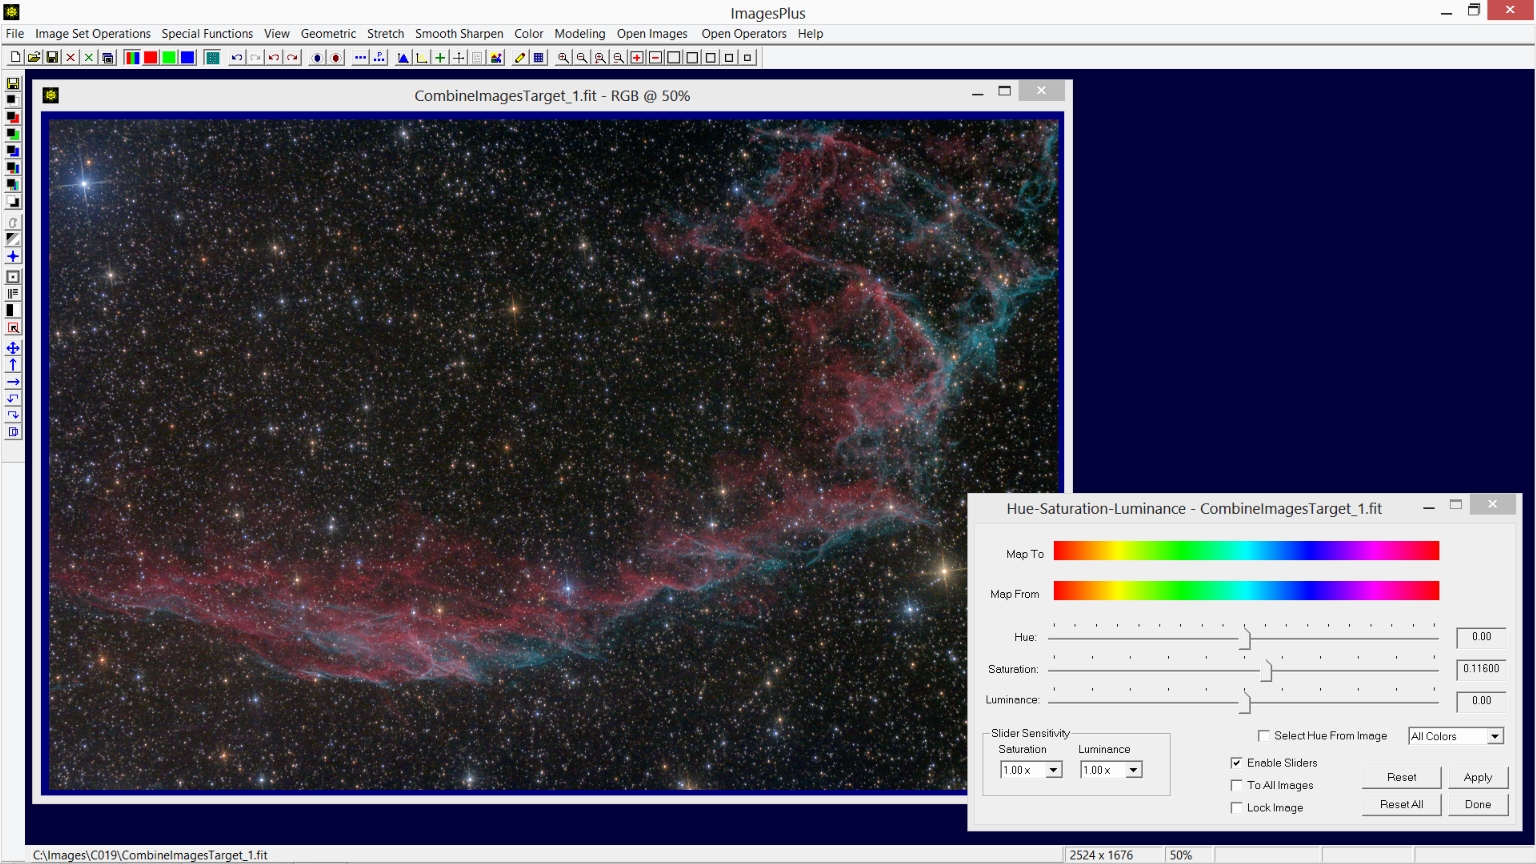
Step 9) Mild saturation increase is applied to the merged image.
The Color | Hue-Saturation-Luminance tool is used to apply a mild saturation increase to the image. Additional information for using the Hue-Saturation-Luminance tool can be found at Shift Hue and Enhance Saturation and Luminance.
 |
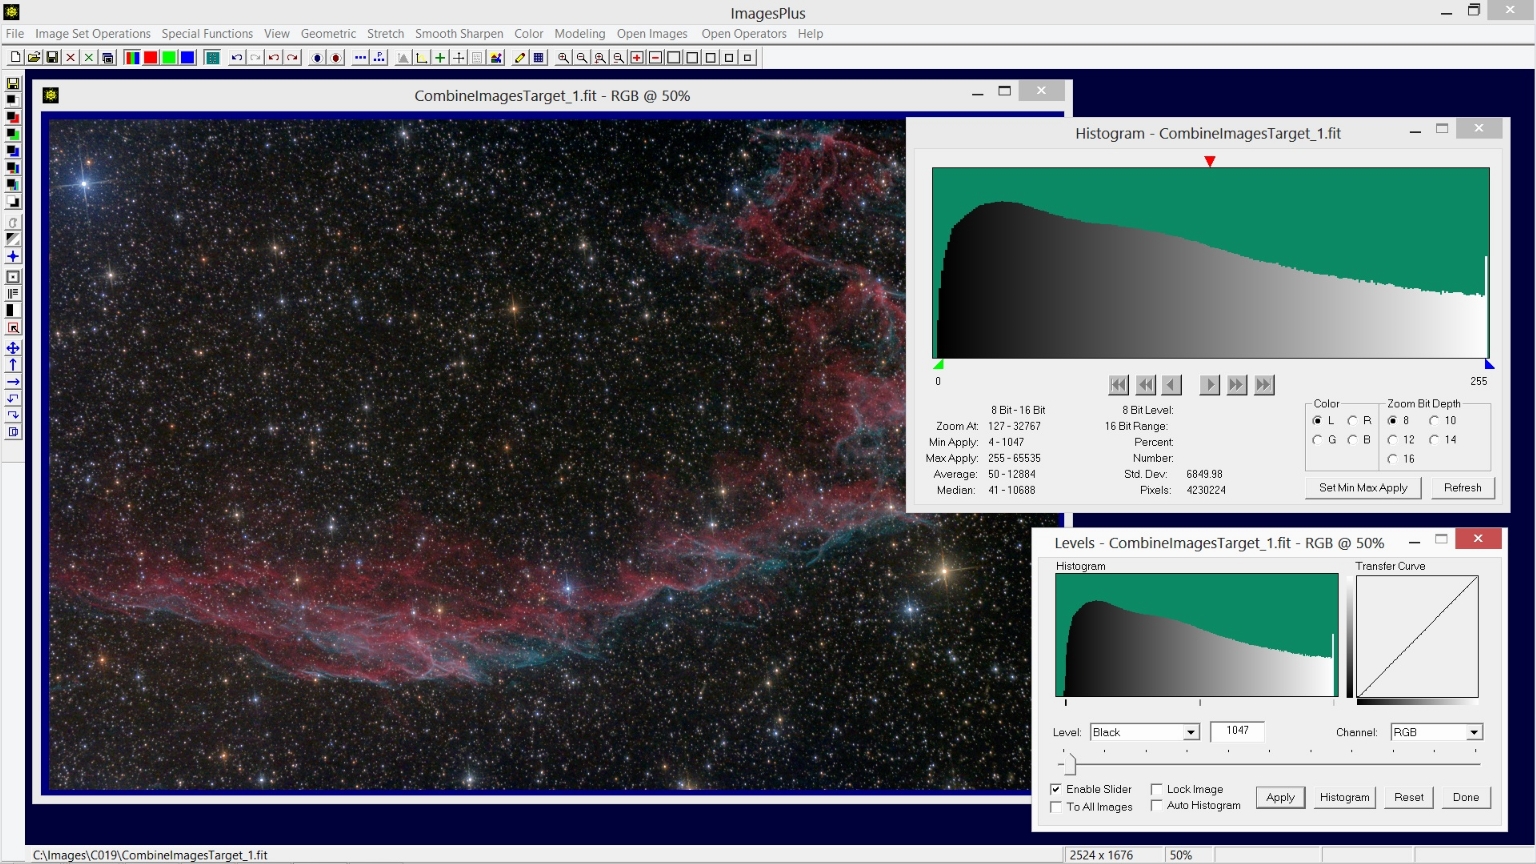
Step 10) Set black point to 0 using the histogram and levels tool.
The Stretch | Levels tool is used to set the black point to the left side of the histogram so that the images uses the complete display range from black to white. A min and max apply luminance range can also be set using the left green and right blue triangles under the histogram on the Histogram tool. See Using the 8-16 Bit Histogramfor details.
 |
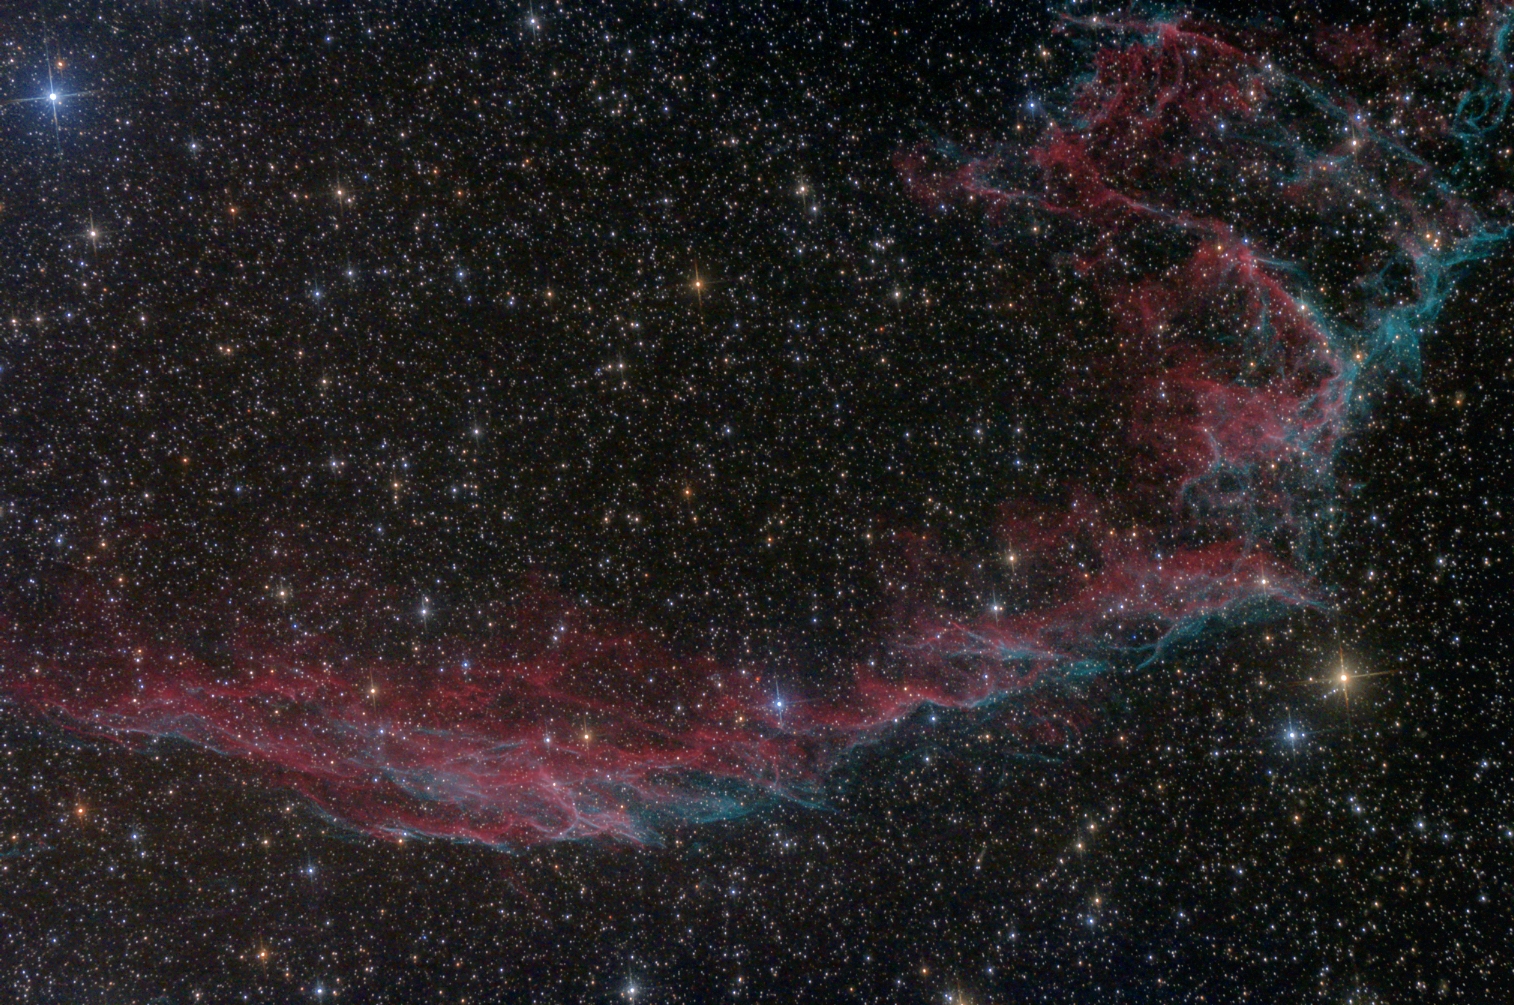
Final image of NGC 6992.
 |
Feature Mask is Copyright © August 1, 2013 MLUnsold Digital Imaging. All Rights Reserved.