Multiple Point Background Color Balance & Flatten Tool
The multiple point background tool is used to neutralize color and set background brighness at each selected image point. The background correction is planar or piecewise planar depending on the number of points.
With 3 or more correction points selected from an image the multiple point background tool can eliminate or reducer most of a concave or convex gradient. Micro Curve with a control point mask can be used to remove residual convex or concave gradients.
This tutorial first uses the multiple point background tool to neutralize and set the background level of an image. Micro Curve with control point mask is then used to reduce a slignt local convex gradient.
The multiple point background tool can be used with a mask and either the Process History or Combine Image & Mosaic layers.
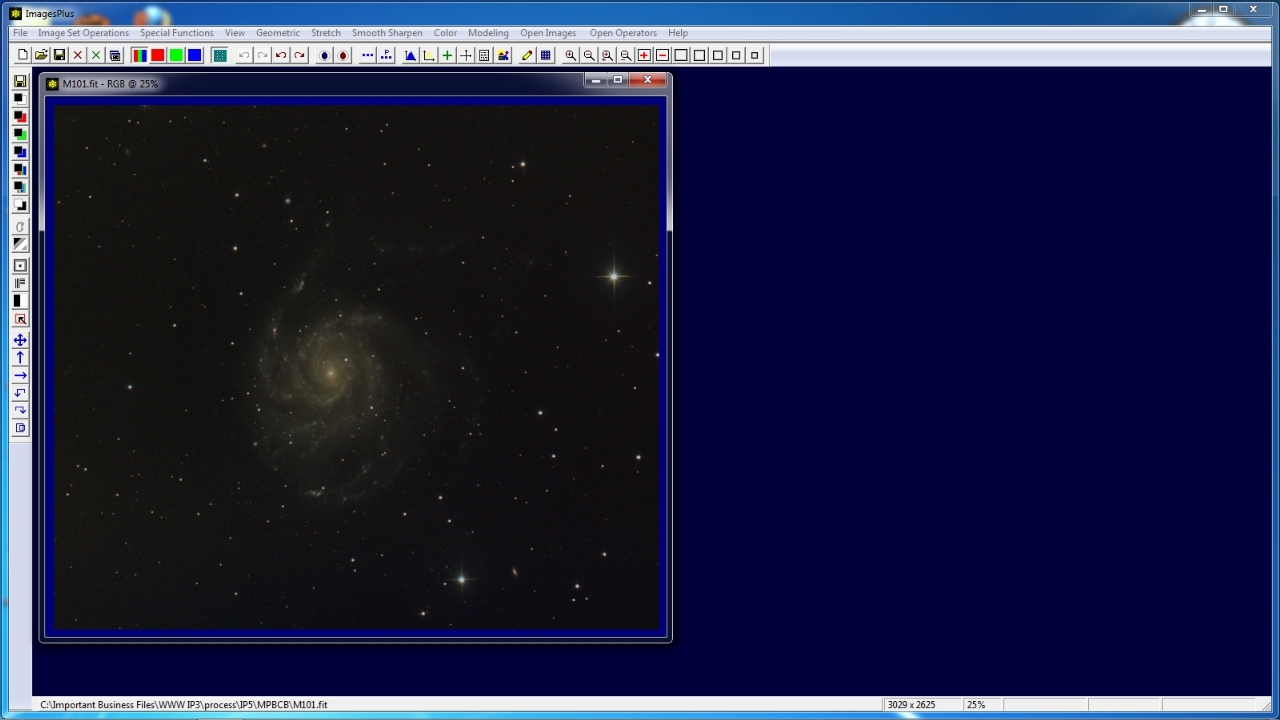
Step 1) Initial Image with Color & Luminance Gradient
Initial image of M101 with low contast and color gradient from left to right.
 |
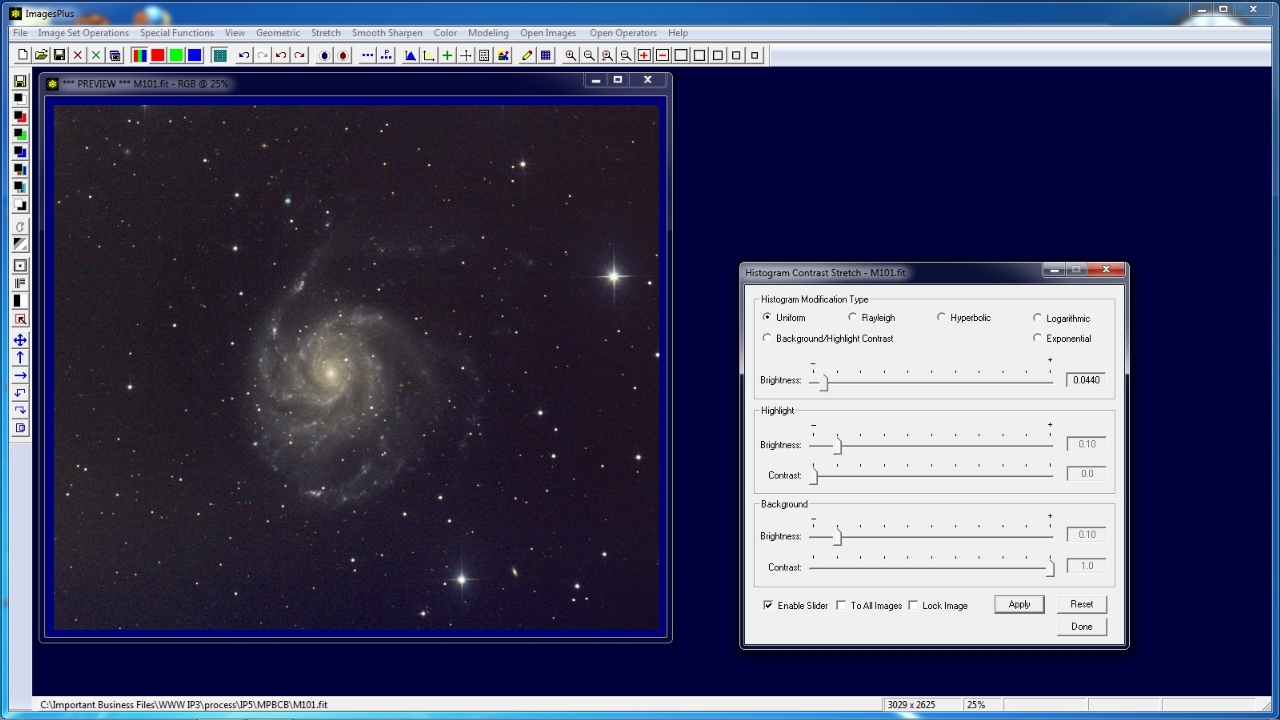
The Stretch | Histogram Contrast tool is used to increase brightness and contrast of M101. The background color gradient is also increased and much more visible.
Note blue in the lower right and more yellow toward upper left.
 |
Step 2) Nuetralize Background Color & Set Background Level
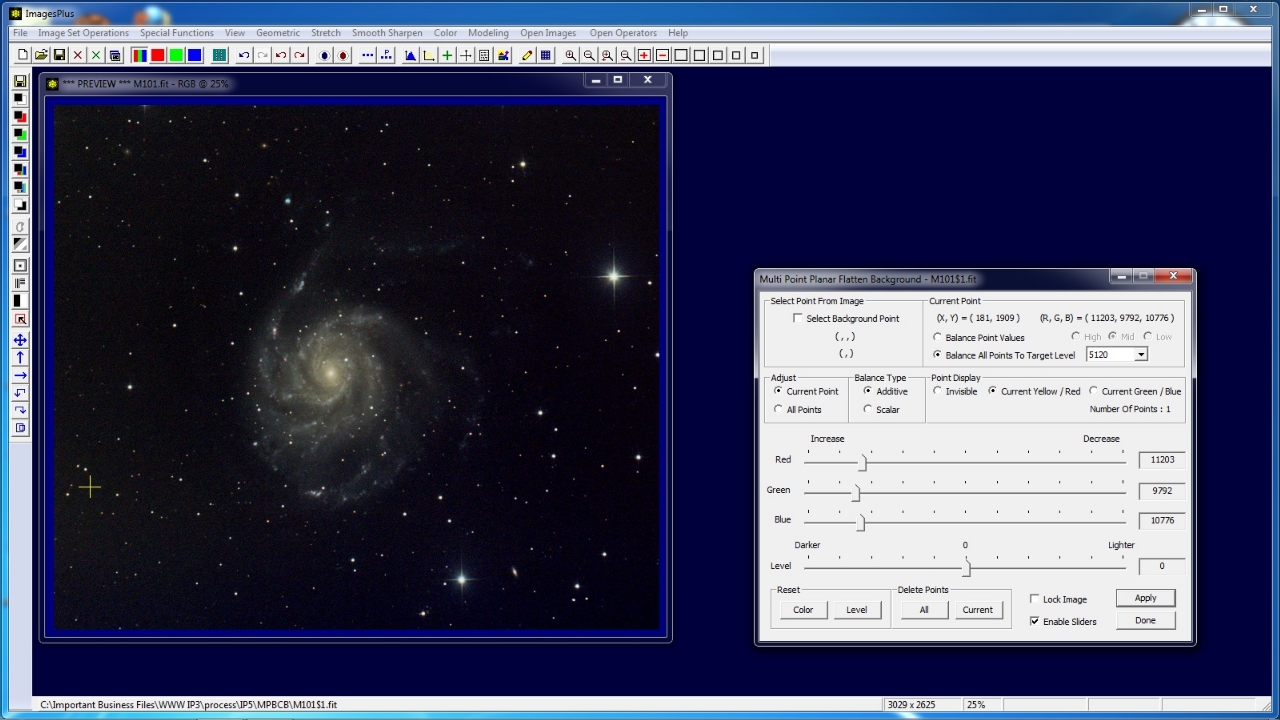
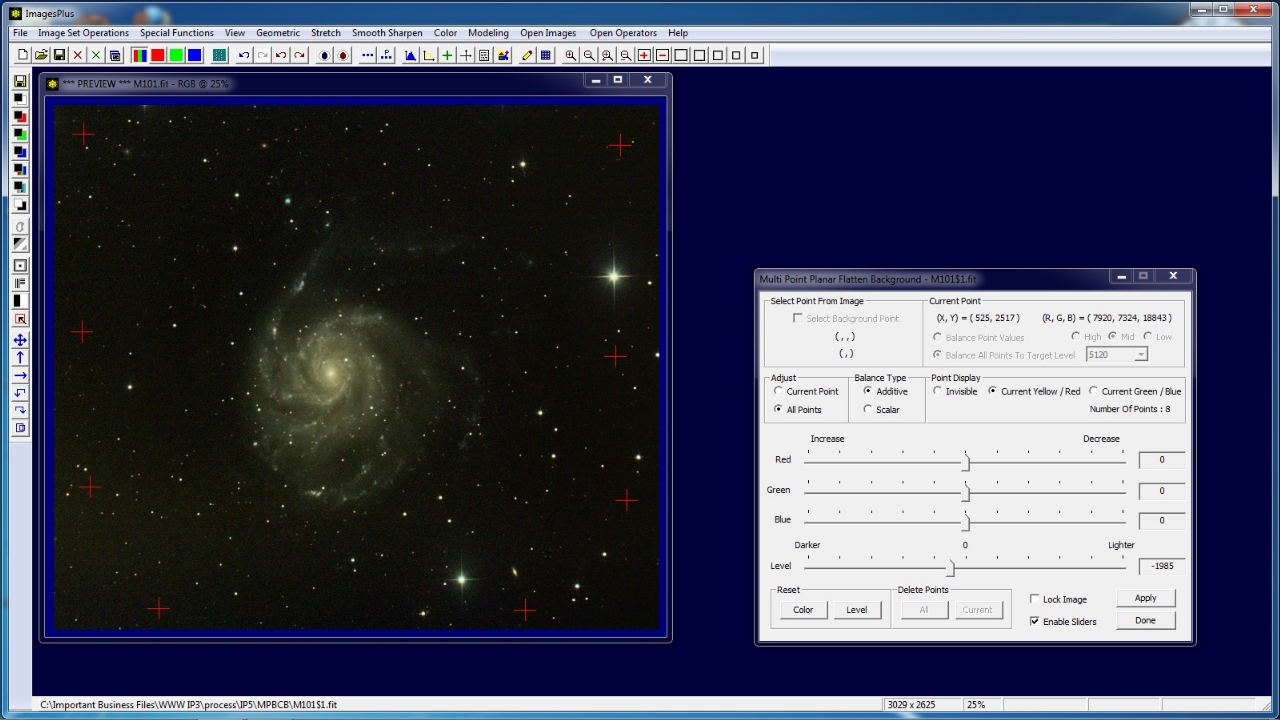
Open the Special Functions | Multi Point Flatten Bacground | Planar tool. Check the Select Background Point box then left click on the lower left area of the image. A yellow + sign marks the current selected image point and the backgound is neutralized at the point.
On the Multi Point tool select the Balance All Points To Target Level option with 5120 in the list box. This option will set the background at the current point shown by the yellow + to level (5120, 5120, 5120) which is dark gray.
The Red, Green, Blue, and Level sliders can be used to adjust the color balance or brightness level at the current point marked by the yellow +.
 |
Select several more correction points on the image. The Red, Green, Blue, and Level sliders are set for the point marked by the yellow +. To change the current point marked by the yellow + left click on a red +.
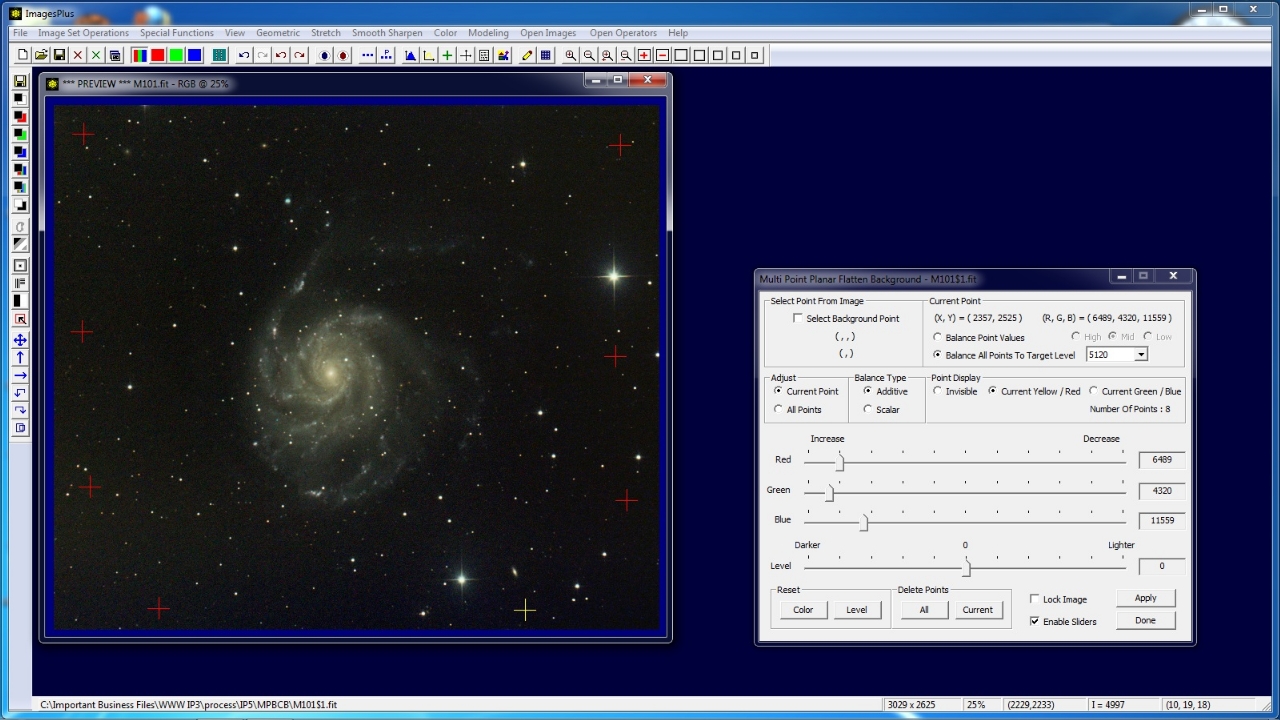 |
Left click on the lower right red + to make it the current point marked by a yellow +. Move the Blue and Level sliders toward the right to decrease blue and increase brightness near the current point.
 |
Left click on the lower left red + to make it the current point marked by a yellow +. Move the Blue and Level sliders toward the right to decrease blue and increase brightness near the current point.
 |
Select Adjust All Points on the Multi Point tool. The Red, Green, Blue, and Level sliders will now adjust color balance and brightness level of all points.
Move the level slider toward the left to make the background of the entire image darker.
 |
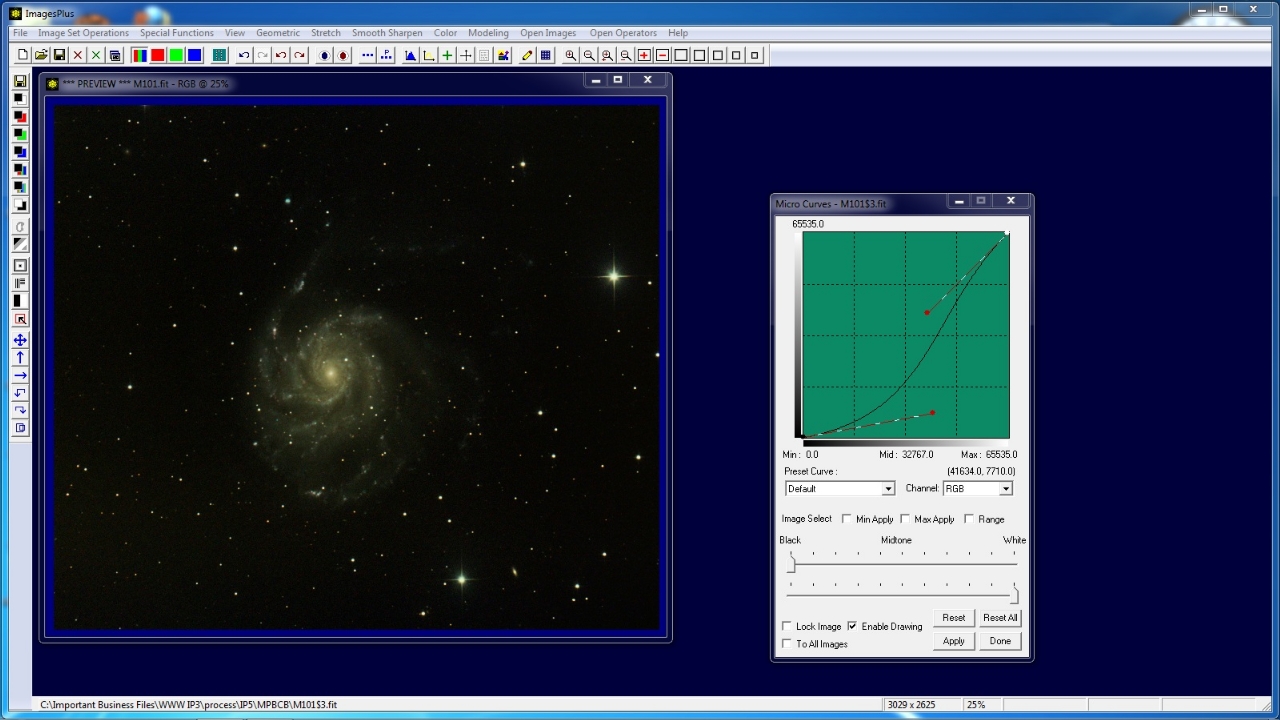
Step 3) Use Micro Curve with a Control Point Mask to Correct Bright Area
Bright area reduced using Micro Curve but M101 is also darker.
 |
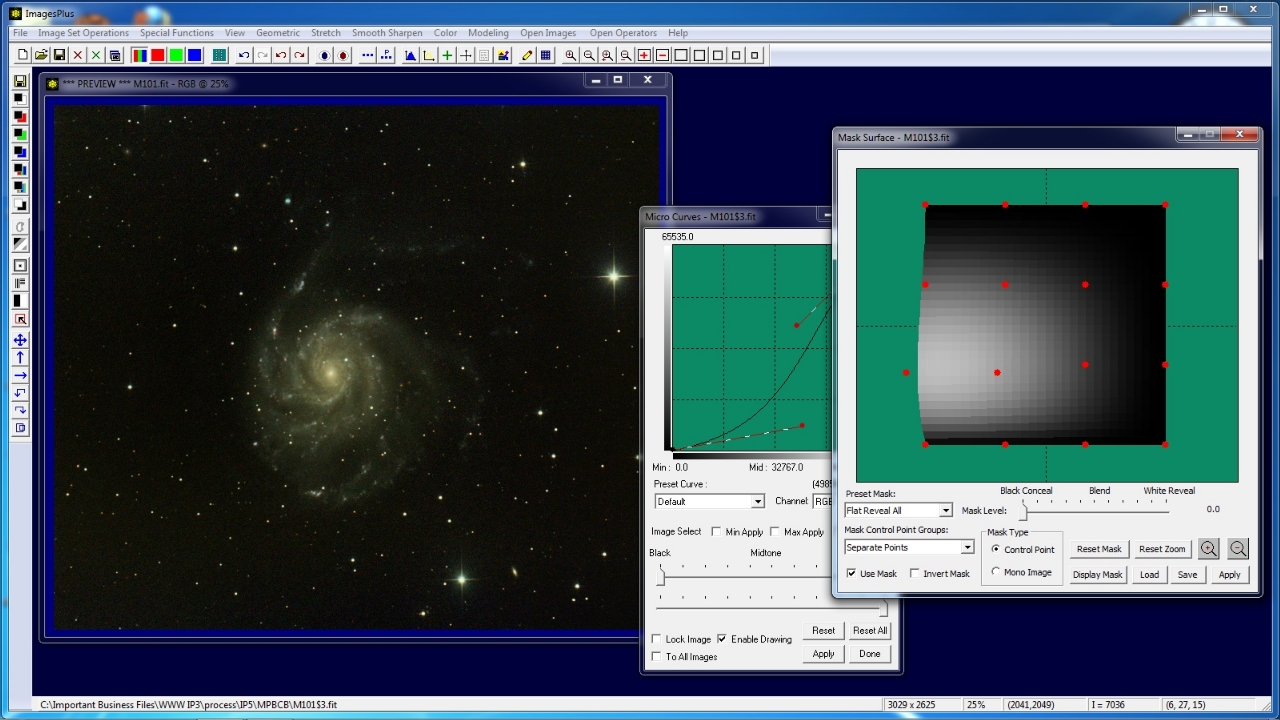
Open the Process History window and press the Mask button to display the default all white control point mask.
Set Mask Level slider to 0 to hide the Micro Curve adjustment. To apply Micro Curve to just the lower left center bright area left click on the 2 red dots at lower left center and move the points out to make the control point mask whiter.
 |
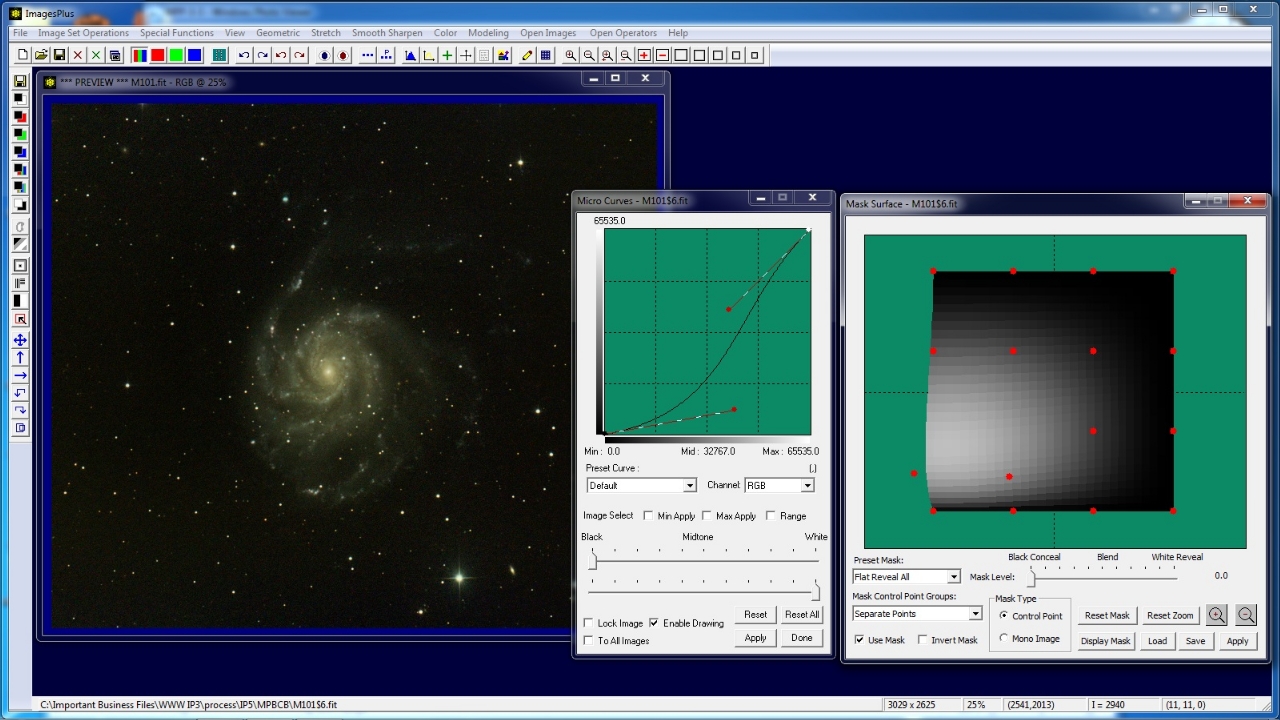
Hold the Shift key down then left click on the two red dots at lower left to move them down closer to the bottom of the image. Micro Curve is applied closer to the bottom left edge of the image since the white mask area is moved toward the bottom left edge of the image.
 |
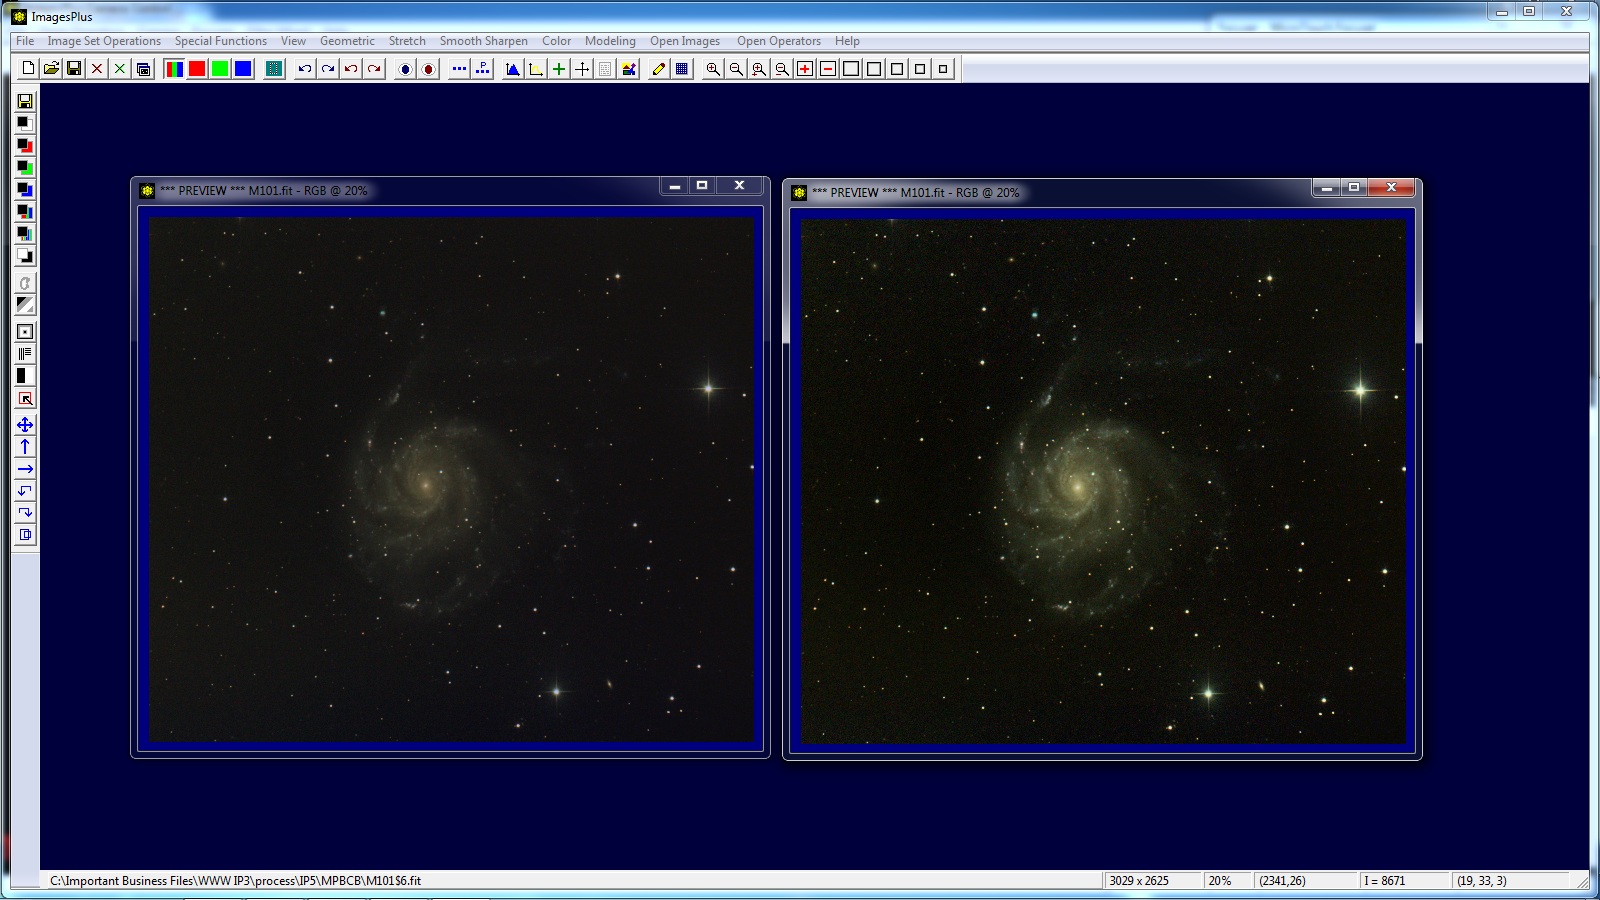
Initial low contrast image left. Higher contrast image with corrected background right.
 |
Copyright © 2012 MLUnsold Digital Imaging. All Rights Reserved.