CH20-NGC 6888 Complete ImagesPlus 5.75 Processing
Complete work flow for processing CH20 H-alpha and RGB data of NGC 6888 from the DSLR_Astro_Image_Processing Yahoo Group is shown below.
Processing Summary:
Ha and RGB Crop Processing
- Crop the Ha and RGB images to remove the dark top and left edge then process the Ha and RGB as separate images.
H-aplha (Ha) Processing
- Open the cropped Ha image in RGB format and split the red data into a new single channel red data only image.
- Set the single channel red data image to gray scale.
- Use digital development with nth root HDR prestretch scale as the initial stretch.
- Remove bright blue, white, and all smaller stars from the stretched Ha image using the Feature Mask© tool.
- Apply detail preserving fine pixel size noise smoothing.
- Sharpen the entire image.
- Smooth the darker areas of the image.
RGB Processing
- Open the initial cropped RGB image.
- Digital development stretch is applied to the initial RGB image.
- Additive color balance is used to increase blue stars using a selective color blue star mask.
- Mild saturation increase is applied to the entire RGB image.
- Background color blance is set to a neutral dark gray.
Ha and RGB Layer Processing
- Combine Images is used to layer the processed Ha image with lighten blend mode and inverse blue star mask on top of the processed RGB image to create the final HaRGB image.
Each step is used with normal blend mode and 100% opacity unless otherwise noted. Many steps are explained in detail by links to additional tutorials. See ImagesPlus 5.0 Processing Tutorials for a list of all tutorials by function.
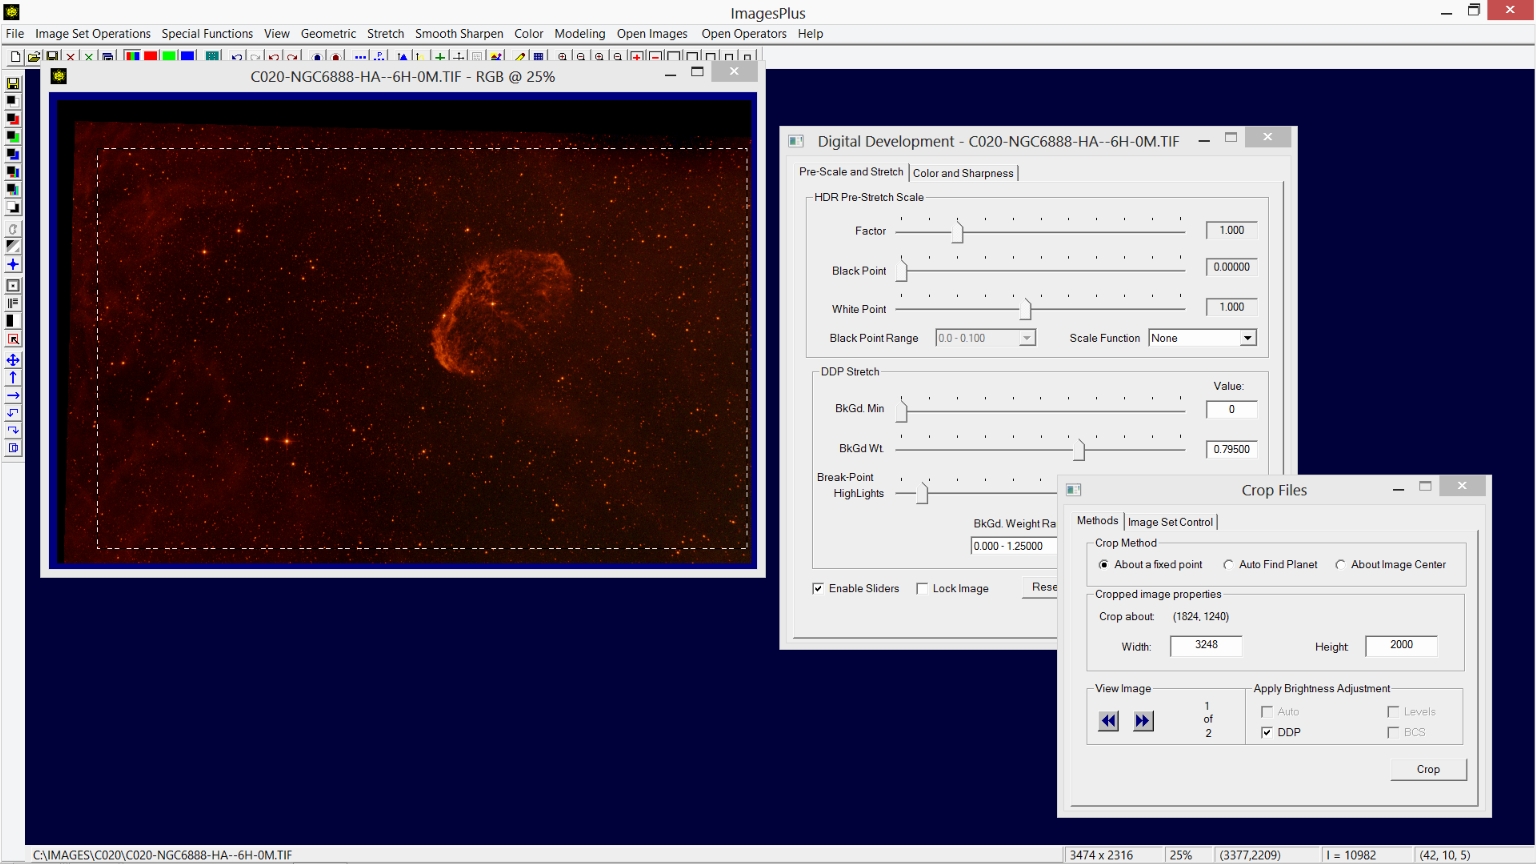
Ha and RGB Crop Processing Detail:
Step 1) Crop the Ha and RGB images to remove the dark top and left edge.
Image Set Operations | Crop Files is used to crop the Ha and RGB images to the same size. Digital development is used to brighten the display and show the dark edges. Crop Files adds a prefix of CR_ to the cropped file names.
 |
Ha Processing Detail:
Step 1) Open the cropped Ha image in RGB format and split the red data into a new single channel red data only image.
The Color | Split Colors tool is used to create a single channel red image from the red data fo the 3 channel RGB image.
 |
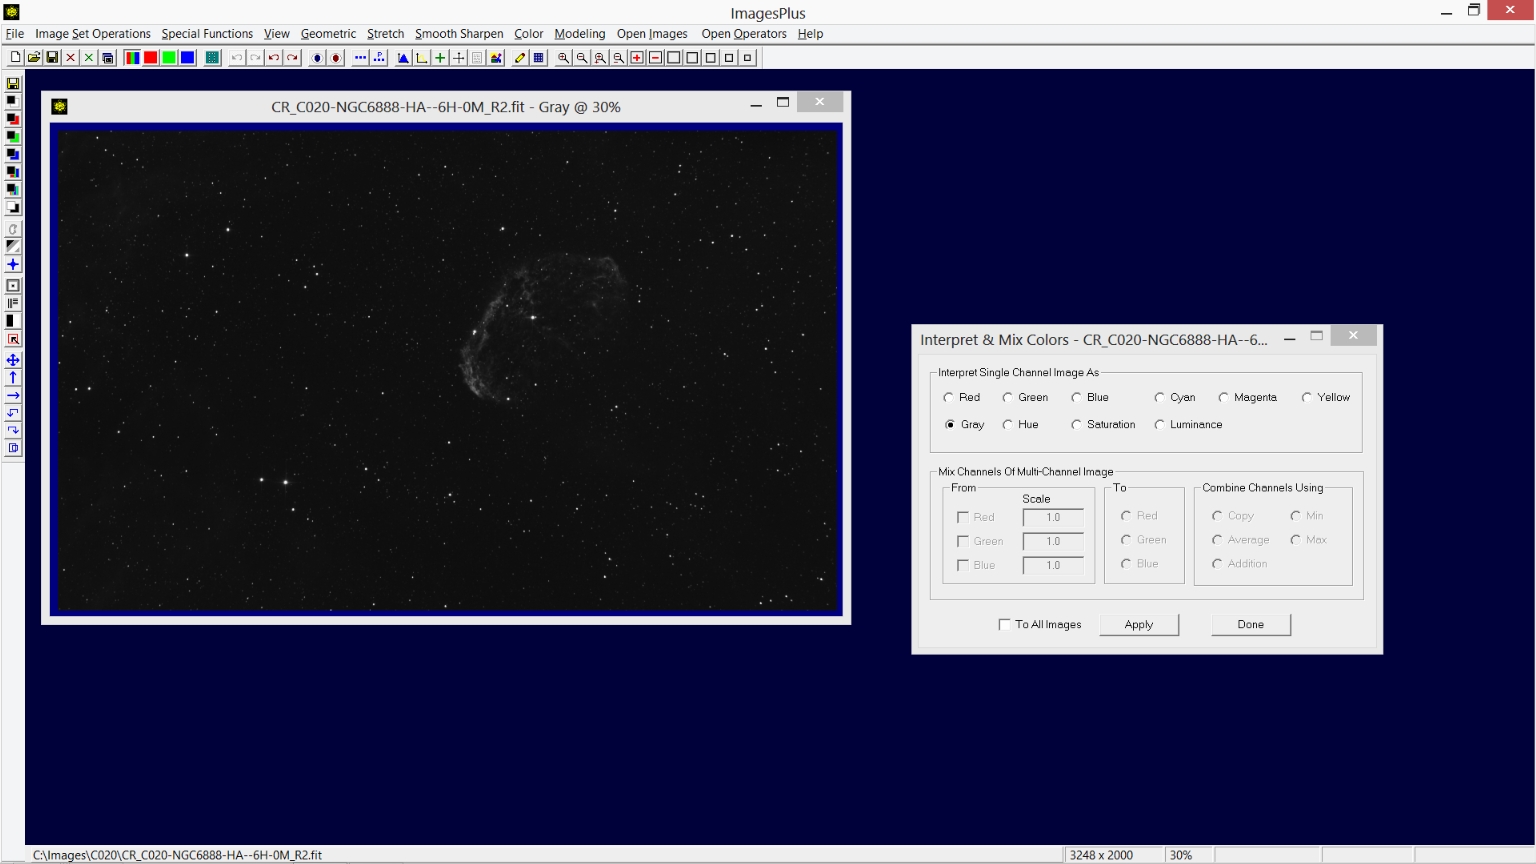
Step 2) Set the single channel red data image to gray scale.
The Color | Interpret - Mix Colos tool is used to set the red data image to a gray luminance image.
 |
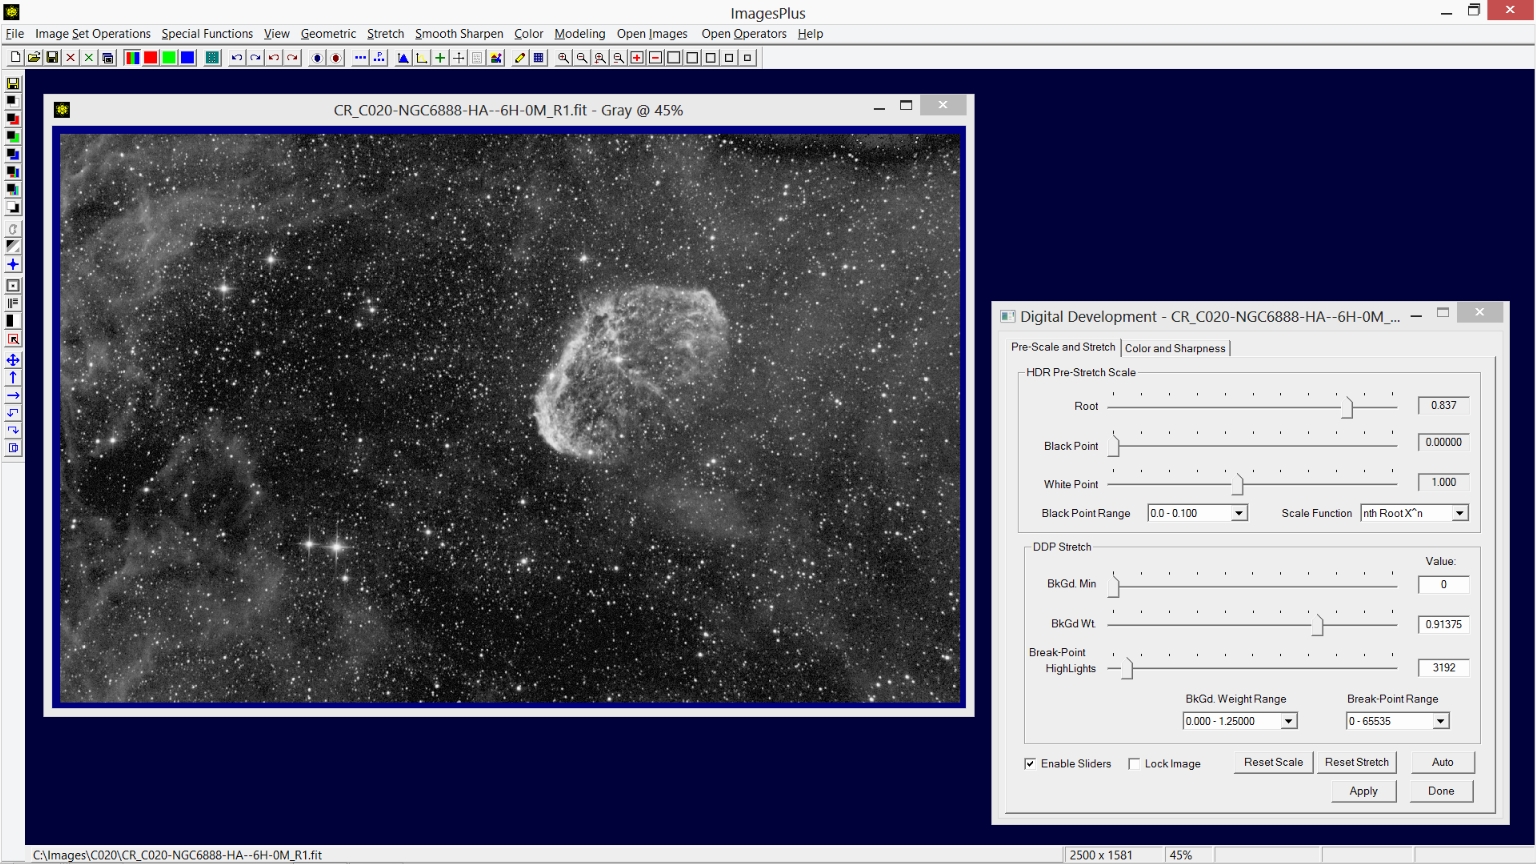
Step 3) Use digital development with nth root HDR prestretch scale as the initial stretch.
The Stretch | Digital Development tool is used for the initial image stretch. First the Break-point and BkGd. Weight sliders are moved to the left to increase brightness and set the background level, respectively. Next the Root slider of the nth Root HDR Pre-Stretch Scale control group is moved to the left to adjust contrast. Careful adjustment of the initial stretch parameters greatly simplifies processing that follows. Additional information for using the Digital Development tool can be found at Digital Development - Increase Brightness and Contrast With HDR and Color Decompression
 |
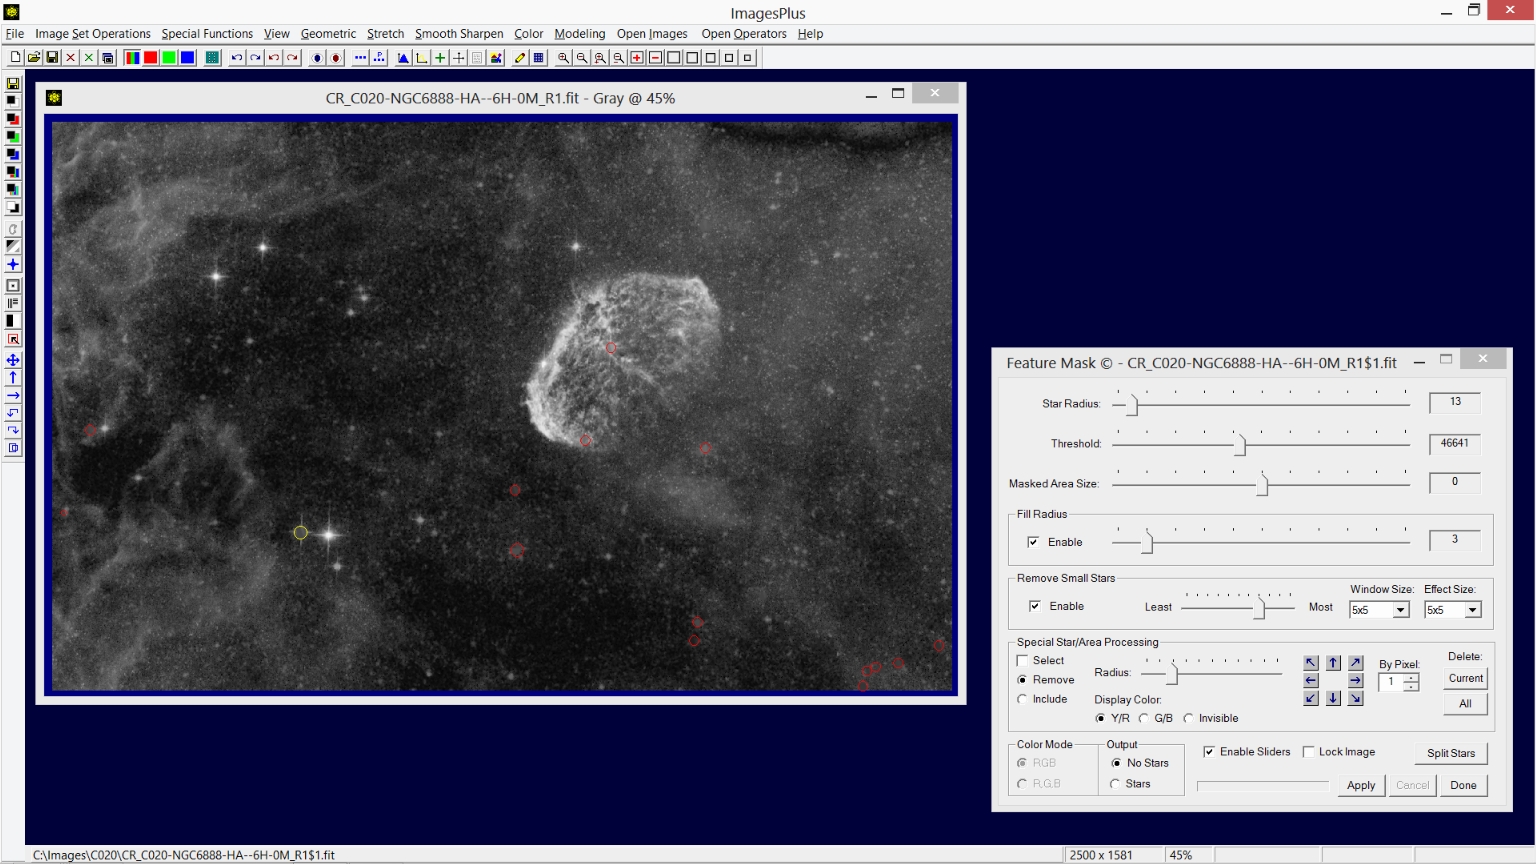
Step 4) Remove bright blue, white, and all smaller stars from the stretched Ha image using the Feature Mask© tool.
The Feature Mask© tool is opened using the 11th button from the top on the left vertical toolbar. Feature Mask© parameters are adjusted to maximize nebula detail while at the same time minimizing stars as shown by the nebula image on left. Bright white and blue stars, shown as red and yellow circles, are selected for additional processing using the Special Star/Area Processing section of the Feature Mask© tool. Bright white and blue stars are removed from the Ha image so that hteir color is preserved when the Ha data is merged with the RGB data. See
Using the Feature Mask© to Create an Object Image, Star Image, and Masks for details.
 |
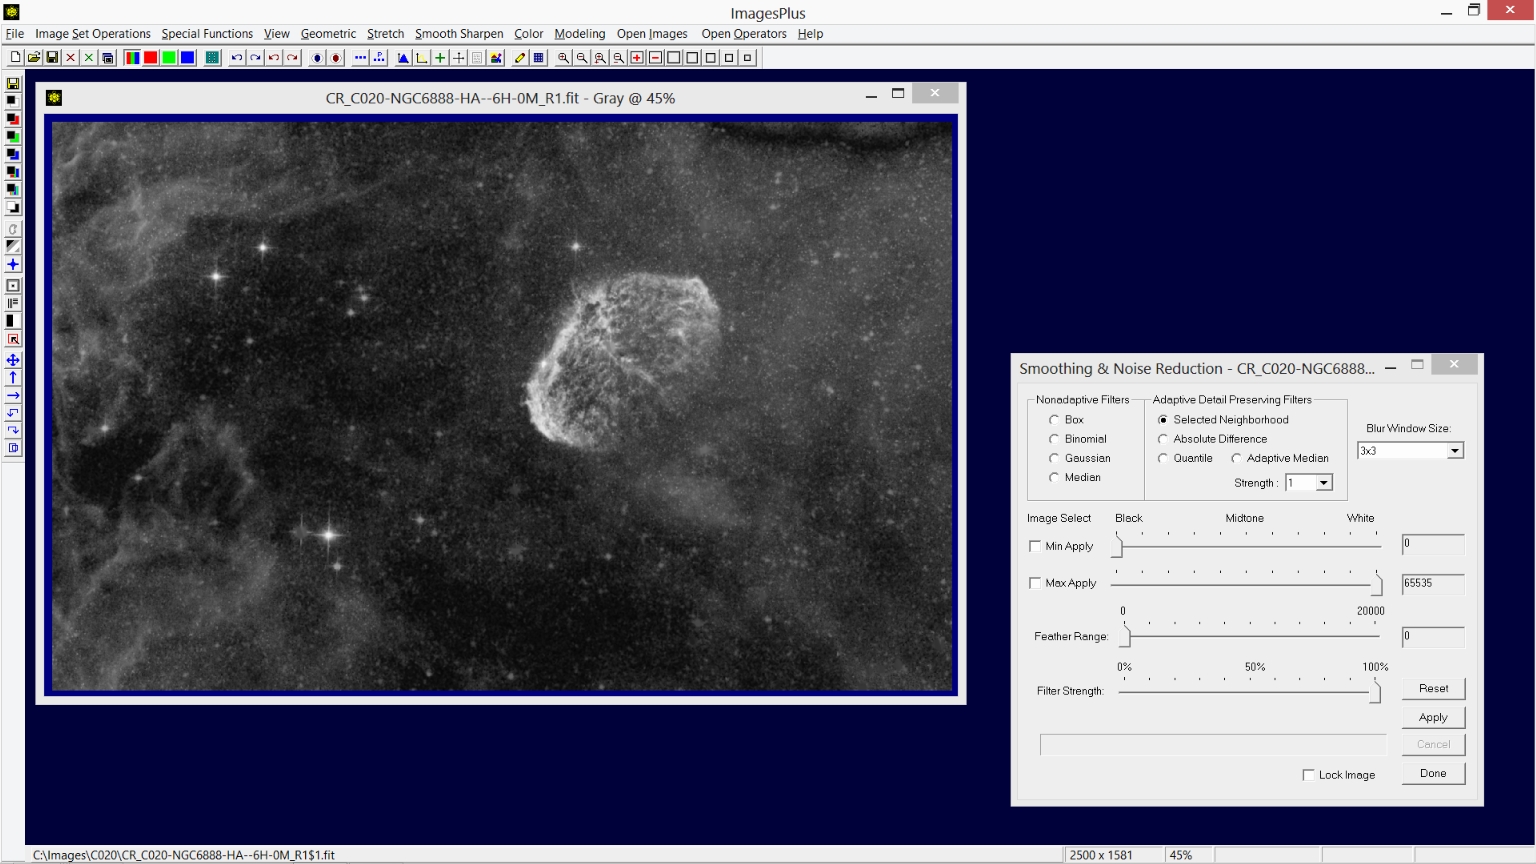
Step 5) Apply detail preserving fine pixel size noise smoothing.
Step 6) Sharpen the entire image.
Smooth Sharpen | Mulitresolution is used to sharpen the entire image.
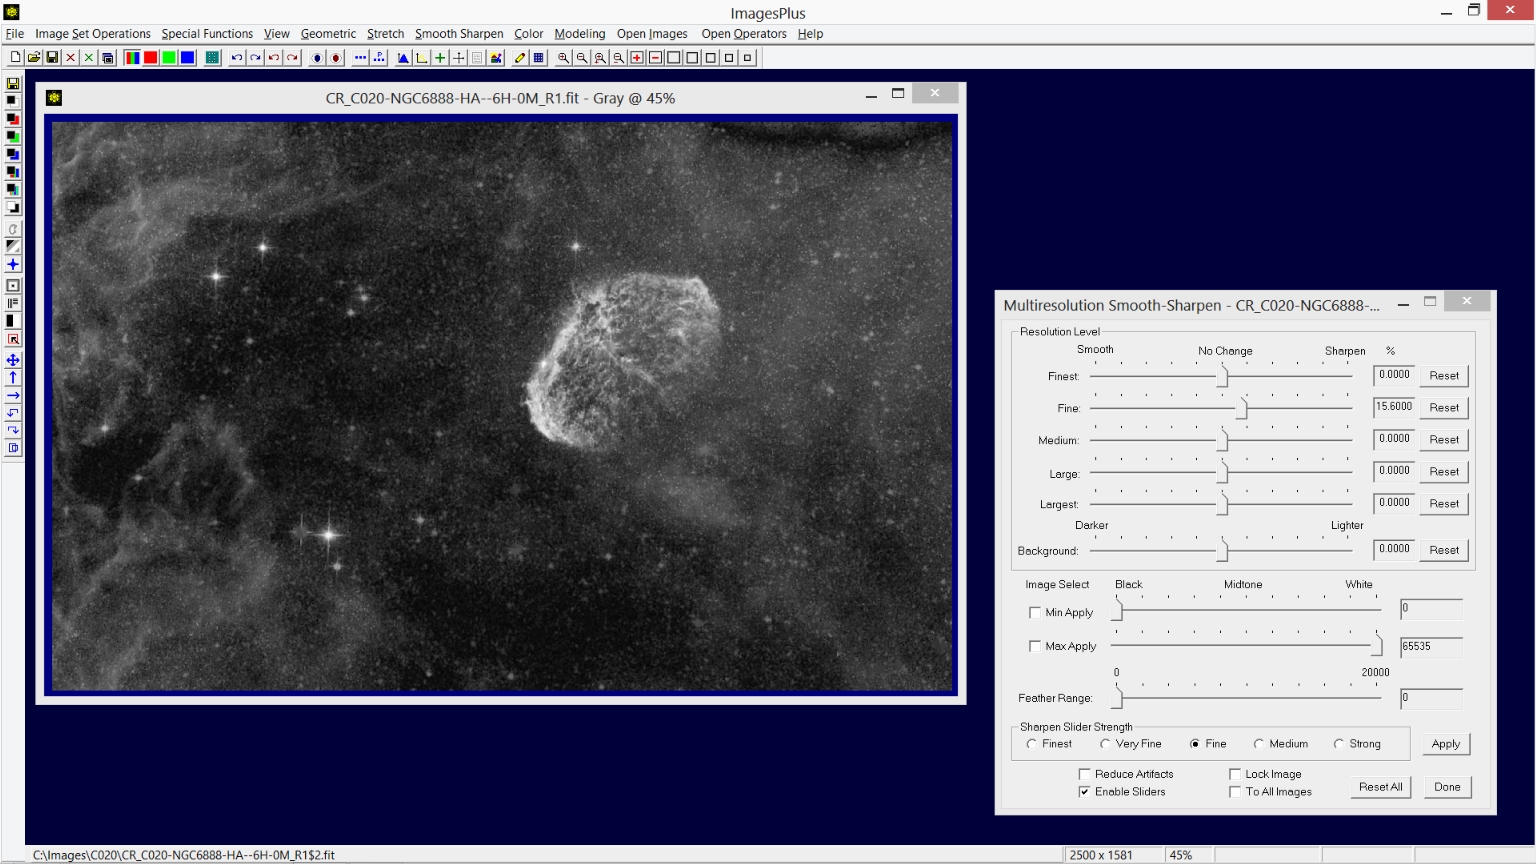 |
Step 7) Smooth the darker areas of the image.
Since Multiresolution was just used to sharpen the image press the Set View button on the top horizontal toolbar to allow use to save the sharp image and apply Multiresolution with smoothing parameters. Now Mulitresolution can be used to smooth the dark areas of the image. Smoothing is applied to only the min/max luminance range of [0, 15930] with a feather radius of 2462. Additional information for using the Multiresoltion tool can be found at Feathered Background or Highlight Smoothing & Sharpening Multiresolution Smoothing & Sharpening.
 |
RGB Processing Detail:
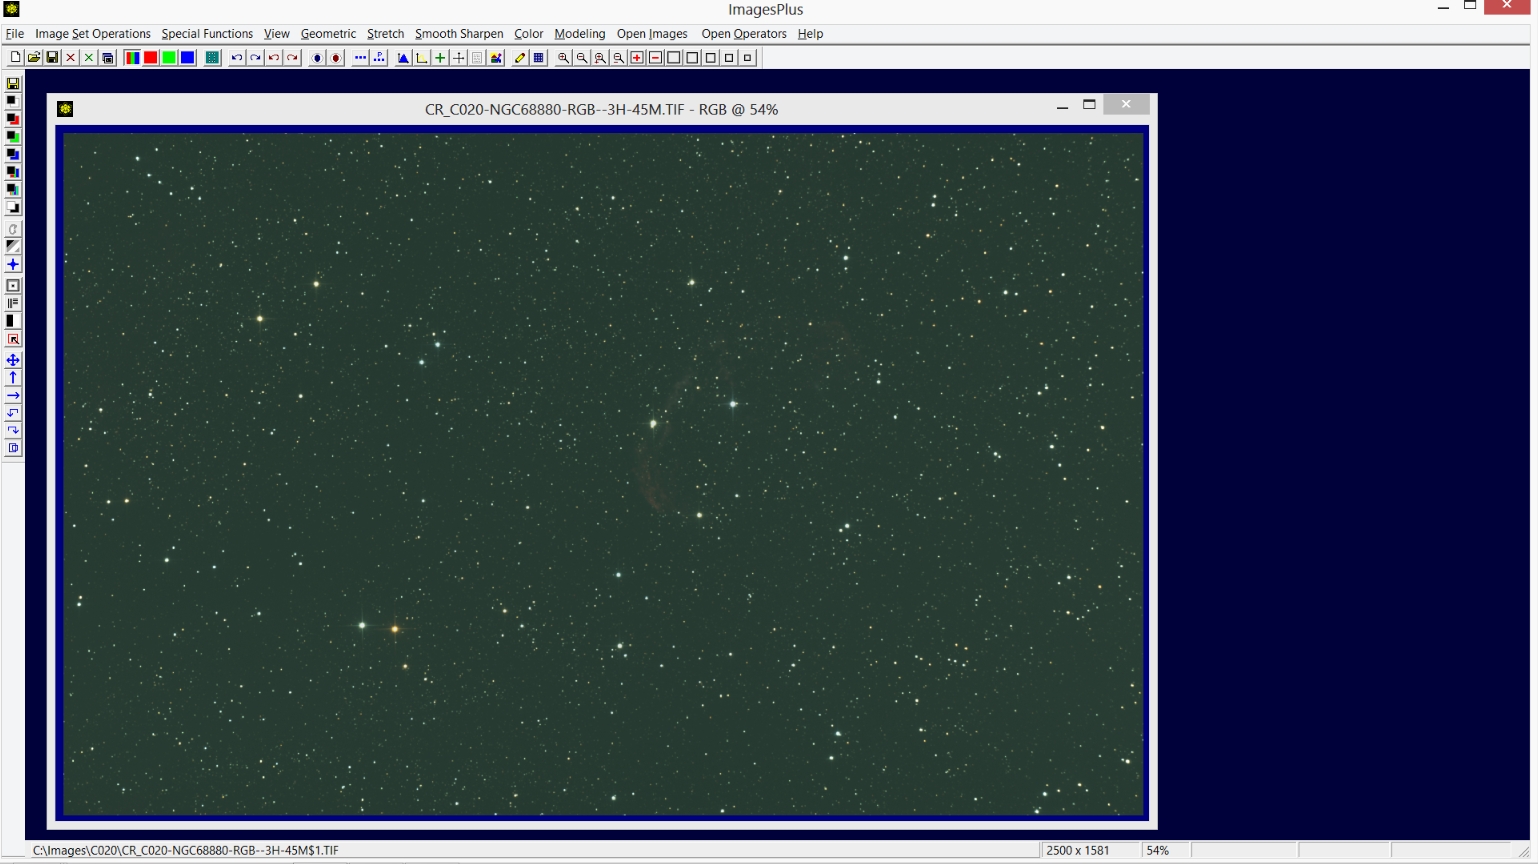
Step 1) Open the initial cropped RGB image.
The intial stacked and cropped RGB image.
 |
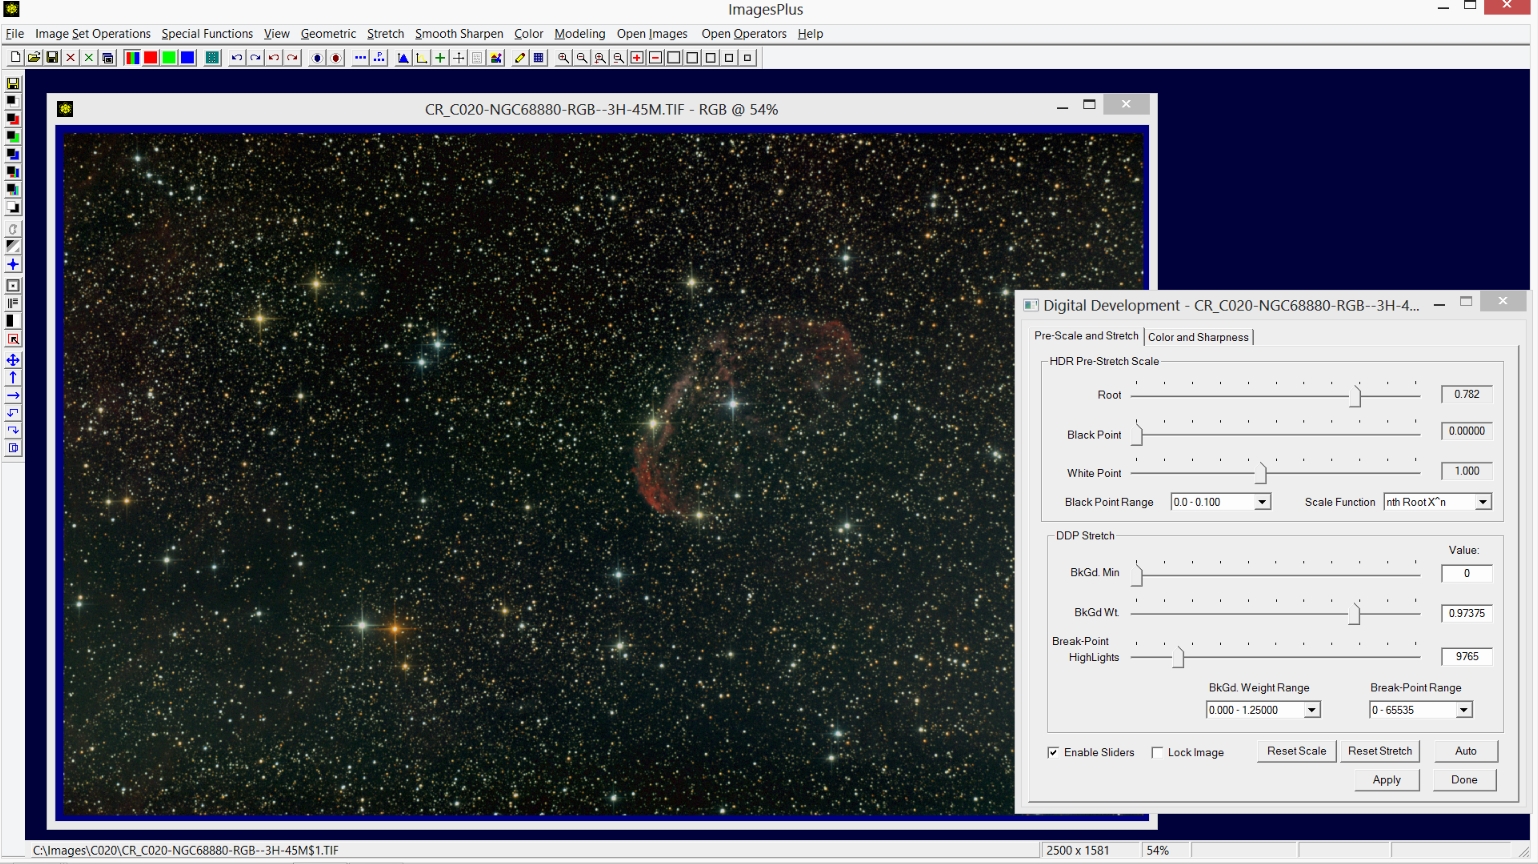
Step 2) Digital development stretch is applied to the initial RGB image.
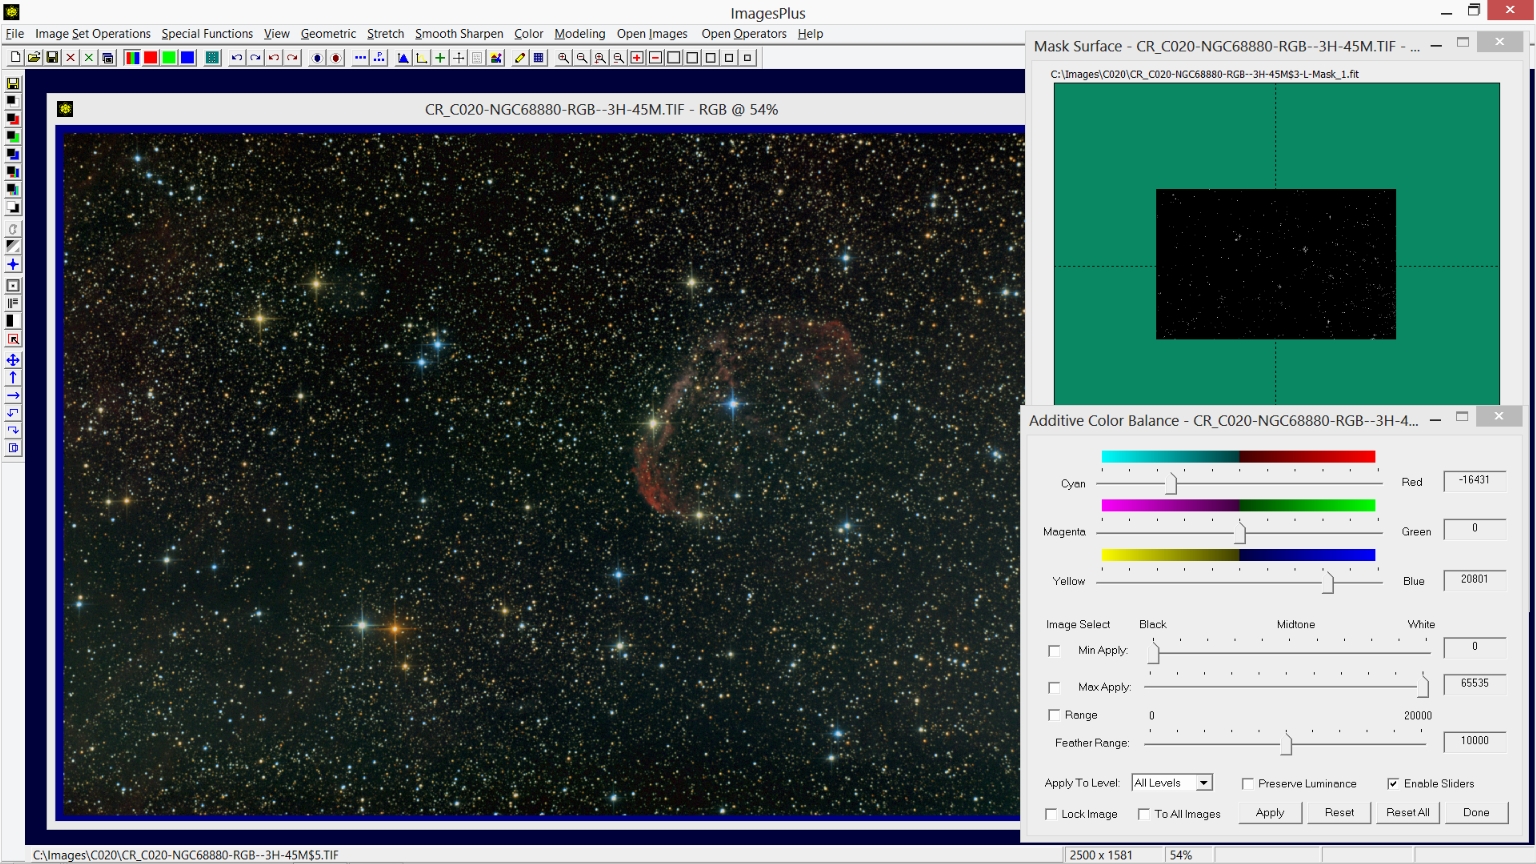
Step 3) Additive color balance is used to increase blue stars using a selective color blue star mask.
The Color | Additive Color Balance tool is used to increase color in the bright blue stars. A selective blue mask is used with Additive Color Balance so that only the blue stars are changed. See ImagesPlus 5.0 Processing Tutorials for tutorials on creating and using masks with filters.
 |
Step 4) Mild saturation increase is applied to the entire RGB image.
The Color | Hue-Saturation-Luminance tool is used to apply a mild saturation increase to the image. Additional information for using the Hue-Saturation-Luminance tool can be found at Shift Hue and Enhance Saturation and Luminance.
 |
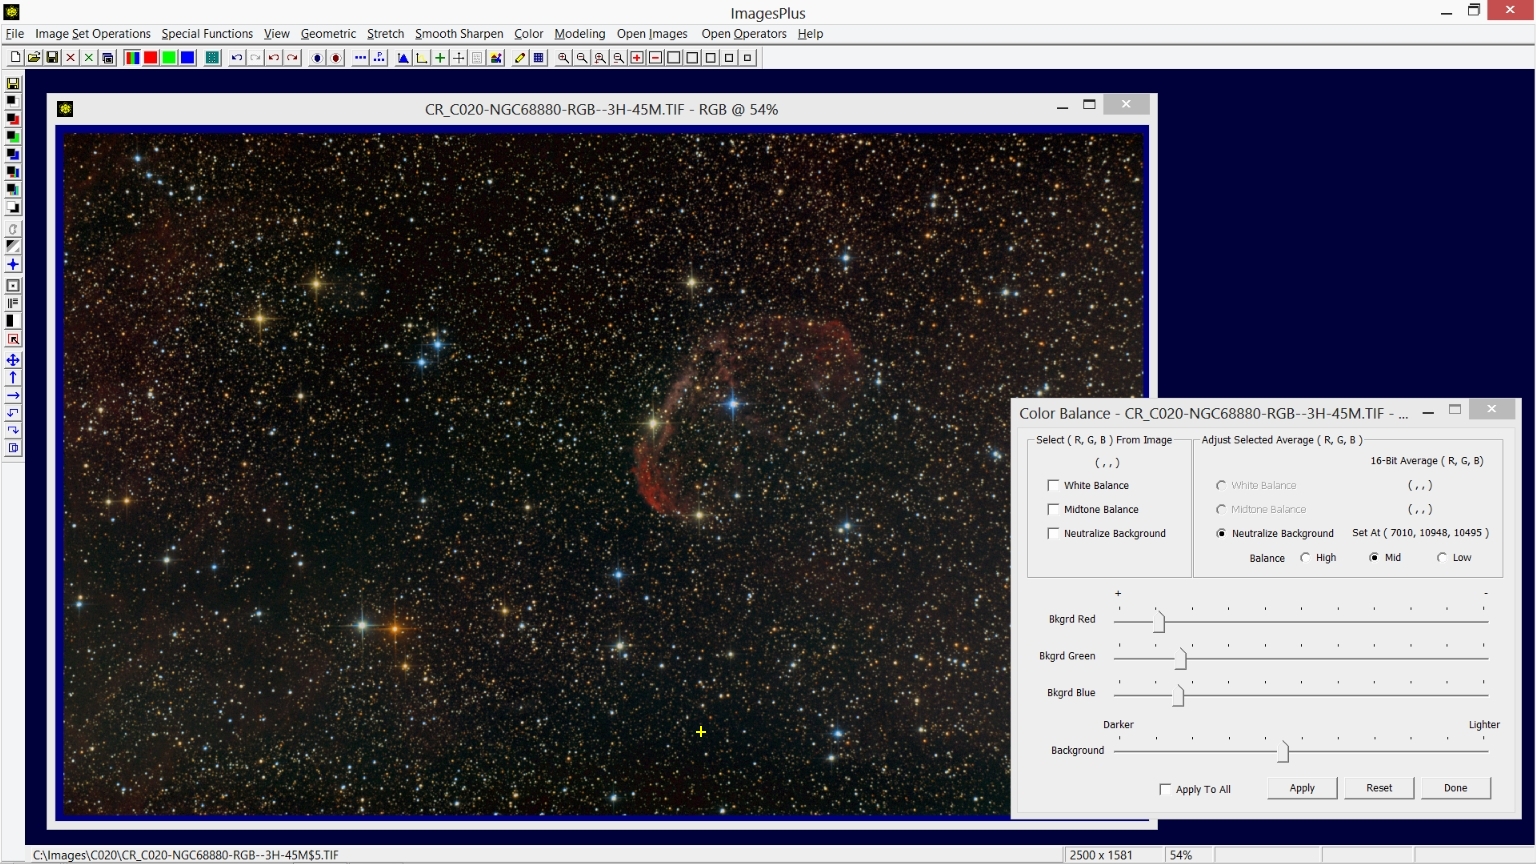
Step 5) Background color balance is set to a neutral dark gray.
The Color | Color Balance tool is used to set the background to a neutral dark gray. Check the Neutralize Background box on Color Balance then left-click on the dark background of the image that does not contain H-alpha data as shown by the yellow + sign. See Color Balance for additional information on setting the background to neutral dark gray.
 |
Ha and RGB Layer Processing Detail:
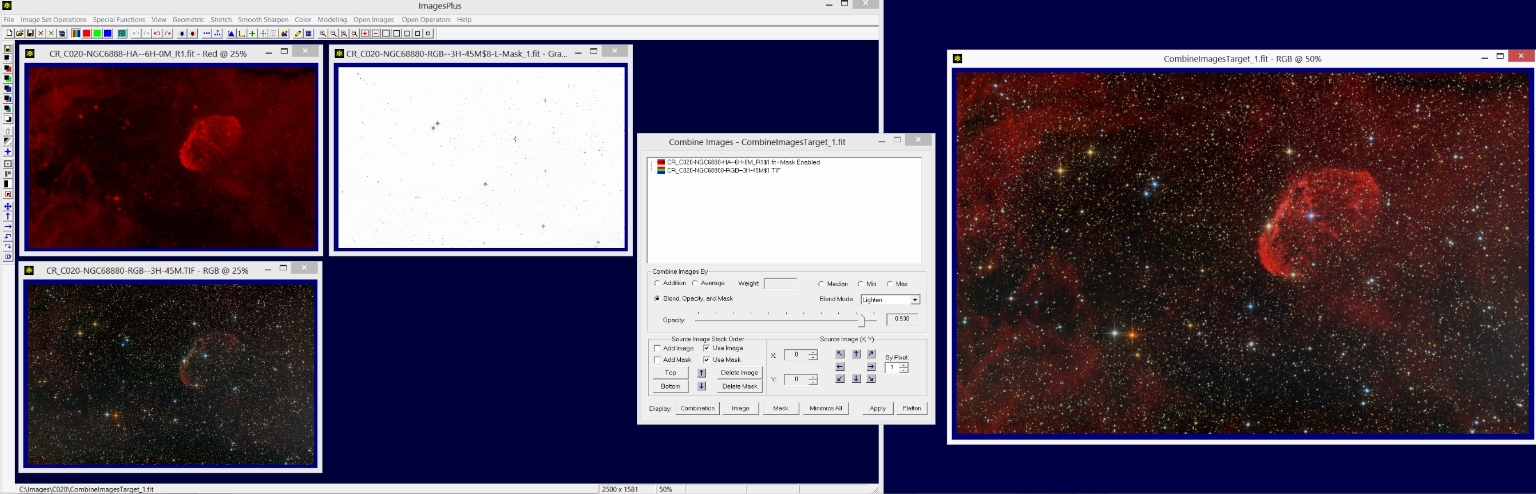
Step 1) Combine Images is used to layer the processed Ha image with lighten blend mode and inverse blue star mask on top of the processed RGB image to create the final HaRGB image.
The Special Functions | Combine Images Using | Blend Mode, Opacity, and Masks tool is used to layer the processed Ha and RGB images. The RGB image is placed on the bottom of the layer stack with normal blend mode. The Ha image is placed on top of the RGB layer. The Ha layer is set to red data using the Color | Interpret - Mix Colors tool so that the Ha data is added to only the red data from the RGB image. Lighten blend mode is set on the Ha layer to blend the Ha data with the red data from the RGB layer. The inverse of the blue star luminance mask used to process the RGB image is assigned to the Ha layer so that bright blue stars do not change color. Several tutorials that show many different uses of Combine Images layers with blend modes, opacity, and masks can be found at the main
ImagesPlus processing tutorial page.
 |
Final H-alpha image of NGC 6888 that is merged with the final RGB image to create the final layered HaRGB image.
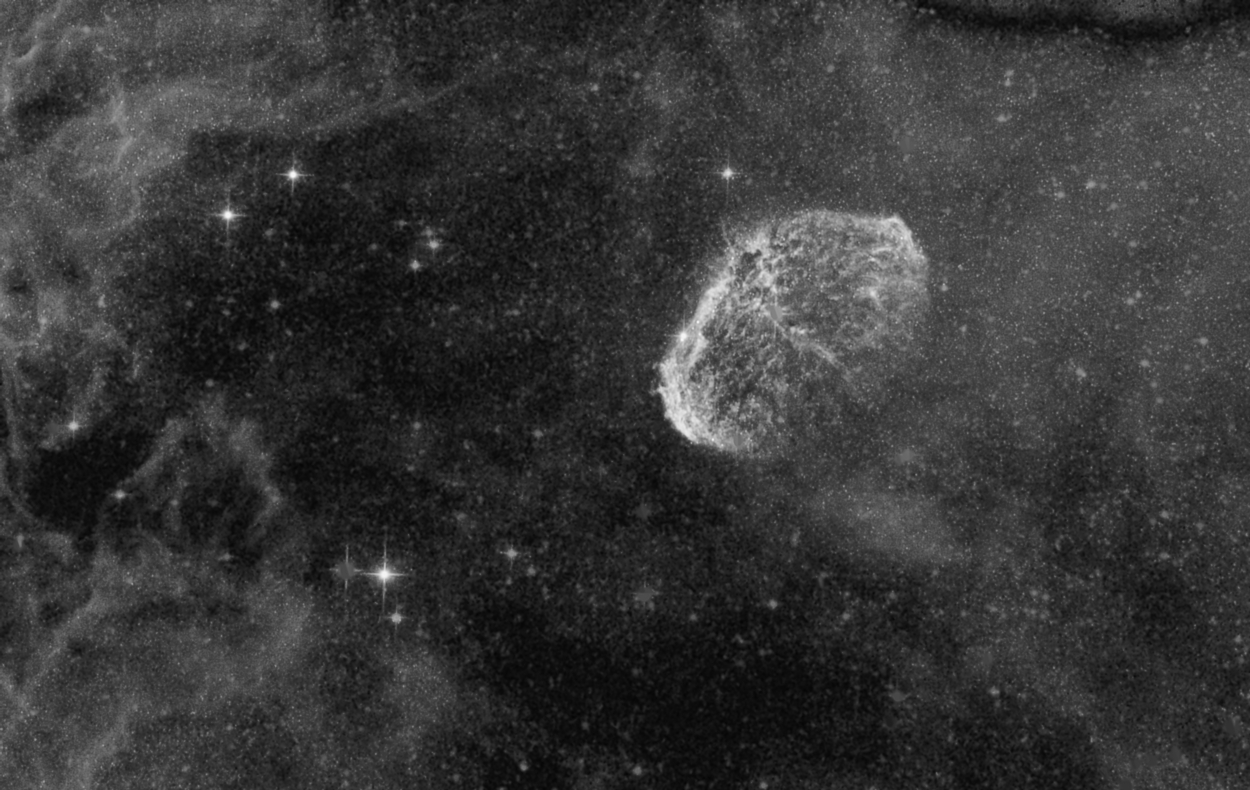 |
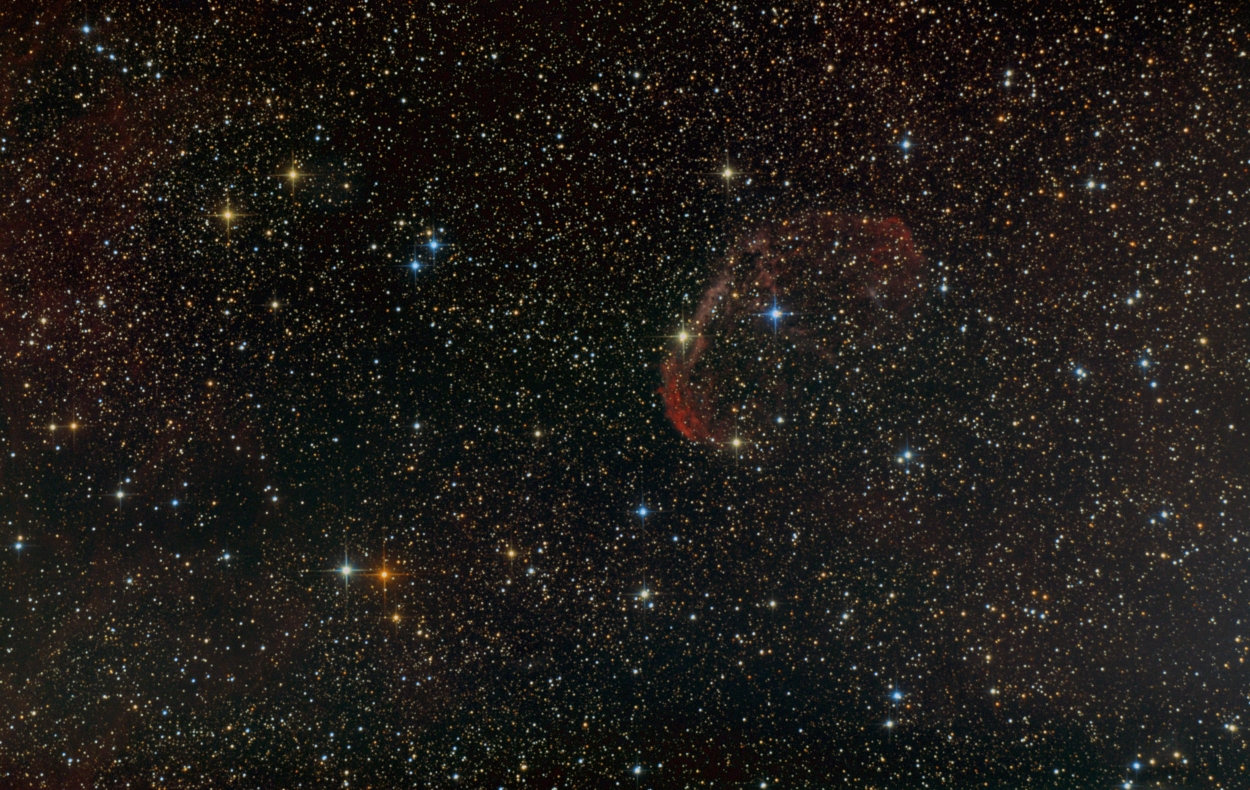
Final RGB image of NGC 6888 that is merged with the final Ha image to create the final layered HaRGB image.
 |
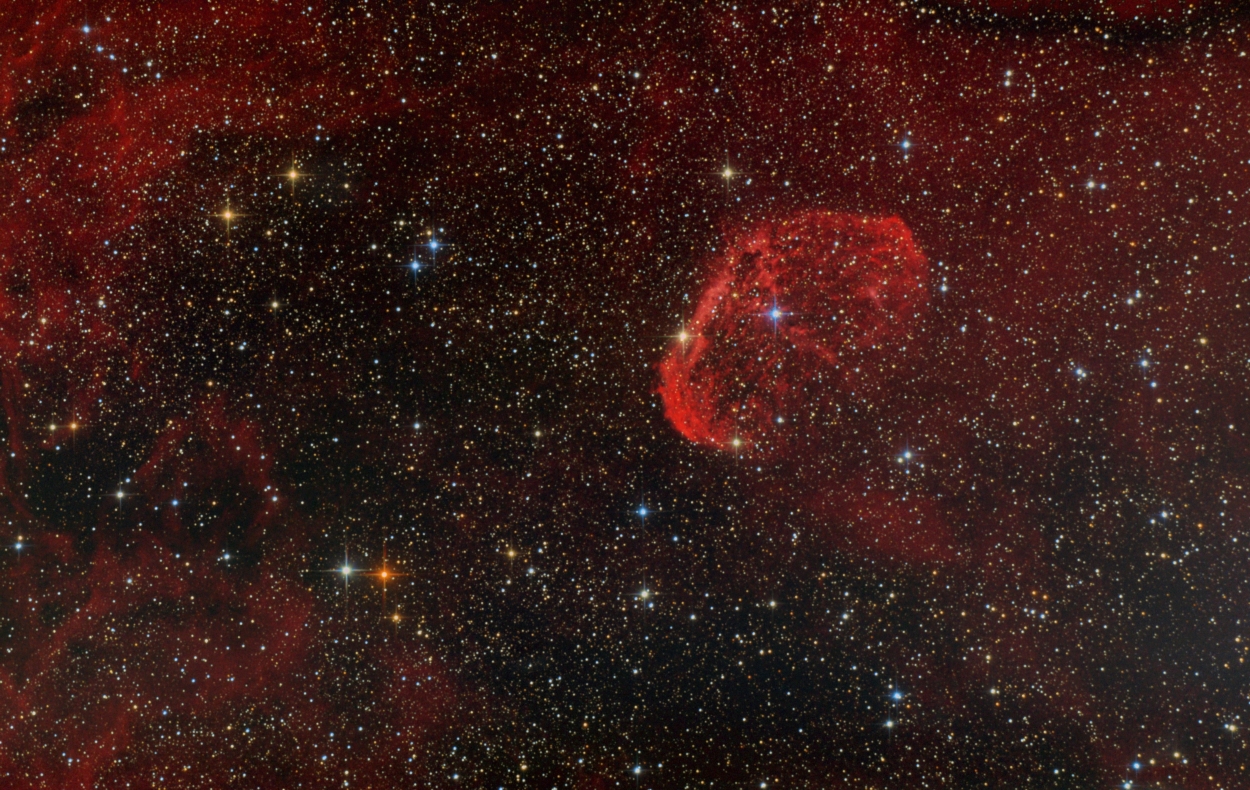
Final layered Ha and RGB image of NGC 6888.
 |
Copyright © August 1, 2013 MLUnsold Digital Imaging. All Rights Reserved.