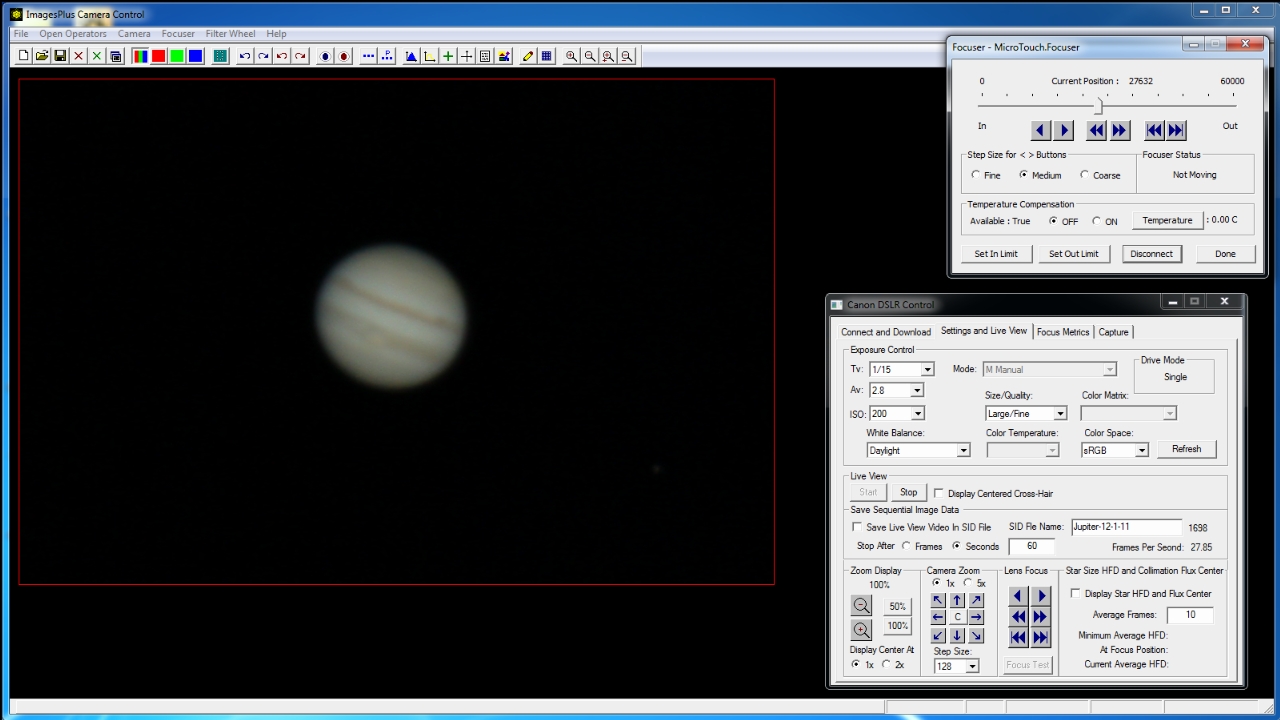
- Canon live view video can be captured and stored as uncompressed 24 bit per pixel color at 23-28 frames per second on Win 7 with faster hard drive. Video is saved in a SID file using ImagesPlus camera control then processed using the video file processing tool in ImagesPlus image processing.
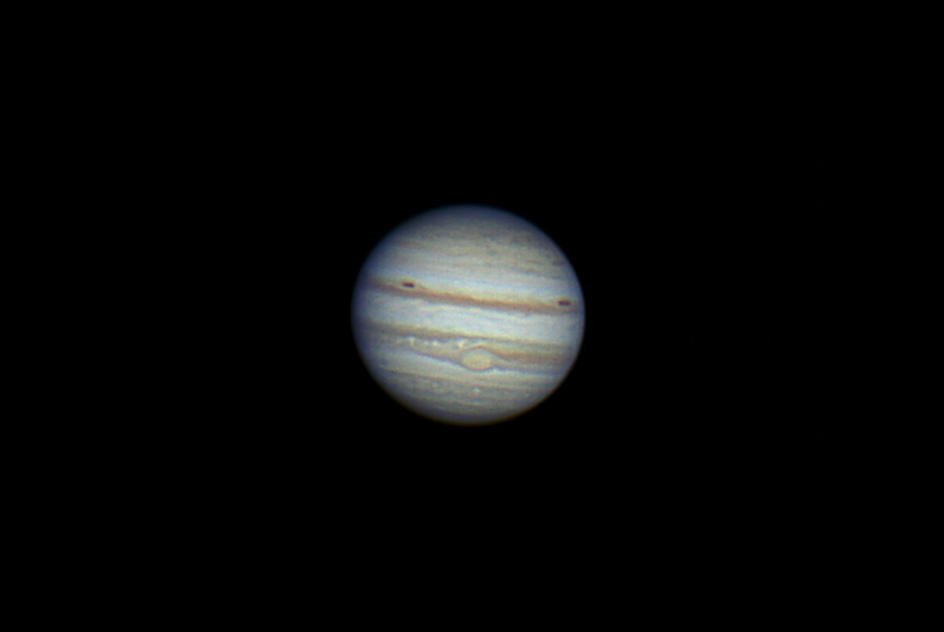
- The goal is to capture 1900 frames of Jupiter as uncompressed data then stack the best frames. The stacked image is then color enhanced and sharpened.
Canon live view data being captured and saved as uncompressed 24 bit per pixel data in a SID file called Jupiter-12-1-11.sid using ImagePlus camera control. The SID file will be graded, aligned, stacked, and enhanced using the steps shown below.
 |
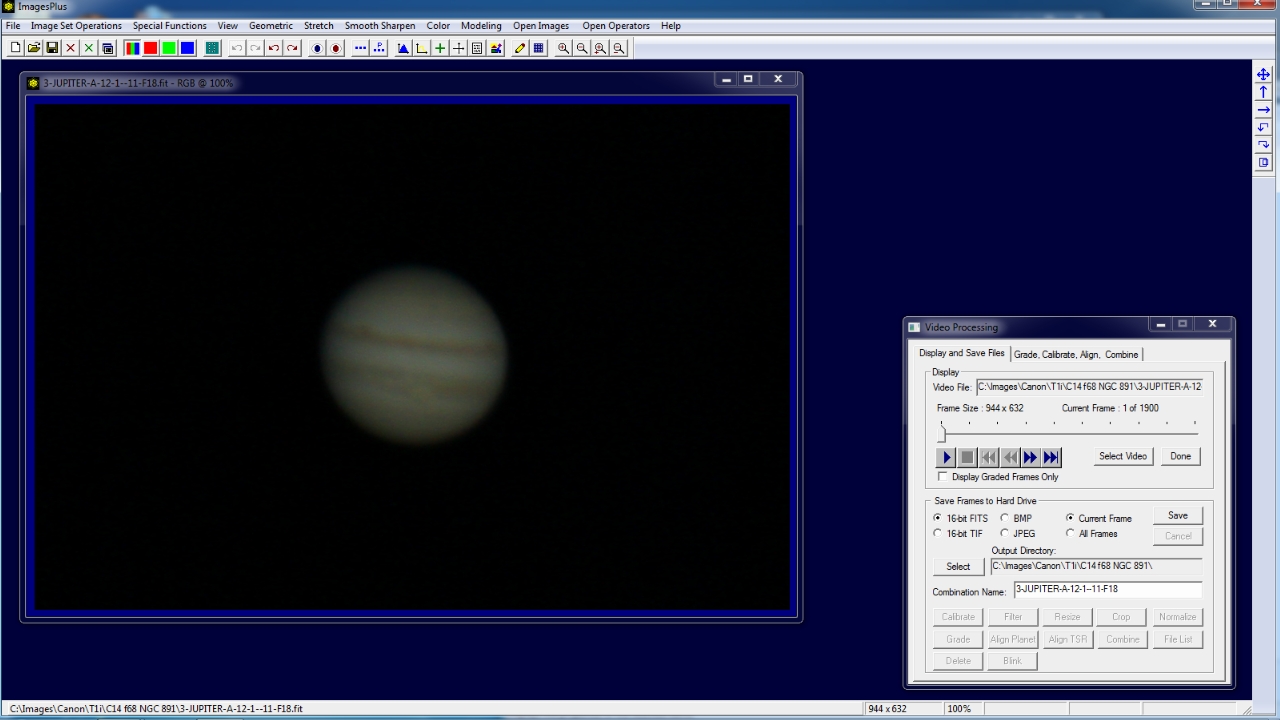
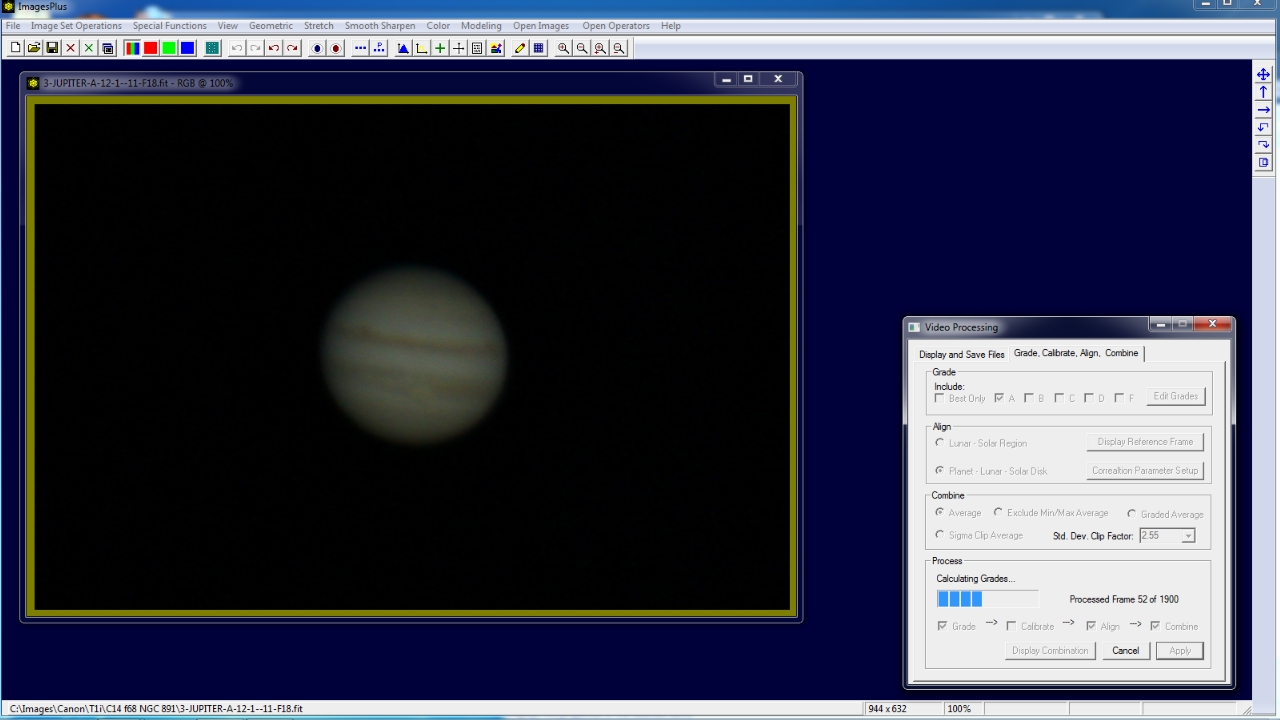
Step 1 - Open the Jupiter SID file using the Image Set Operations | Video Processing tool in ImagesPlus image processing.
Initial frame of the Jupiter 12-1-11 SID file is displayed. The SID file can be played or individual frames can be saved as seperate files. The entire SID file will be processed using the options on the Grade, Calibrate, Align, Combine tab.
 |
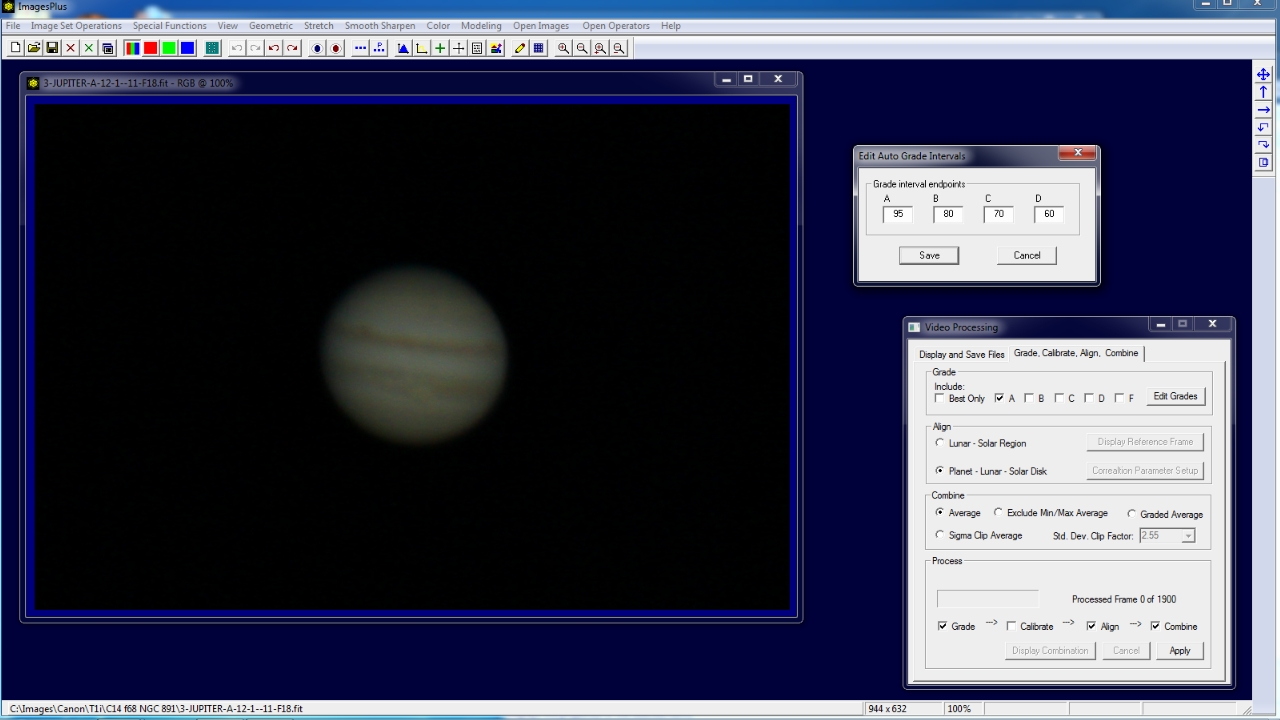
Step 2 - Select grade, align, and combine options.
Only Grade A is checked and set to 95 to select only the best frames with a grade of 0.95 to 1.00 from 1900 frames. The Grade, Align, and Combine boxes are checked to turn on grade, align, and combine processing.
 |
Step 3 - Process the SID file.
First the 1900 frames stored in the SID file are graded then only frames with a grade of 0.95 to 1.0 are aligned and combined.
 |
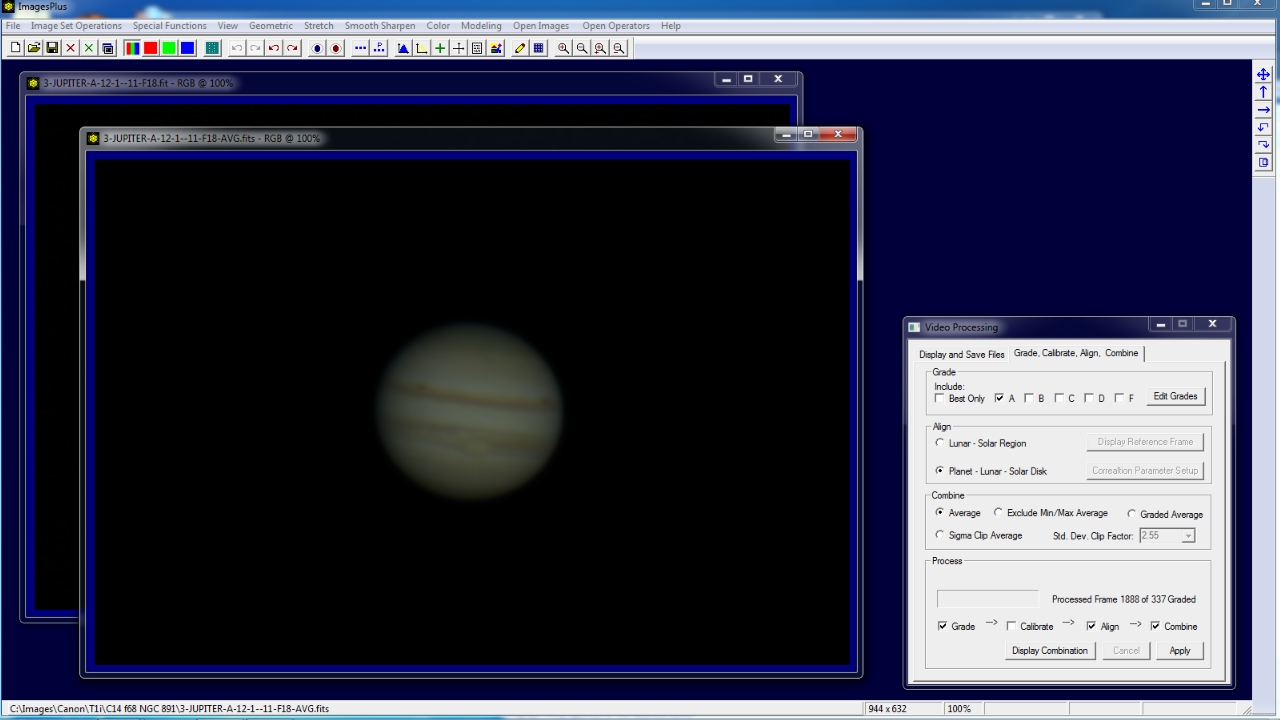
Step 4 - The stacked image is displayed.
Of the 1900 frames 337 frames were selected with a grade from 0.95 - 1.00 then aligned and stacked. Press the Display Combination button to display the stacked image. After grading is performed the play option will only display frames within the grade range.
 |
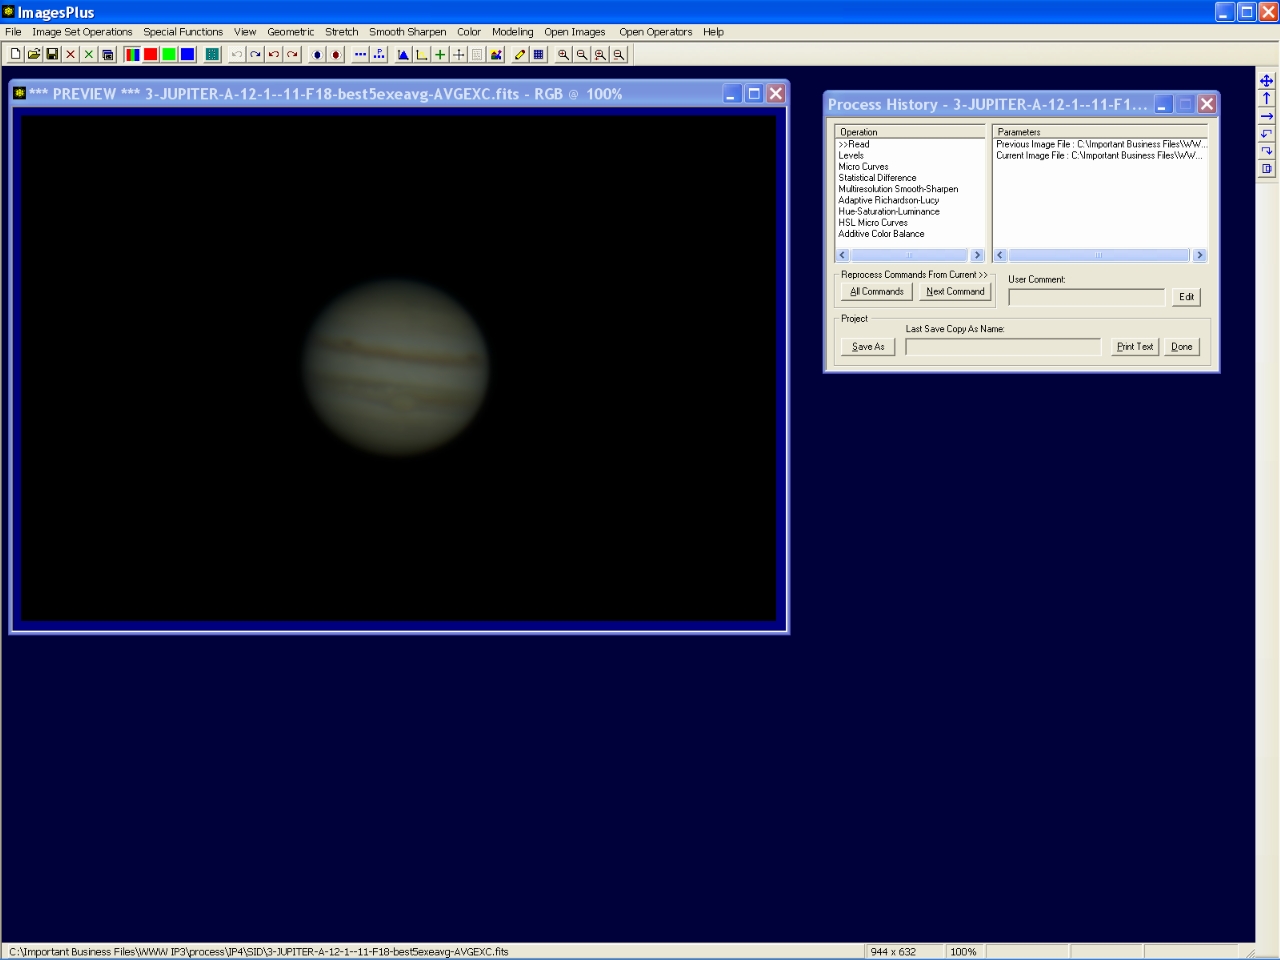
Step 5 - Enhance the stacked image.
The Process History windows shows the steps that will be appiled to enhance the stacked image. The enhancement commands listed in the Operation window of Process History were saved from a previous enhancement of a similar stacked image of Jupiter. The enhancement commands can be used as a workflow guide and can be modified to fit each image.
 |
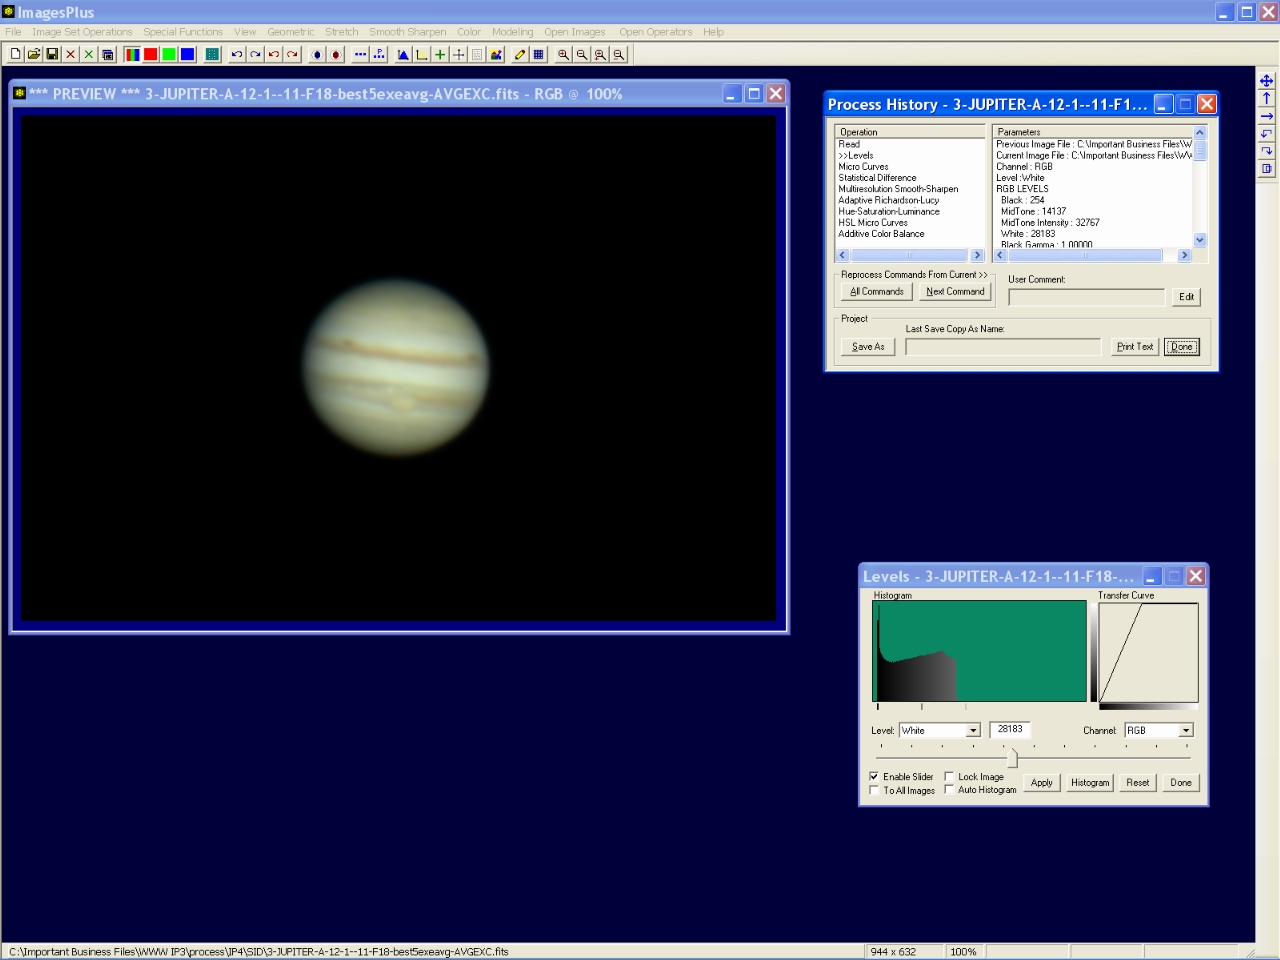
Step 6 - Set white point.
Levels is used to set the white point of the image near the right side of the histogram.
 |
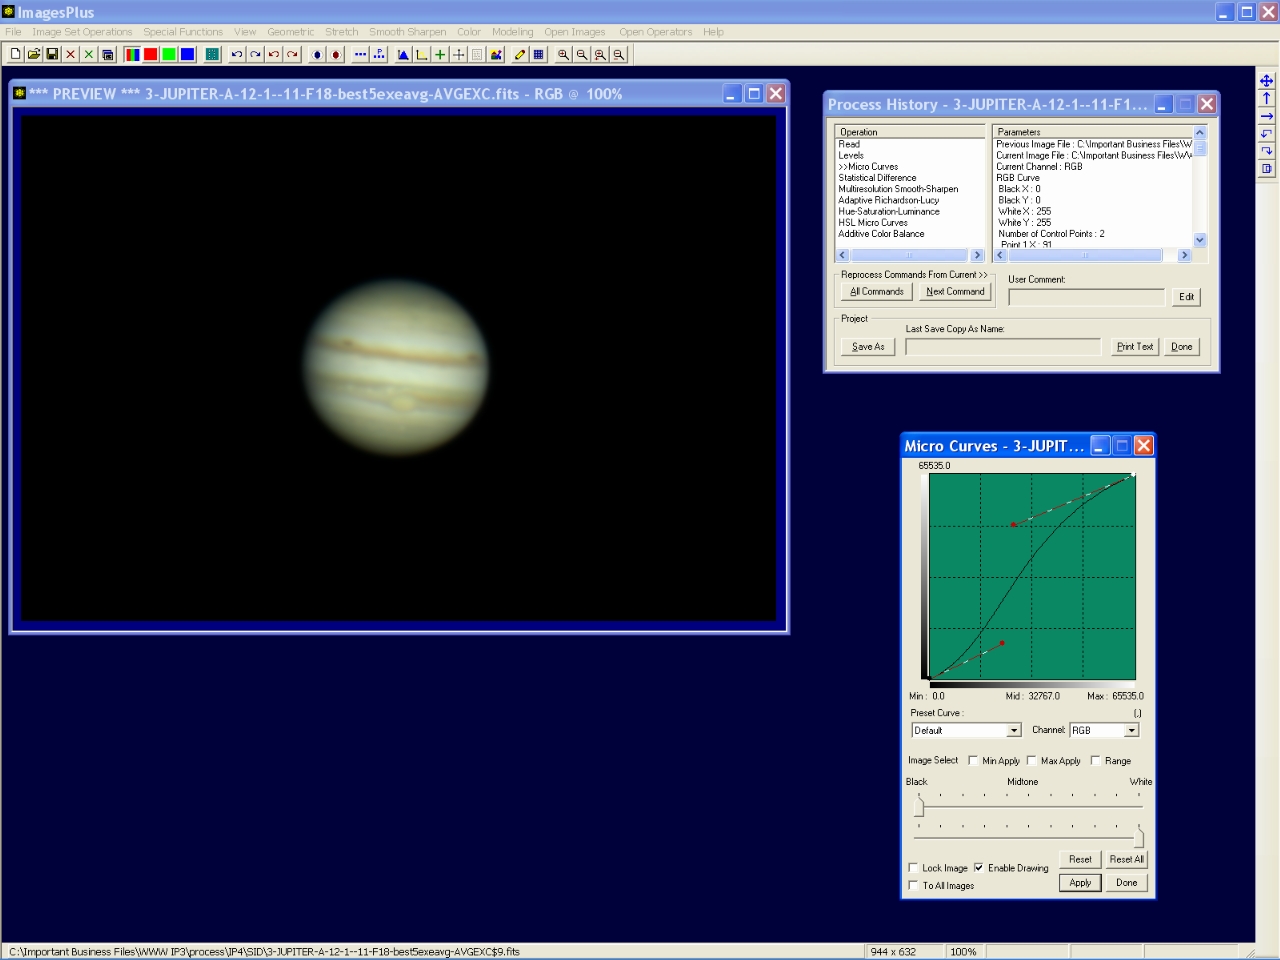
Step 7 - Mild contrast increase.
S-shaped micro curve is used to apply a mild contrast increase. Background is lowered and light areas are increased.
 |
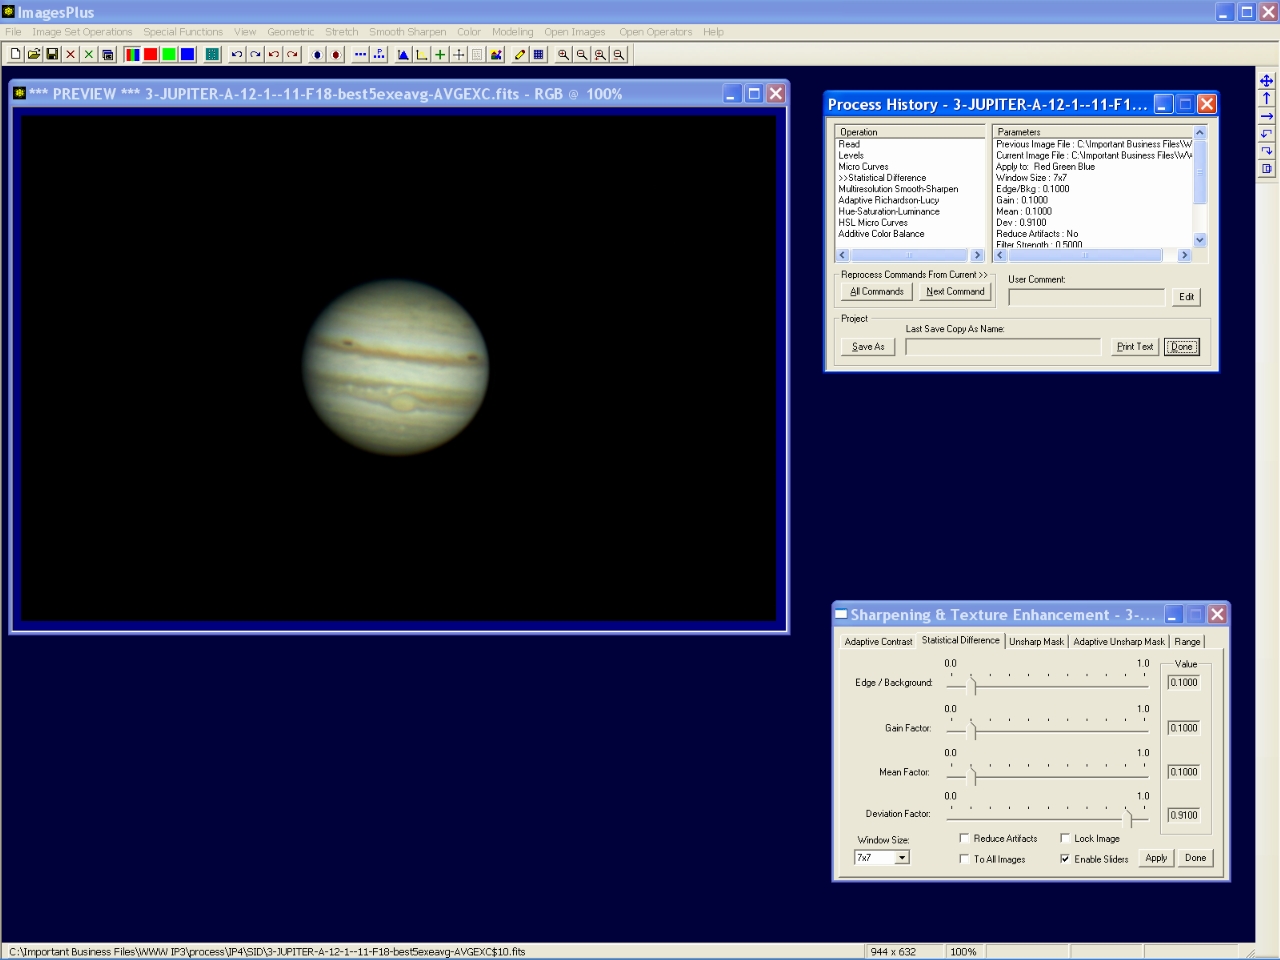
Step 8 - Initial mild sharpening.
The statistical difference function is used to apply a mild sharpening to the image.
 |
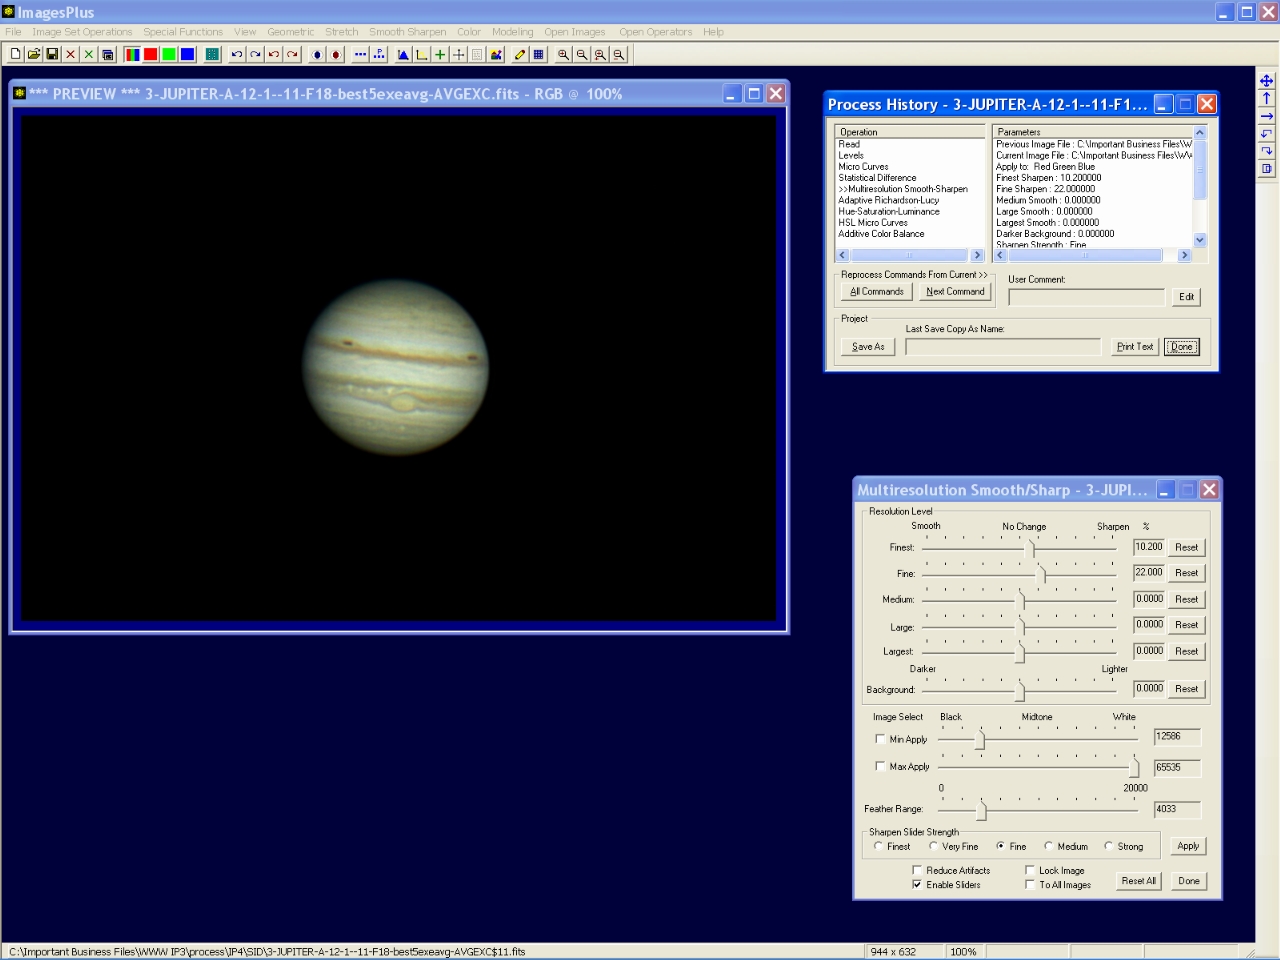
Step 9 - Sharpen fine detail.
Mulitresolution sharpening is used to sharpen fine detail in Jupiter. Only detail away from the limb of Jupiter is sharpened since the minimum apply level for the multiresolution tool is set to 12586 with a feather range of 4033.
 |
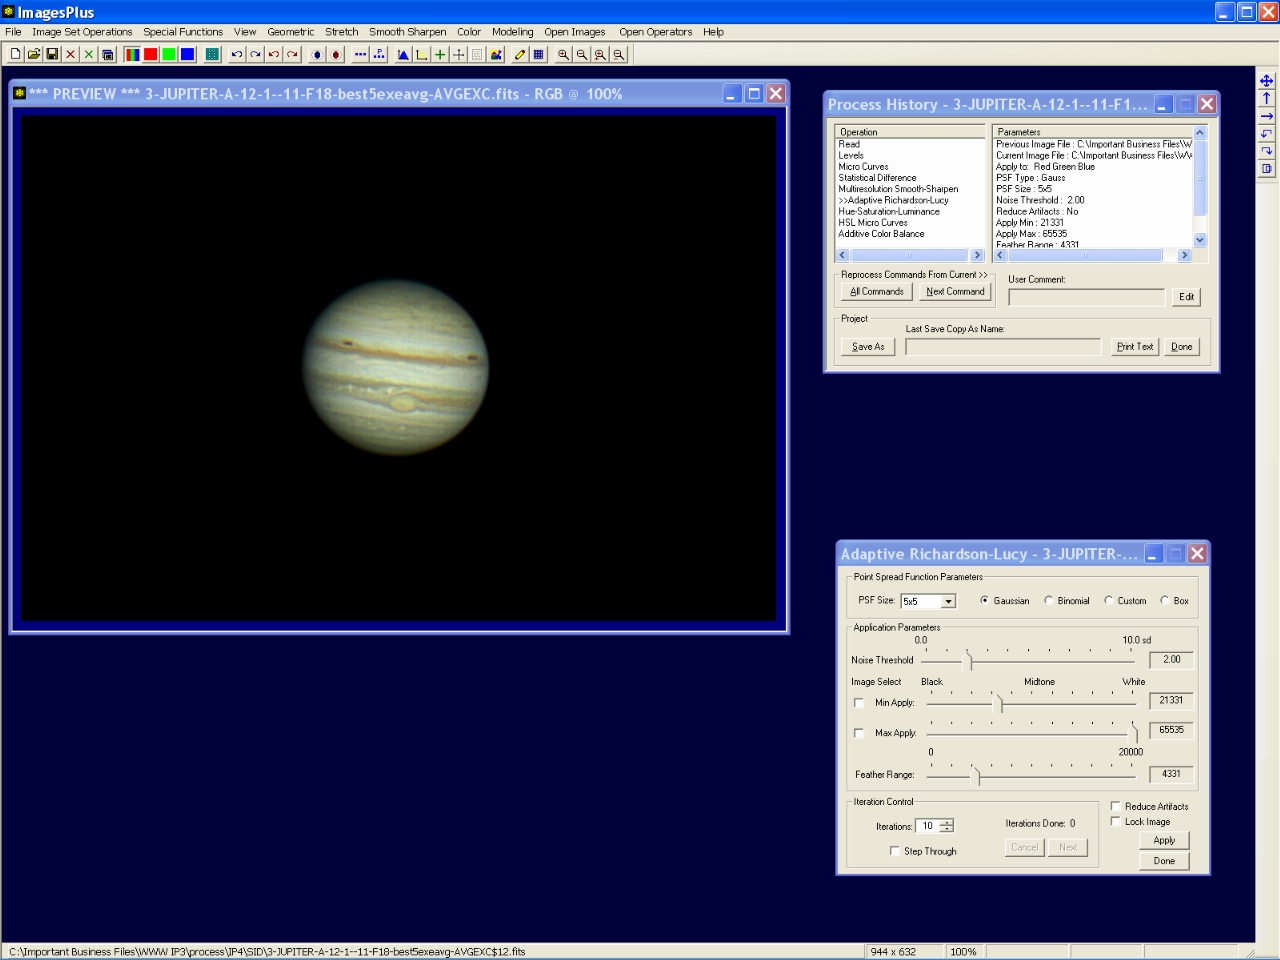
Step 10 - Mild deconvolution.
Adaptive Richardson-Lucy deconvolution is used to sharpen fine detail in Jupiter. Only detail away from the limb of Jupiter is sharpened since the minimum apply level for the decovolution is set to 21331 with a feather range of 4331.
 |
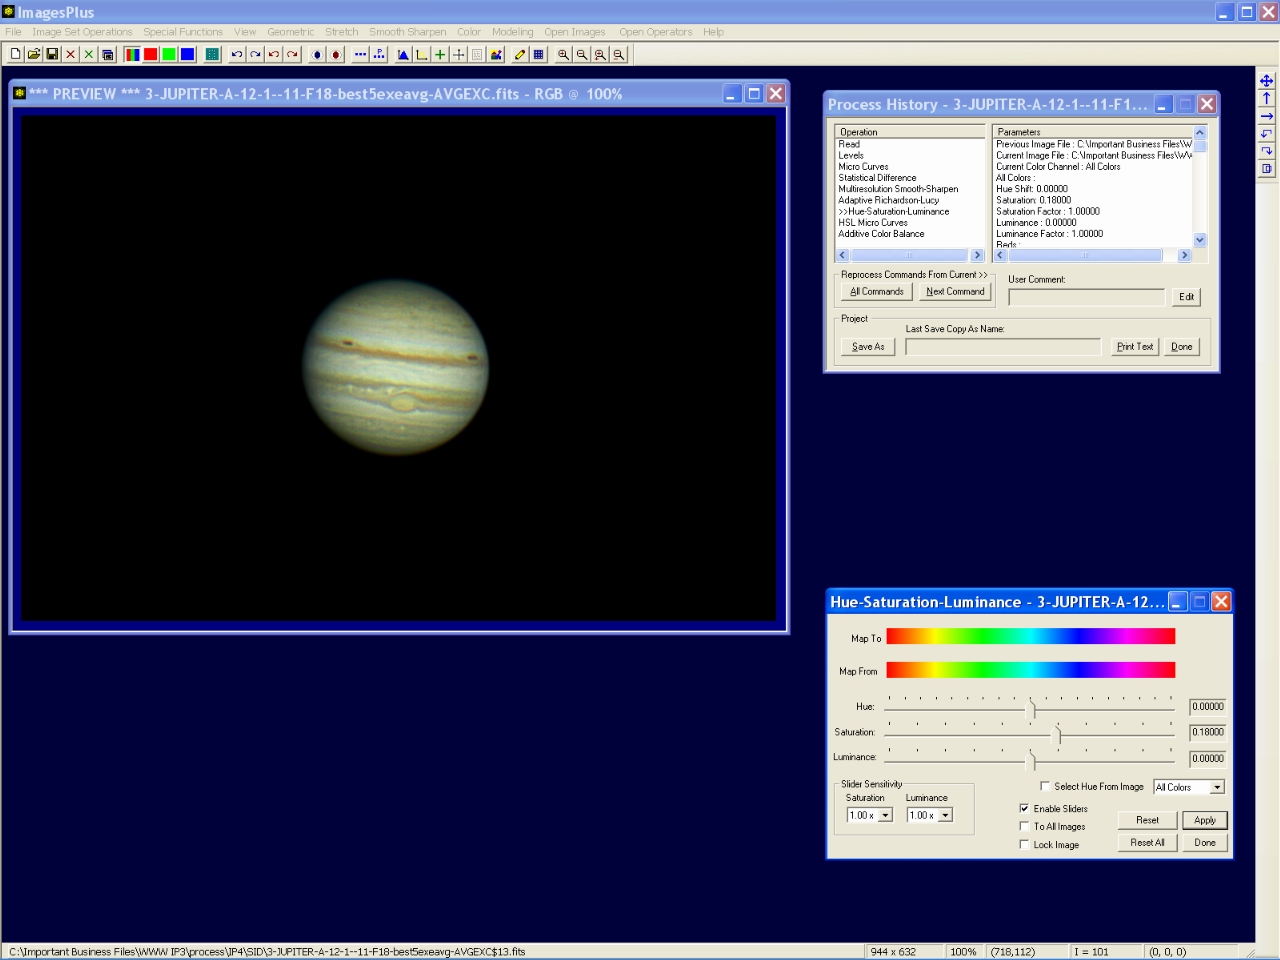
Step 11 - Increase saturation.
Mild saturation increase applied to all hue, saturation, and luminance levels.
 |
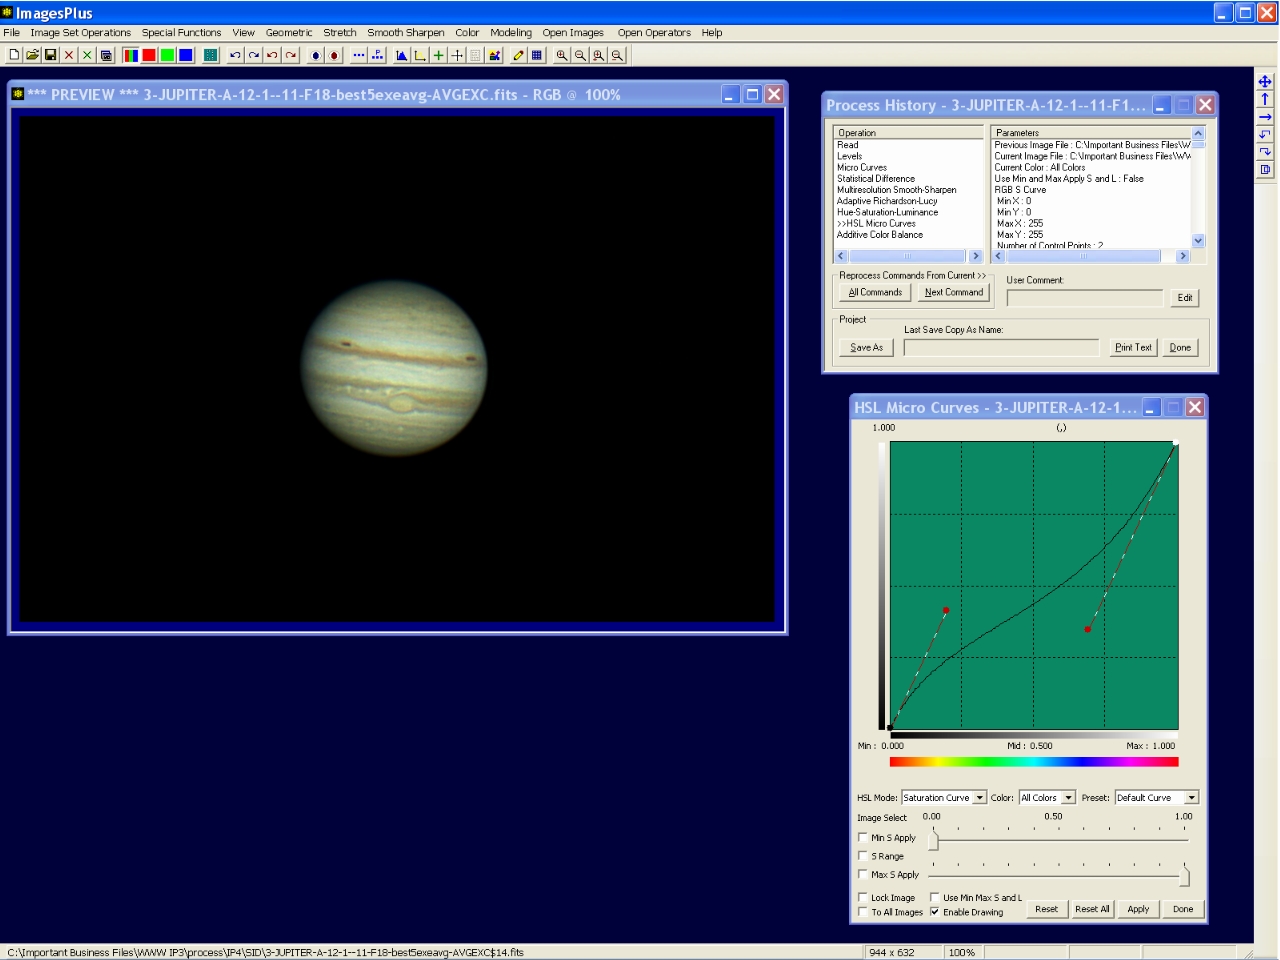
Step 12 - Increase low saturation and decrease high saturation areas.
S-shaped saturation micro curve is used to increase low saturation and decrease high saturation areas.
 |
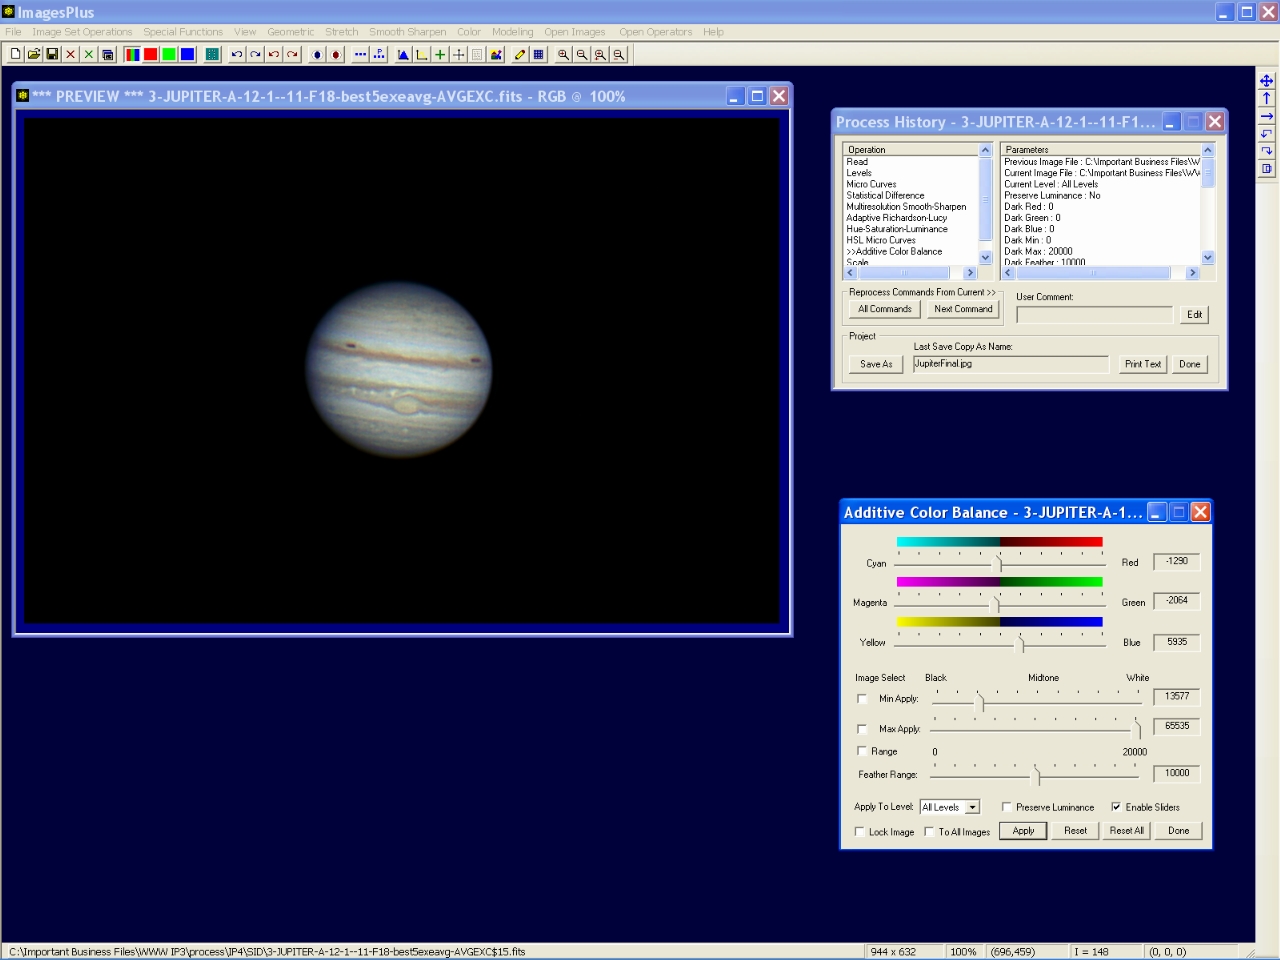
Step 13 - Remove yellow bias.
Increase blue while red and green are reduced. Only color away from the limb of Jupiter is changed since the minimum apply level of Additive Color Balance is set to 13577 with a feather range of 10000. The black background remains black.
 |
Copyright © 2012 MLUnsold Digital Imaging. All Rights Reserved.