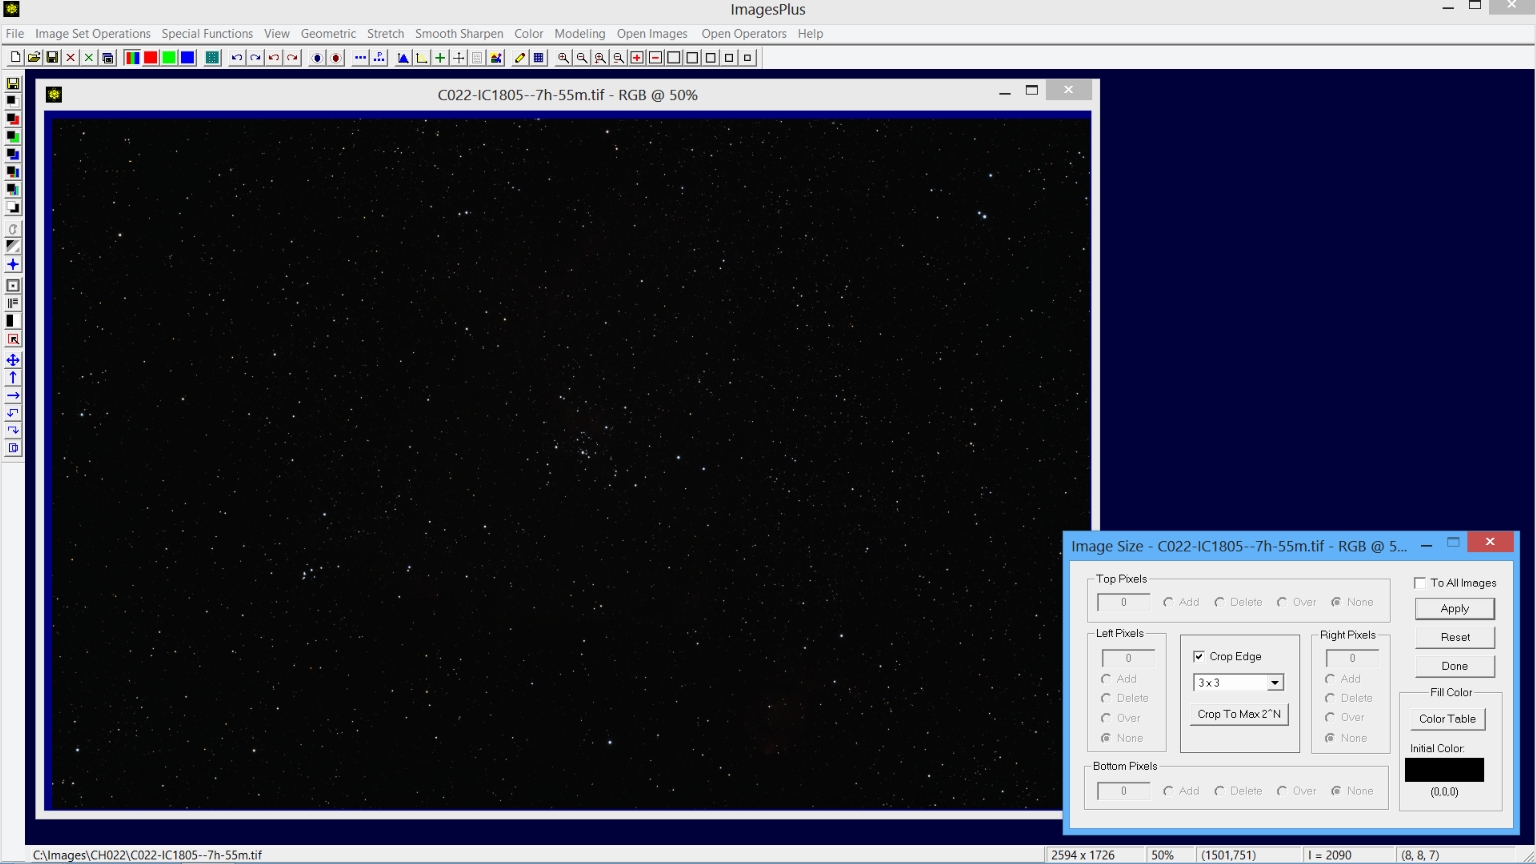
CH22 - IC 1805 - The Heart Nebula Complete ImagesPlus 5.75 Processing
Complete work flow for processing CH22 - IC 1805 - The Heart Nebula RGB data by Jerry Keith of the DSLR_Astro_Image_Processing Yahoo Group
is shown below.
Processing Summary:
Initial RGB Processing
- Scale and crop the full size image to remove areas with no data after stacking.
- Use ArcSinH for the initial stretch.
- Remove stars from the image using the Feature Mask© tool.
Nebula & Background Image Processing
- Increase red in the nebula.
- Flatten the image using Multi Point Flatten.
- Smooth fine pixel size noise while preserving detail.
- Increase blue stars.
- Sharpen the image.
- Apply curves to increase the nebula.
Star Image Processing
- Reduce star size.
Star, Nebula, and Background Merge Processing
- Combine Images is used to merge the processed star image with the processed nebula and background image.
- Adjust contrast.
- Darken the background.
- Increase nebula brightness.
Each step is used with no mask, normal blend mode, and 100% opacity unless otherwise noted. Many steps are explained in detail by links to additional tutorials. See ImagesPlus 5.0 Processing Tutorials for a list of all tutorials by function.
Initial RGB Processing Detail:
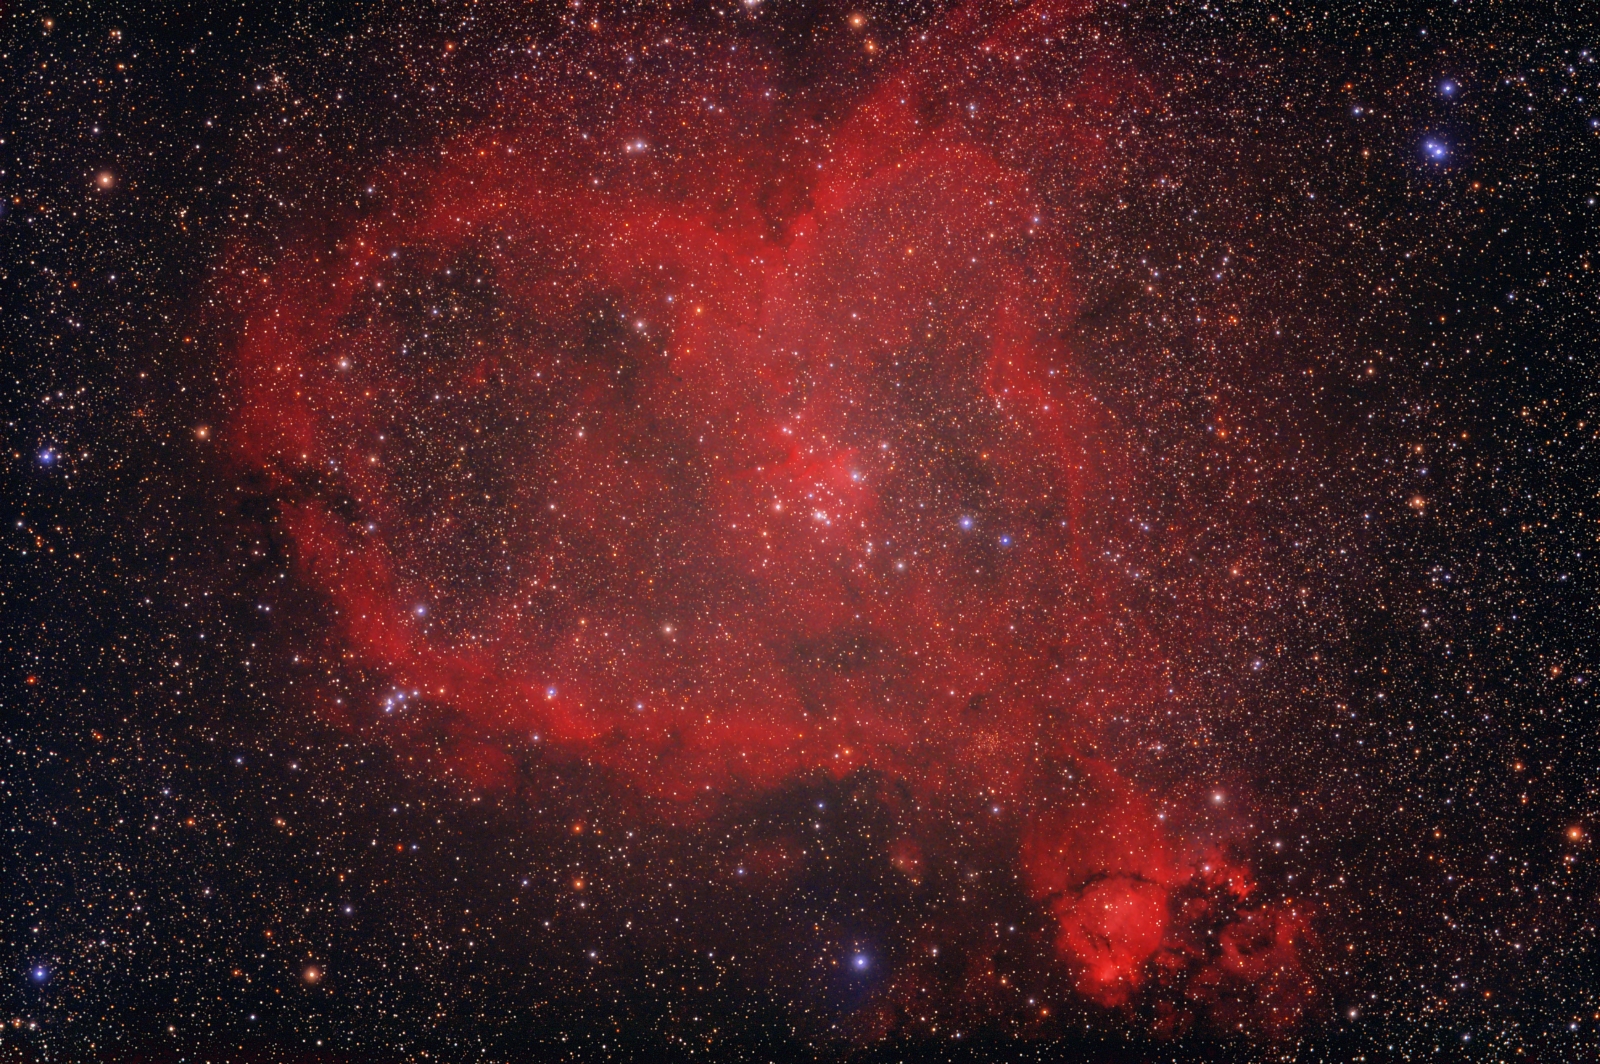
Step 1) Scale and crop the full size image to remove areas with no data after stacking.
The Geometric | Geometric Transforms | Scale tool is used to reduce the full size image by a factor of 0.50. Next the Geometric | Image Size tool is used to delete 3 rows and columns from the edge of the image where there is no data. Scaling early in the processing workflow smooths the image slightly and allows faster processing of a smaller image.
 |
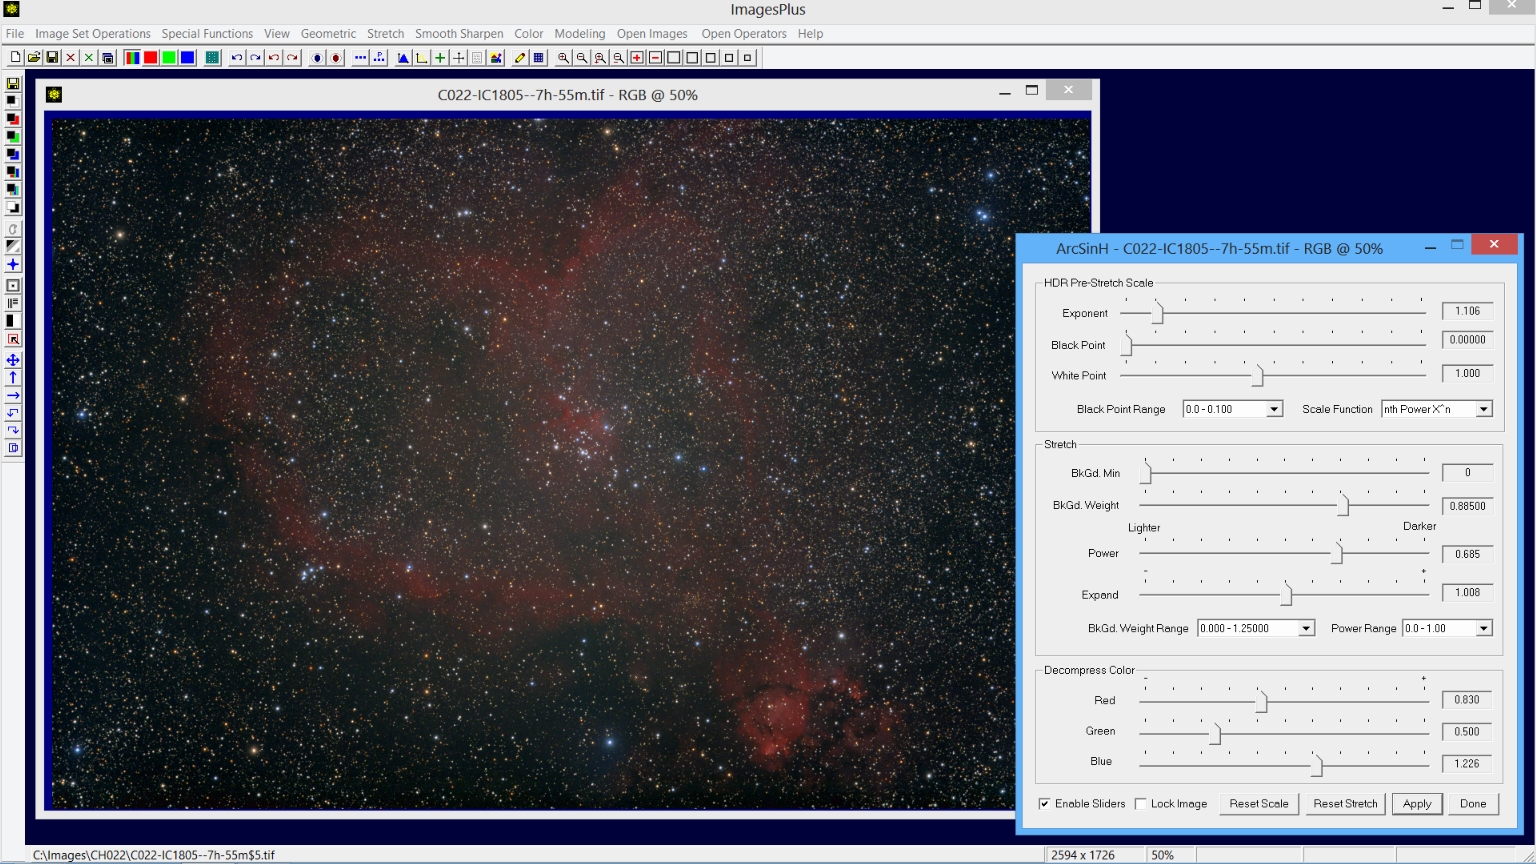
Step 2) Use ArcSinH for the initial stretch.
The Stretch | ArcSinH tool is used for the initial brightness stretch. First the Power and BkGd. Weight sliders are moved to the left to increase brightness and set the background level, respectively. Next the Root slider of the nth Root HDR Pre-Stretch Scale control group is moved to the left to adjust contrast.
Color decompression is adjusted to maximize color. Careful adjustment of the initial stretch parameters greatly simplifies processing that follows. Additional information for using the ArcSinH tool can be found at ArcSinH - Increase Brightness and Contrast With HDR and Color Decompression
 |
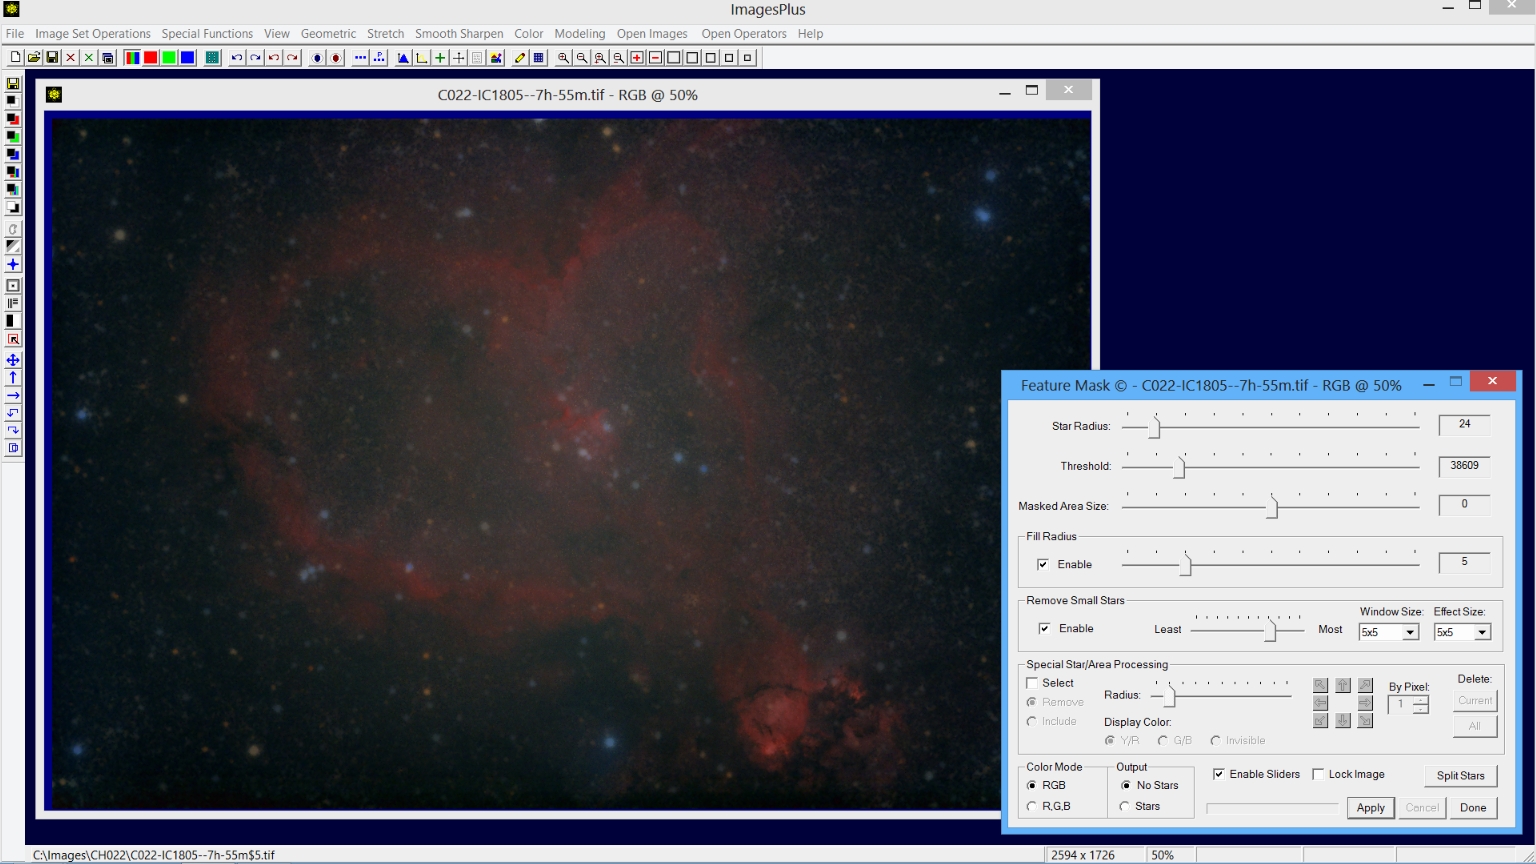
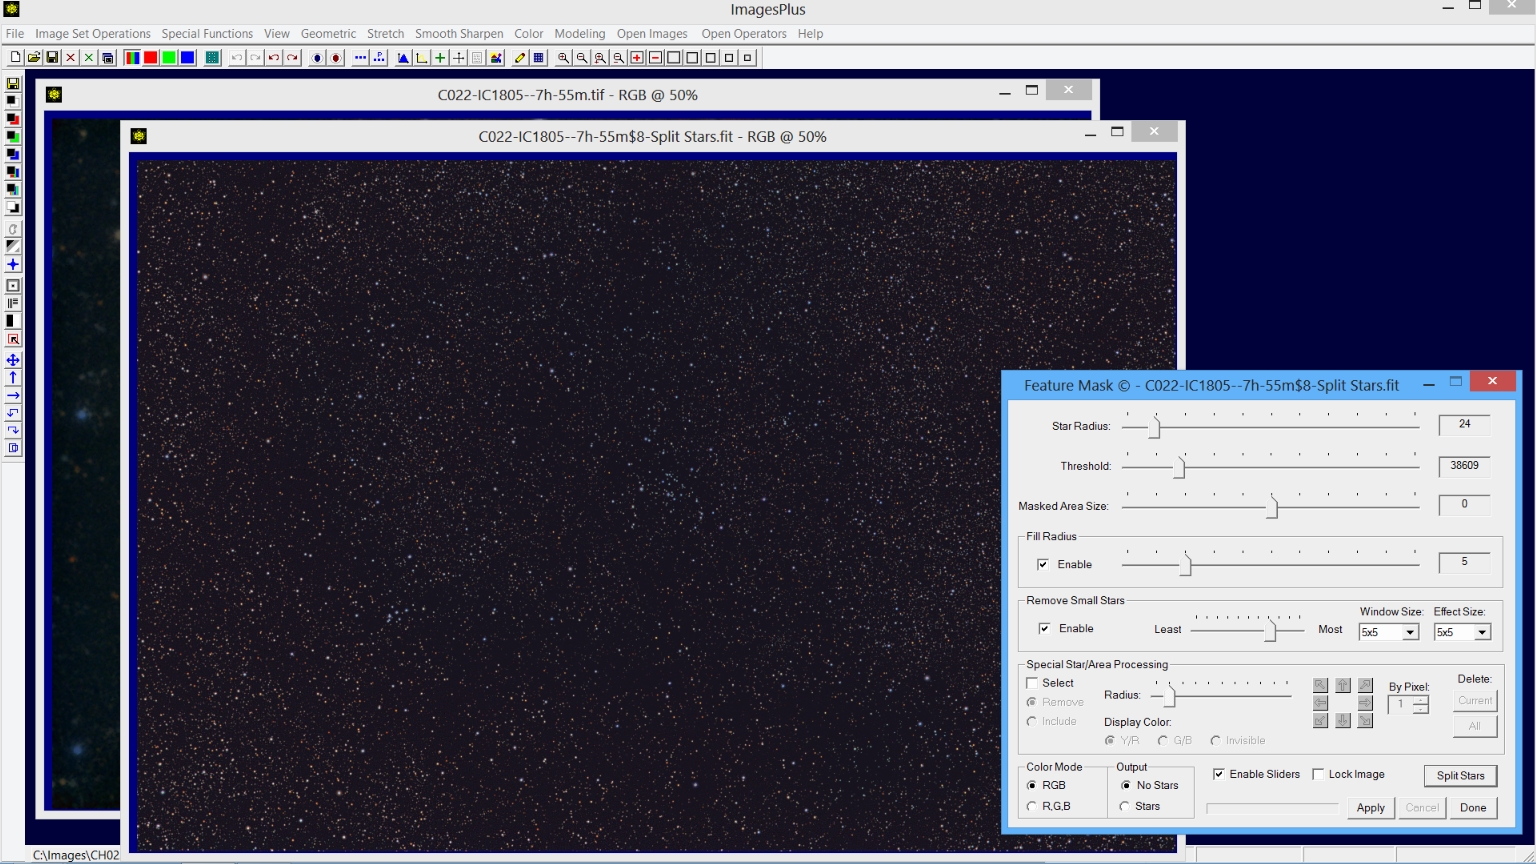
Step 3) Remove stars from the image using the Feature Mask© tool.
After Feature Mask© parameters are adjusted to remove the star press the Split Stars button to create the matching star only image. On x64 systems spilt and merge of the star and galaxy image is lossless.
 |
Nebula & Background Image Processing Detail:
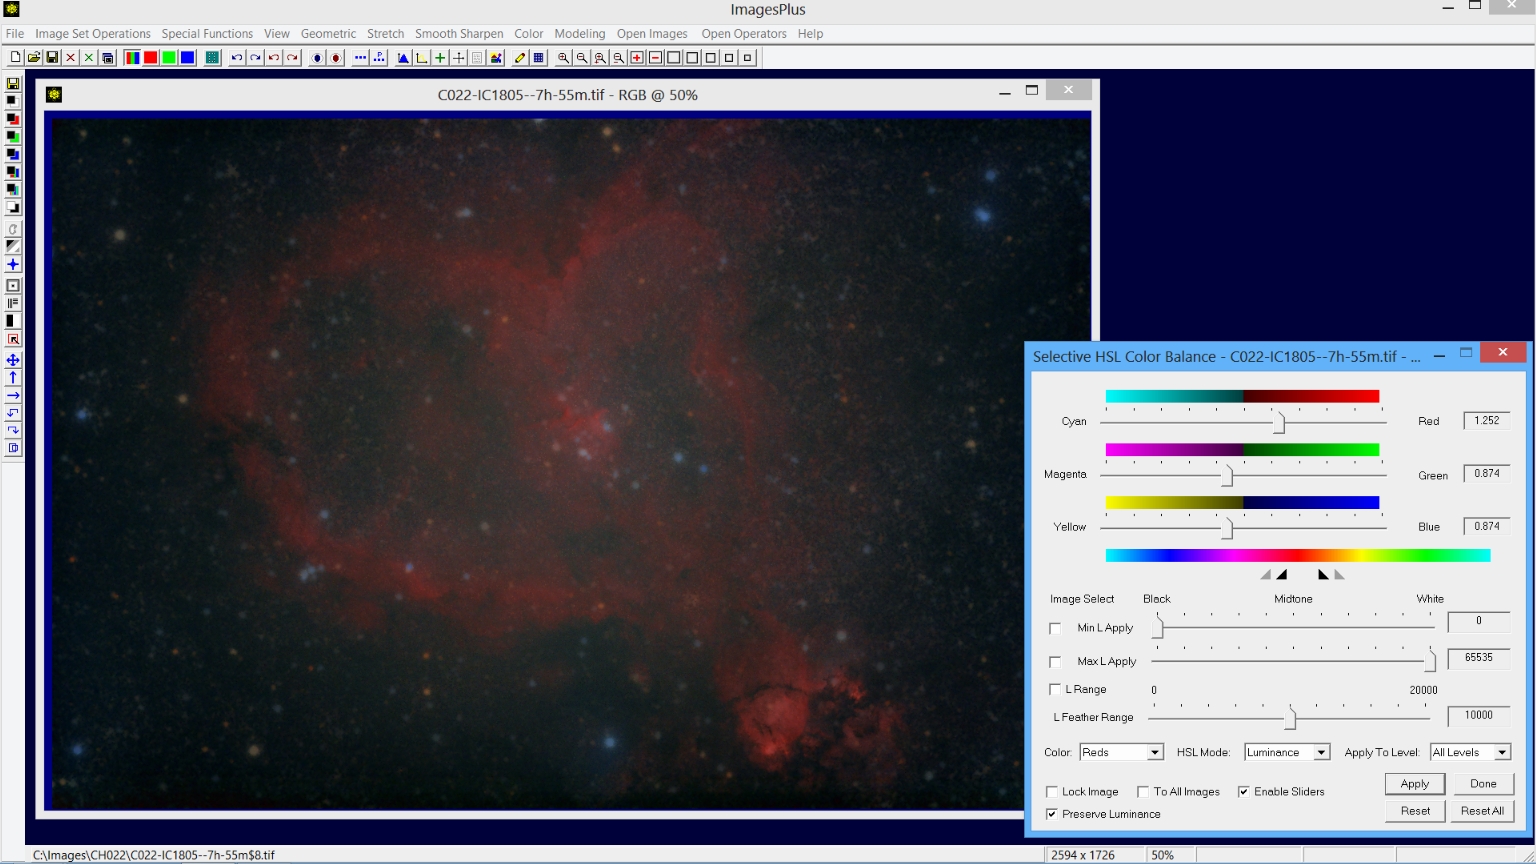
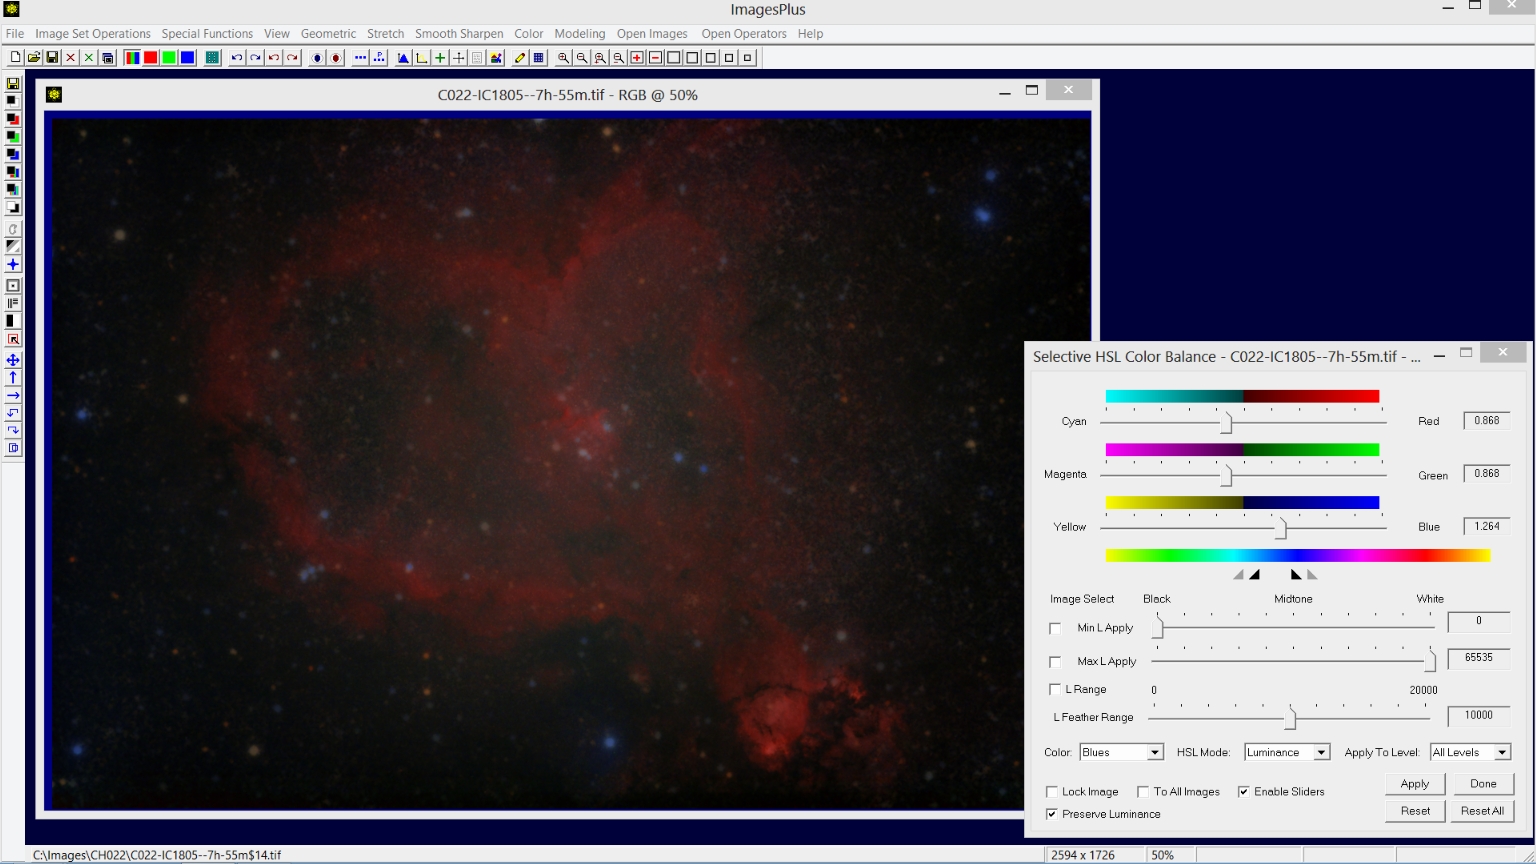
Step 1) Increase red in the nebula.
Color | Selective HSL Color Balance is used to increase red in the nebula. Set Select Hue in the HSL Mode list and check the Image Select H Range box then left click on a red part of the nebula to select a hue range. Use the triangles to adjust the selected hue range
and increase red by moving the top Cyan-Red slider to the right. See Selective HSL Color Balance for an example of using this tool.
 |
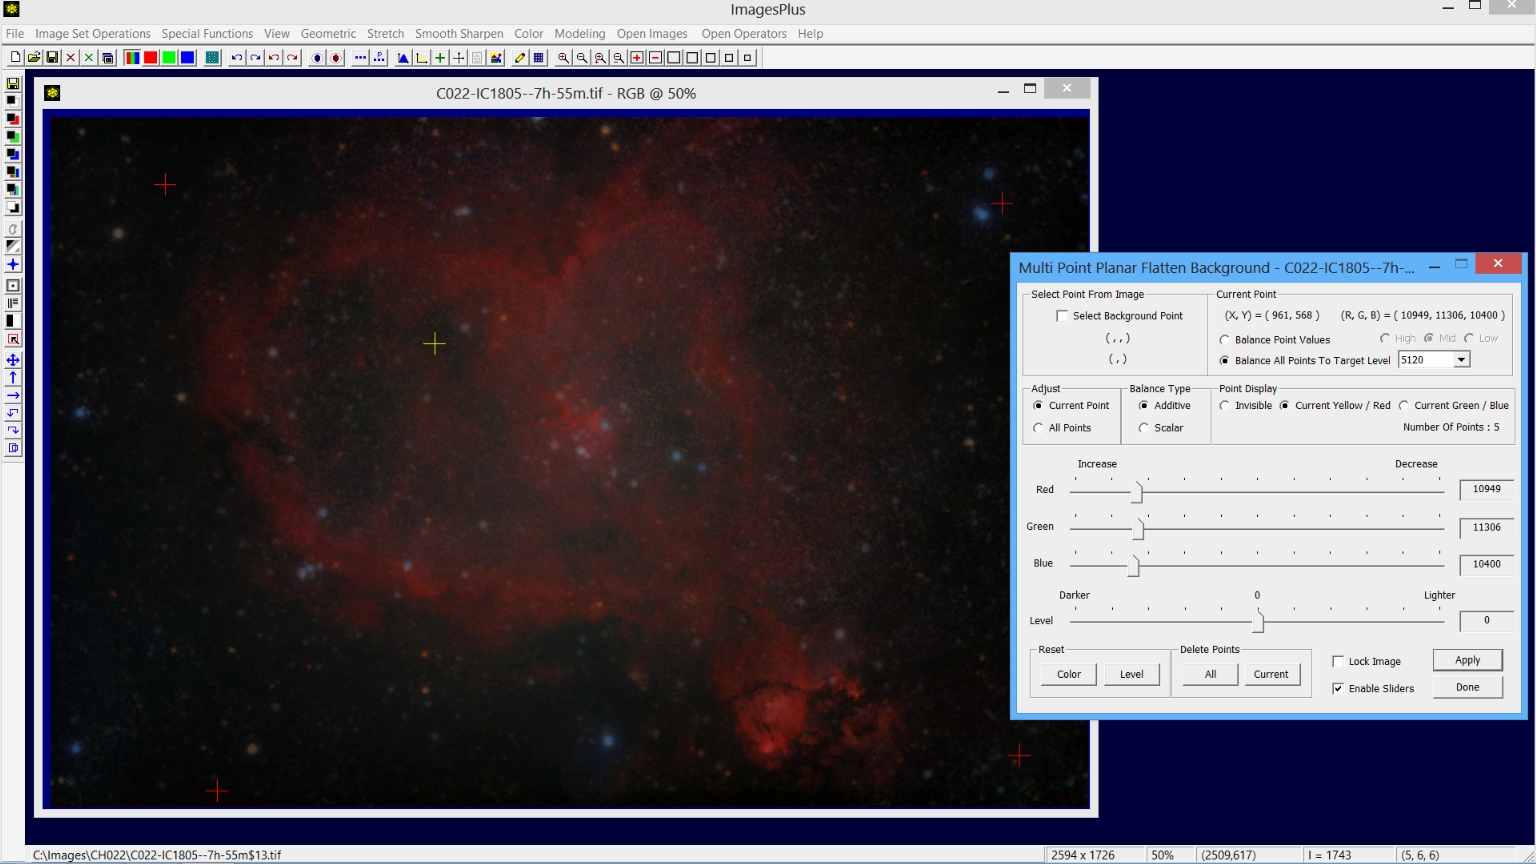
Step 2) Flatten the image using Multi Point Flatten.
Special Functions | Multi-Point Flatten Background is used to flatten, neutralize, and set the background level to dark gray. The gradient appears brightest at the center of the image so correction points are selected in the 4 corners and a dark area near the center where the is no nebula.
See Multiple Point Background Color Balance & Flatten Tool
for a tutorial.
 |
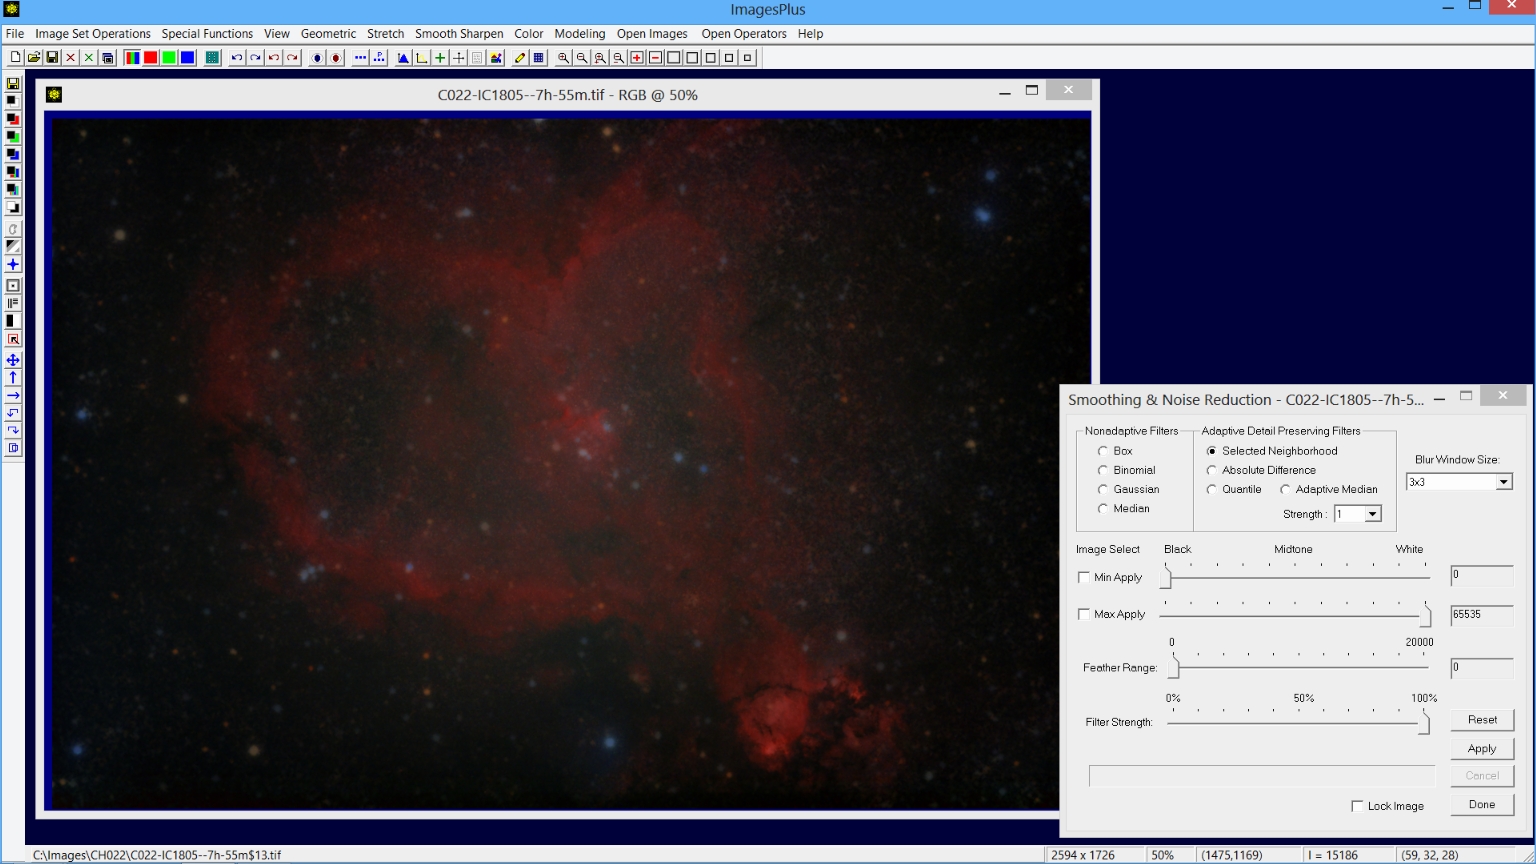
Step 3) Smooth fine pixel size noise while preserving detail.
Fine pixel size noise is removed using the Smooth Sharpen | Smoothing & Noise Reduction tool. A 3x3 Selected Neighborhood is used since it removes pixel size noise without losing detail.
 |
Step 4) Increase blue stars.
Color | Selective HSL Color Balance is used to increase blue stars. Set Select Hue in the HSL Mode list and check the Image Select H Range box then left click on a blue star to select a hue range. Use the triangles to adjust the selected hue range
and increase blue by moving the top Yellow-Blue slider to the right.
 |
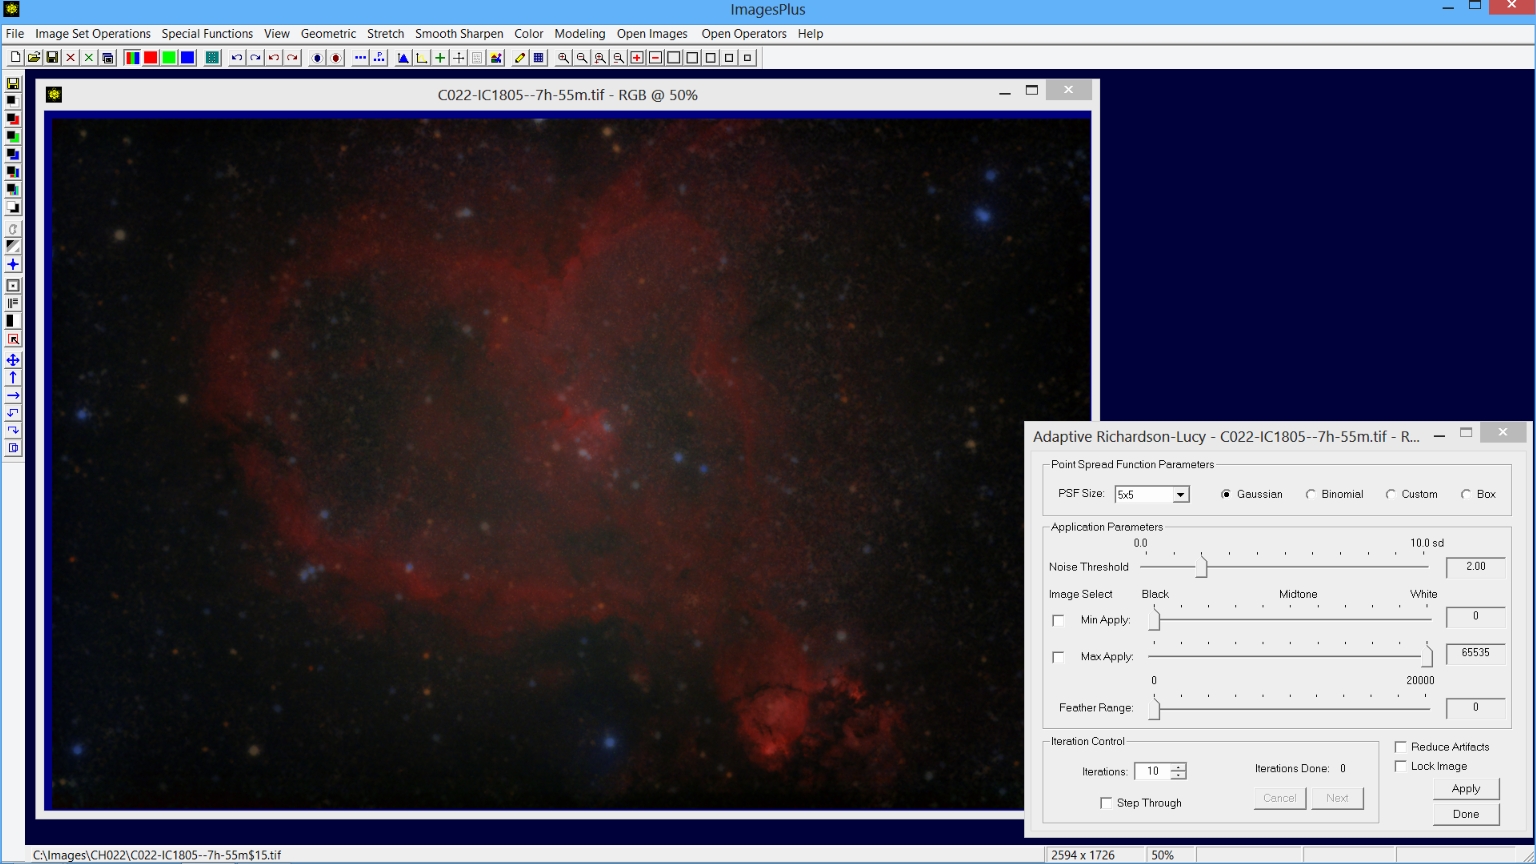
Step 5) Sharpen the image.
Smooth Sharpen | Adaptive Richardson-Lucy deconvolution is used to apply a mild sharpening to the image.
 |
Step 6) Apply curves to increase the nebula.
Stretch | Micro Curves is used to increase the RGB curve. Soft light blend mode with opacity of 0.609 is set on the
Process History window to blend the micro curve adjustment with the image.
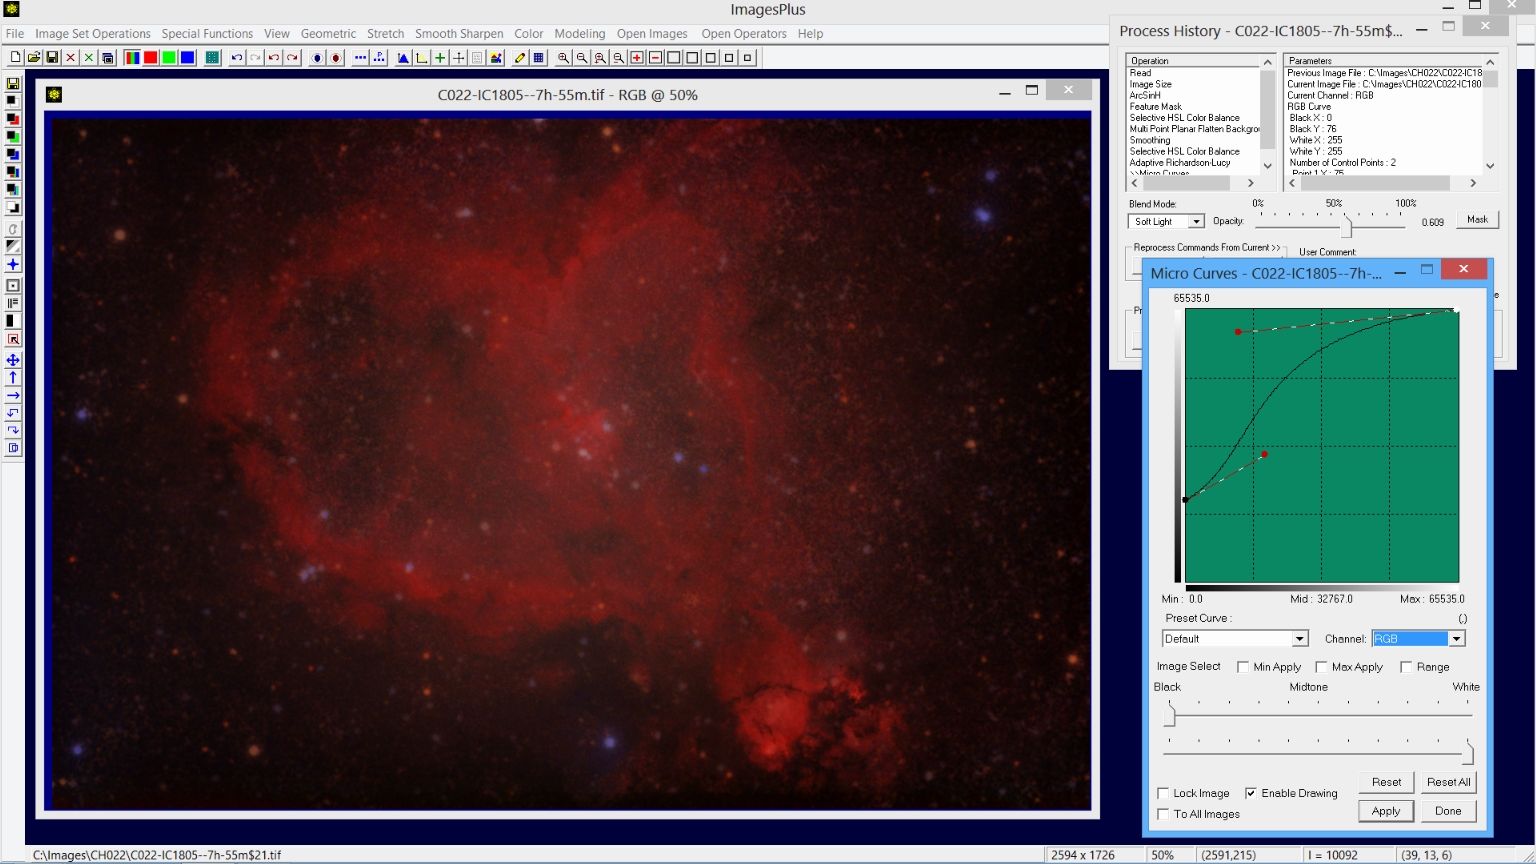 |
The red curve is also adjusted using the same soft light blend mode and opacity as was used with the RGB curve adjustment.
 |
Star Image Processing Detail:
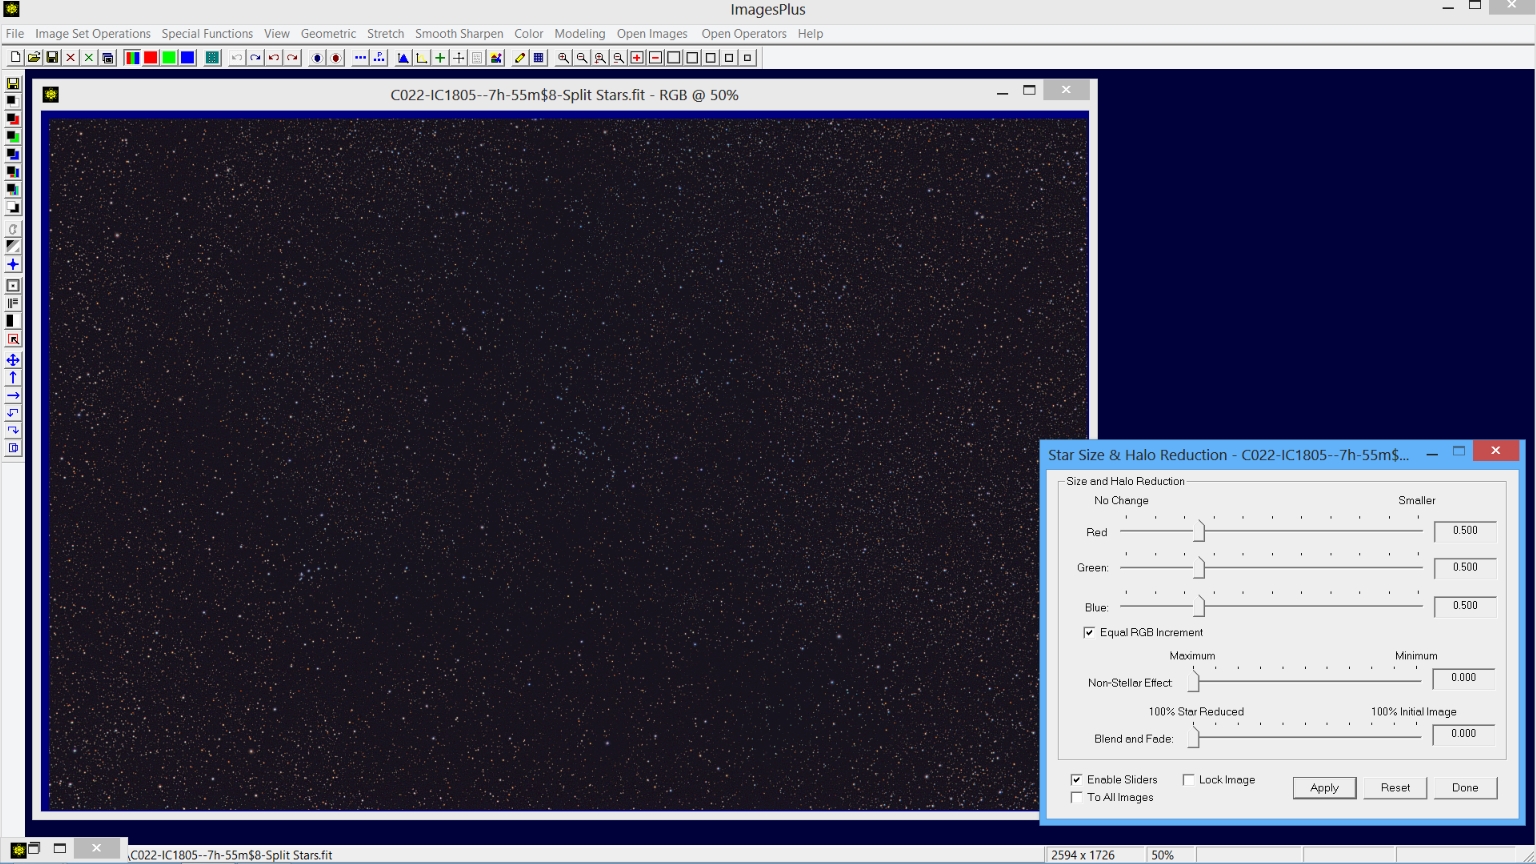
Step 1) Reduce star size.
Special Functions | Star Size & Halo Reduction is applied to the star image to reduce star size a little.
 |
Star, Nebula, and Background Merge Processing Detail:
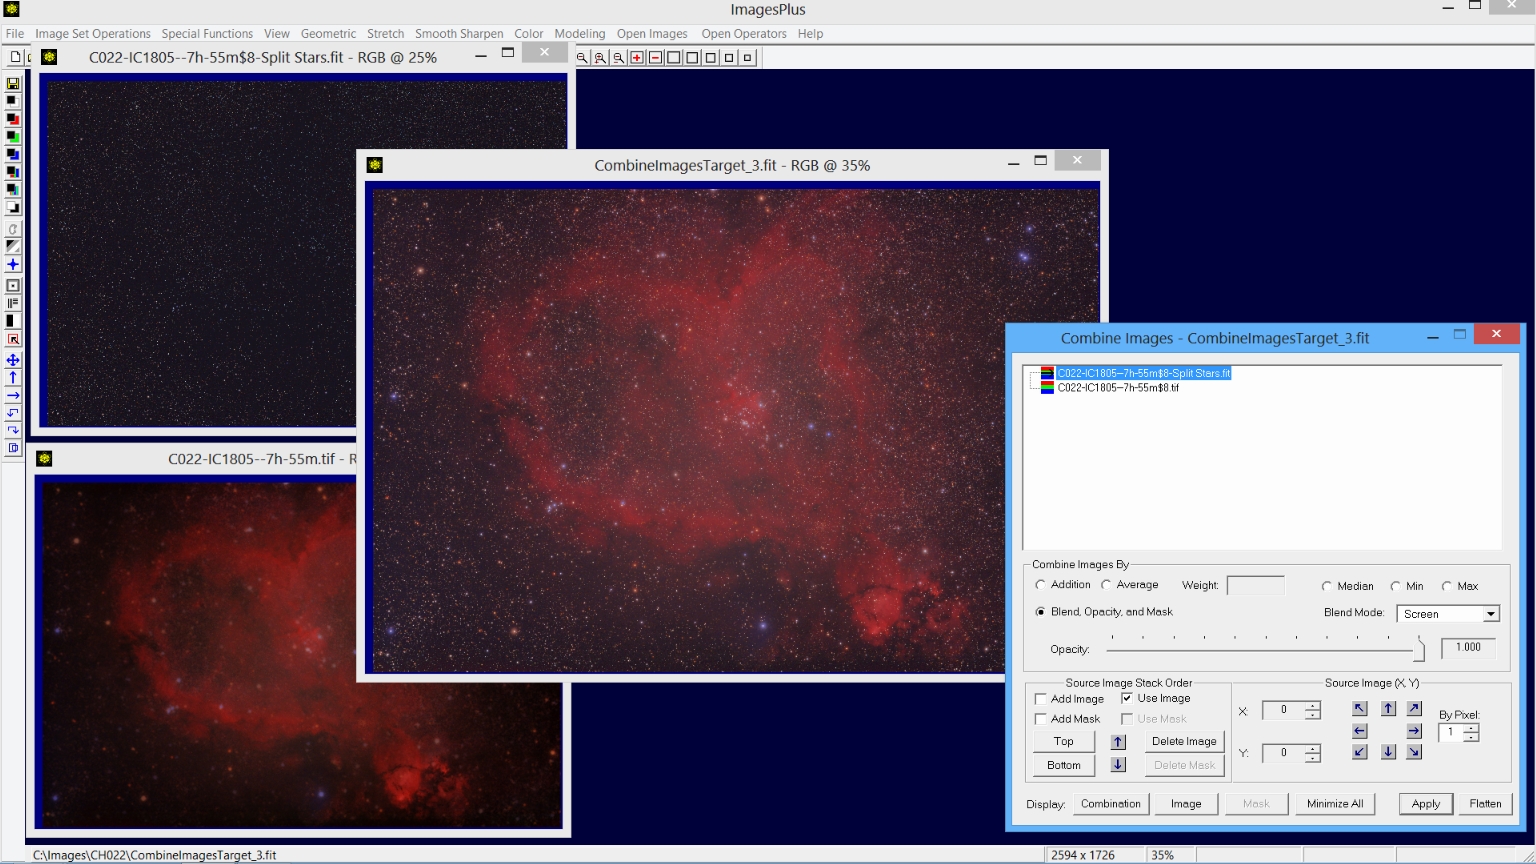
Step 1) Combine Images is used to merge the processed star image with the processed nebula and background image.
The Special Functions | Combine Images Using | Blend Mode, Opacity, and Masks tool is used to merge the processed star and nebula image. The nebula and background image is placed on the bottom of the layer stack with normal blend mode.
The star image is the top layer with screen blend mode. Screen blend mode was used to lighten the entire image so that final contrast adjustment could be applied without making the background too dark.
 |
Press Flatten on Combine Images to close the tool then close the nebula and star images. Final contrast adjustment will now be applied to the merged star and object image shown above.
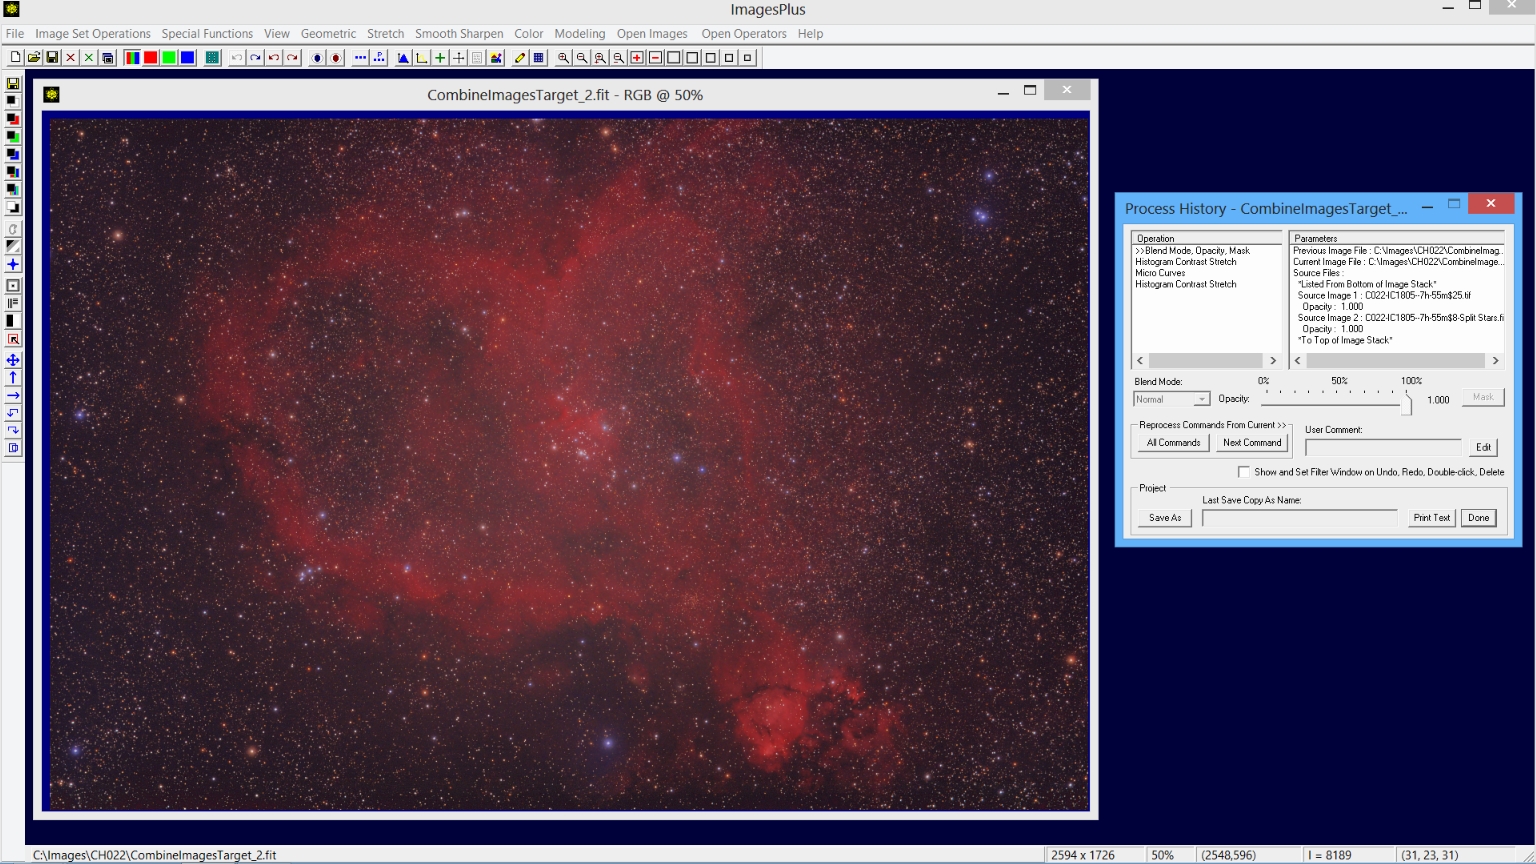 |
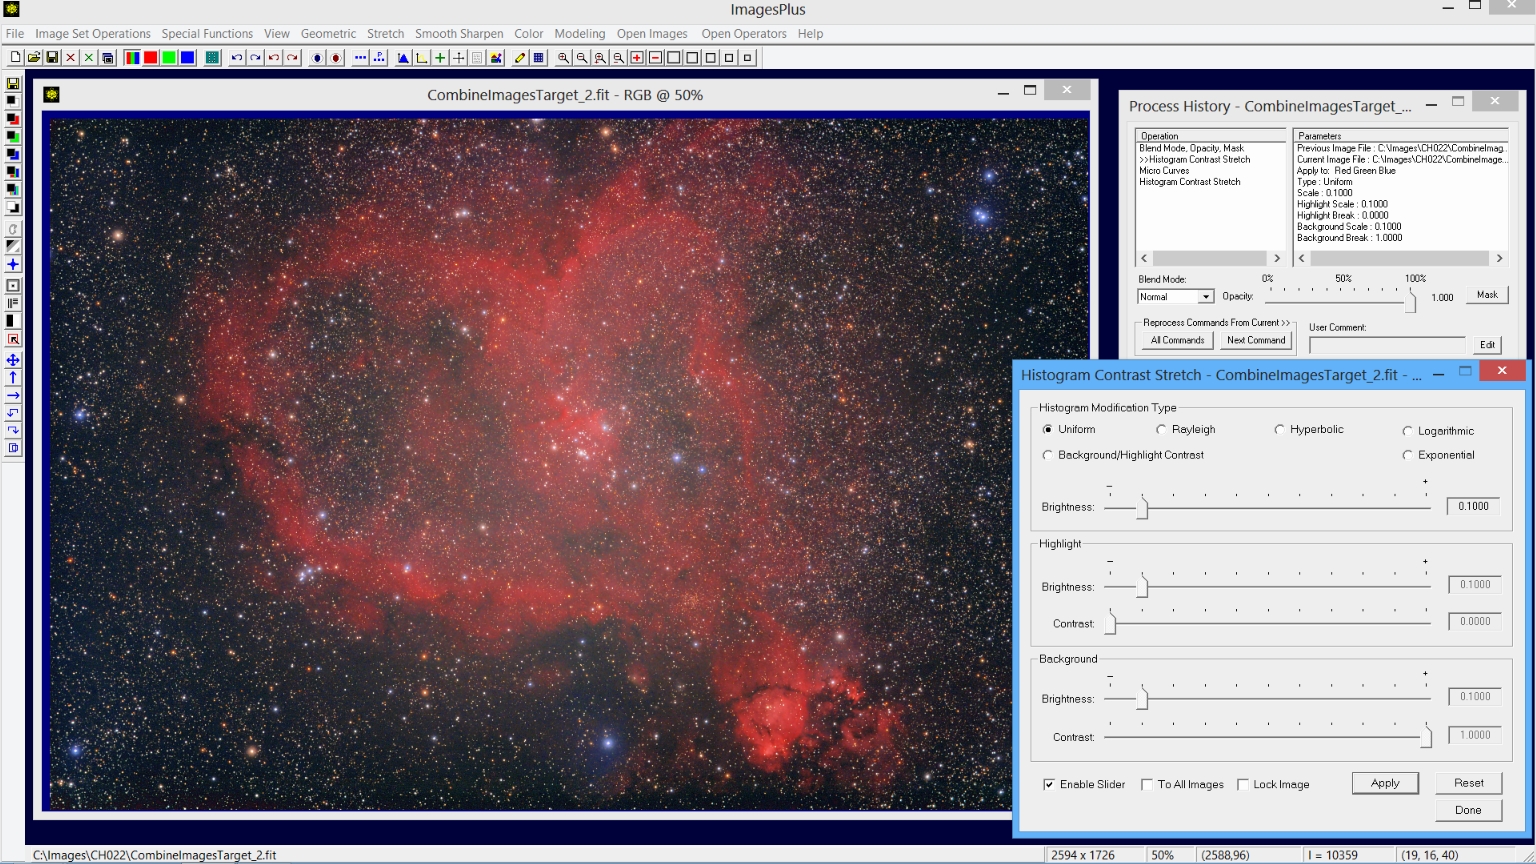
Step 2) Adjust contrast.
Stretch | Histogram Contrast Stretch | Uniform is used to equalize and balance color.
 |
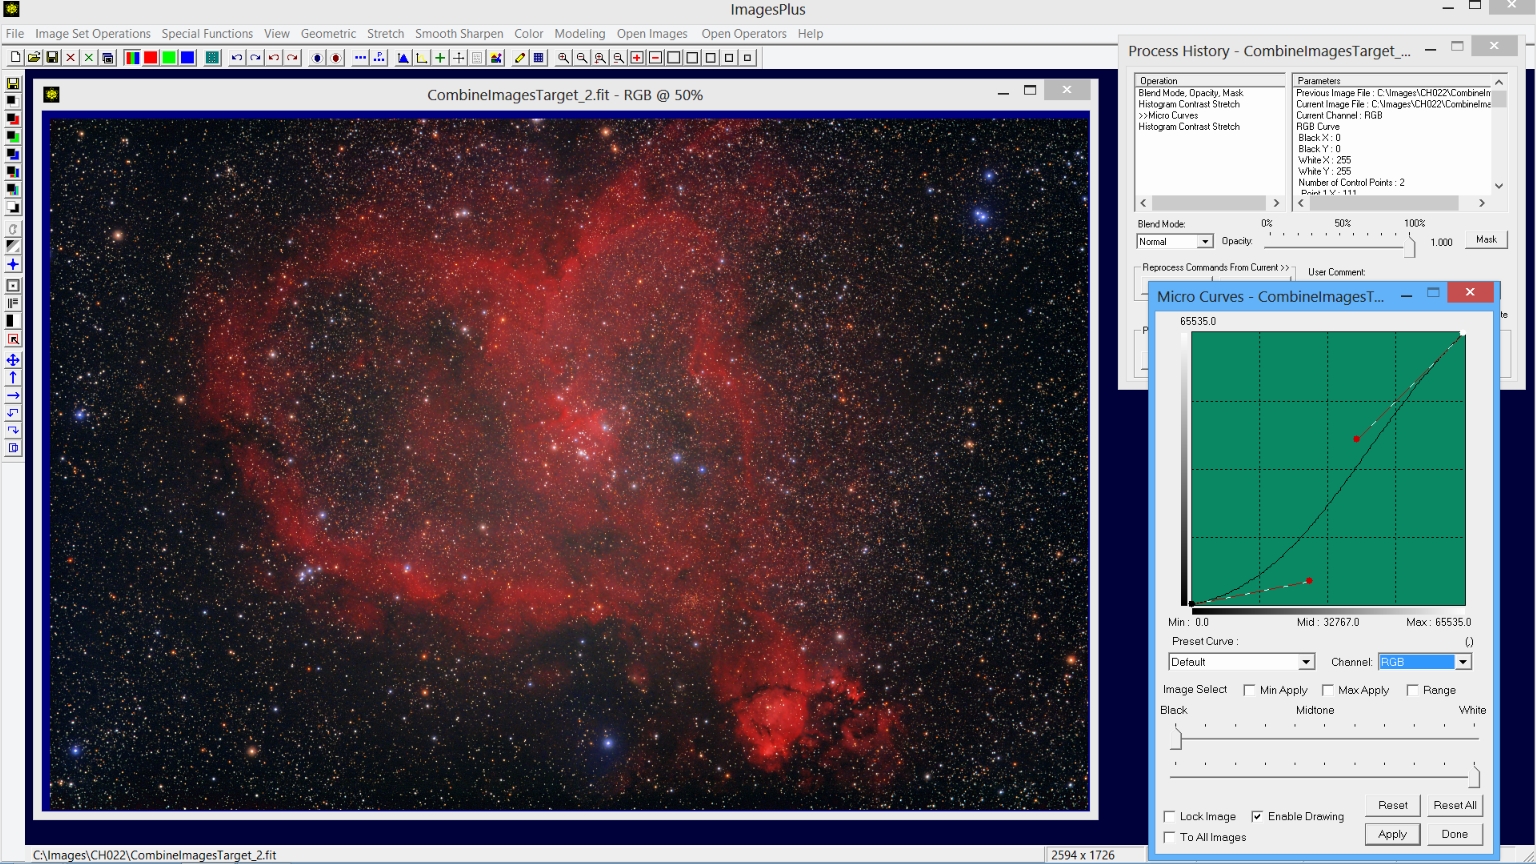
Step 3) Darken the background.
Micro Curves is used to darken the image background.
 |
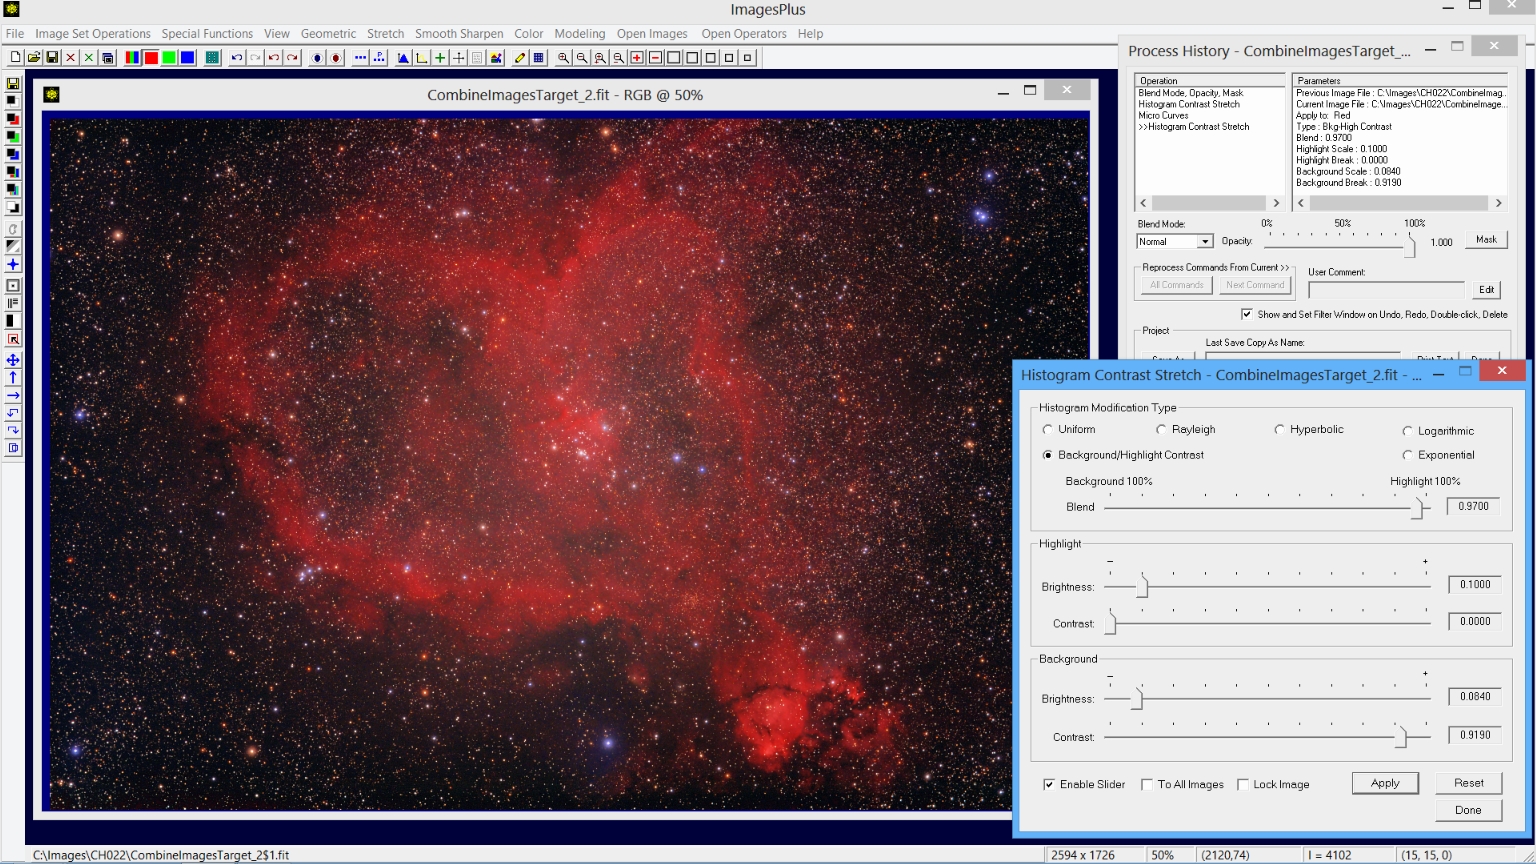
Step 4) Increase nebula brightness.
Final contrast and brightness adjustment using Histogram Contrast Stretch.
 |
Copyright © January 18, 2014 MLUnsold Digital Imaging. All Rights Reserved.