A set of 304 color BMP files 933 x 632 were collected using ImagesPlus live view camera control at 5x zoom with a Canon 50D and a 203mm F9 TMB APO with 4x Televue Powermate.
The goal is to crop and center Saturn in all 304 frames then normalize, grade, align, stack, and enhance the stacked image. ImagesPlus images set operations are used to automate the process.
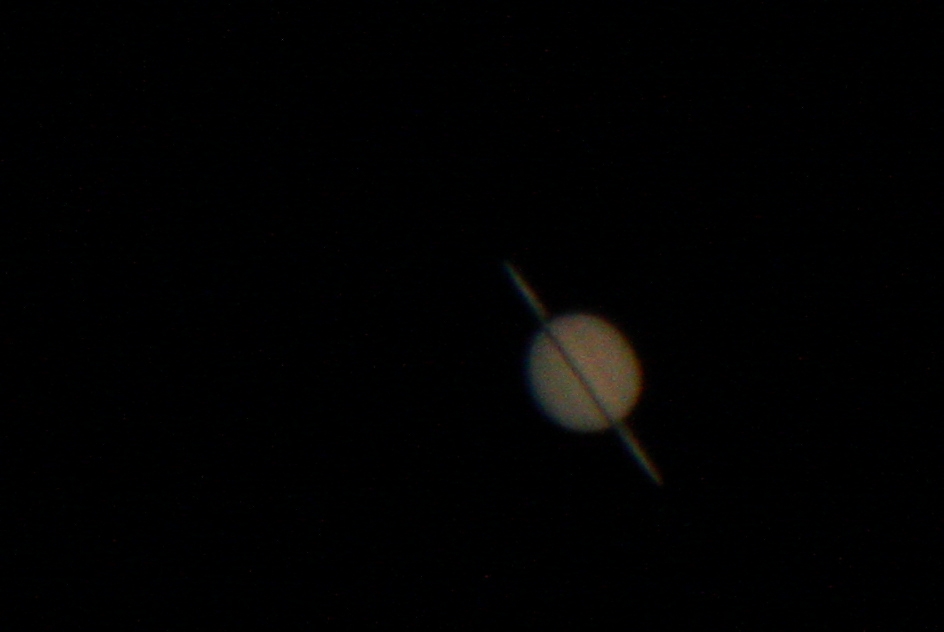
Typical single frame. Canon 50D 5x live view data with 203mm F9 TMB APO and 4x Televue Powermate for an effective F36.
 |
Step 1 - Focus and Capture Live View Data
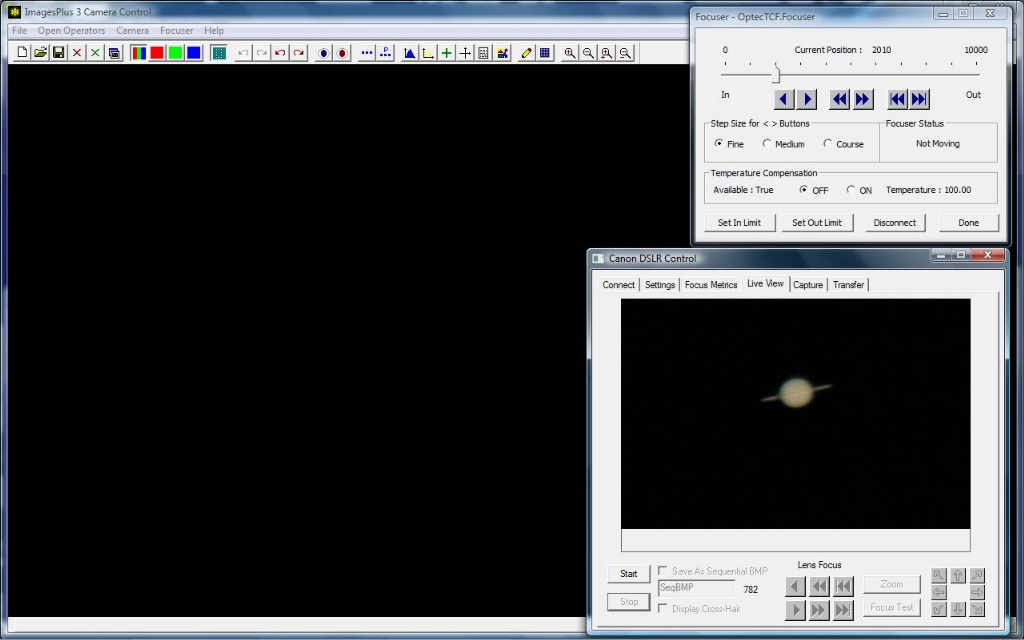
- ImagesPlus camera control live view is used first with the focus control window to center and focus the 50D on Saturn.
- The arrow buttons on the Live View control tab are used to center Saturn in the 5x zoom box before 5x zoom is applied.
- After fine focus is found using the focus control window the live view data is captured and saved as sequential BMP files by checking the Save As Sequential BMP box on the lower left of the Live View tab.
ImagesPlus 50D live view with 5x zoom is used to focus and capture the 304 color BMP files for processing.
 |
Step 2 - Crop and Center Saturn
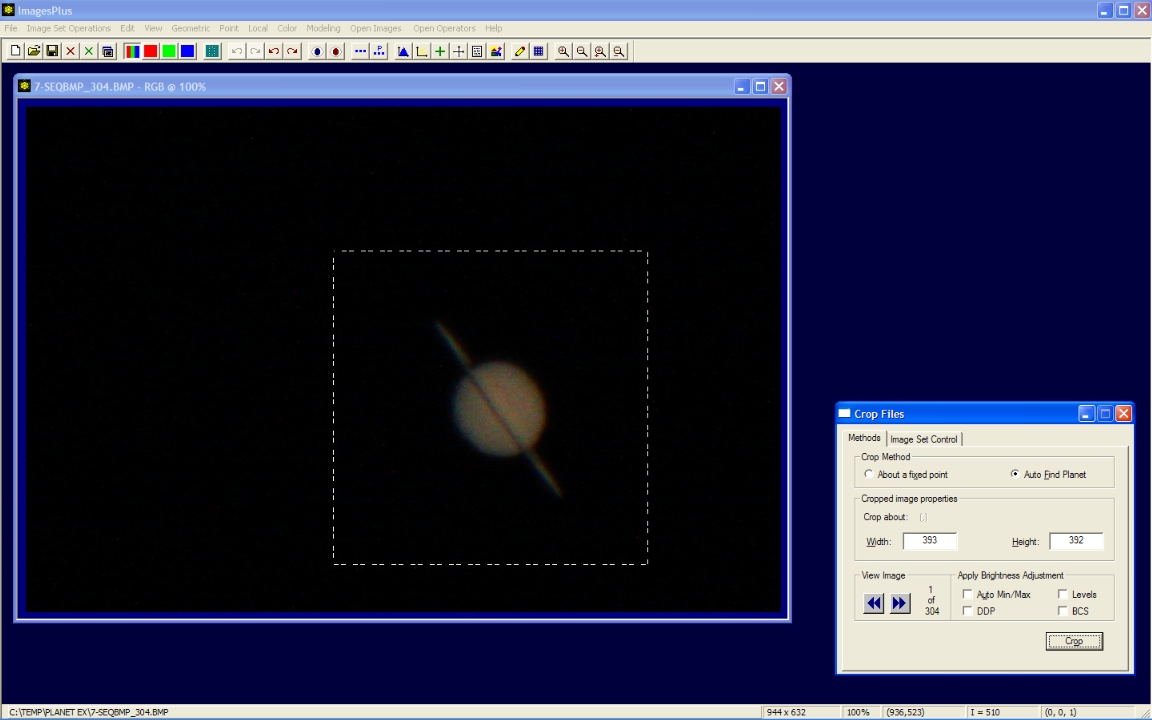
- The 304 images are selected in Image Set Operations | Crop Files.
- The cropped image is defined using the mouse to left-click and drag a rectangle with Saturn in its center.
- On Crop Files the Auto Find Planet option is used to center Saturn in each of the cropped images.
- Press the Crop button to start cropping the image set.
Crop Files before execution with the crop rectangle around Saturn defined and Auto Find Planet option to center Saturn
 |
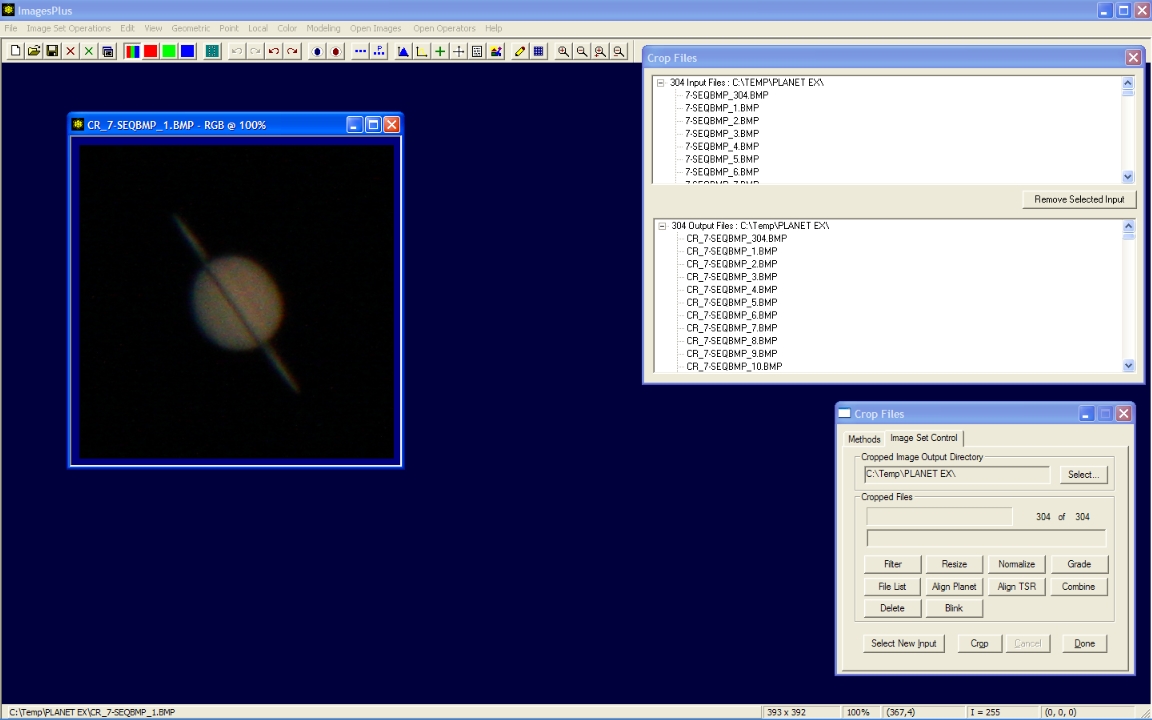
- The cropped image with Saturn in its center is shown left.
- The input-output file list for Crop Files is shown top right. Crop Files adds a prefix of CR_to each file name that is processed. Double-click on a file name in the input-output list to display the image.
- The Image Set Control tab of Crop Files has several buttons such as Normalize, Grade, Align Planet, and Combine that are used to send the output files from Crop Files to another image set operation. All of the image set operations in ImagesPlus operate in this manner.
- Press the Normalize button to send the cropped image set to Normalize Files for the next processing step.
Cropped image file on left with input-output file list on right.
 |
Step 3 - Normalize the average brightness and contrast of each Saturn image in the cropped set.
- The brightness and contrast of the 304 cropped Saturn images are selected in Image Set Operations | Normalize Files by pressing the Normalize button on Crop Files in step 2.
- Average brightness and contrast of the image set is first calculated then each image is adjusted to have the same average brightness and contrast.
- Normalized average brightness and contrast improves edge sharpness grading in step 4.
- Press the Normalize button to start adjusting the brightness and contrast of each image in the set.
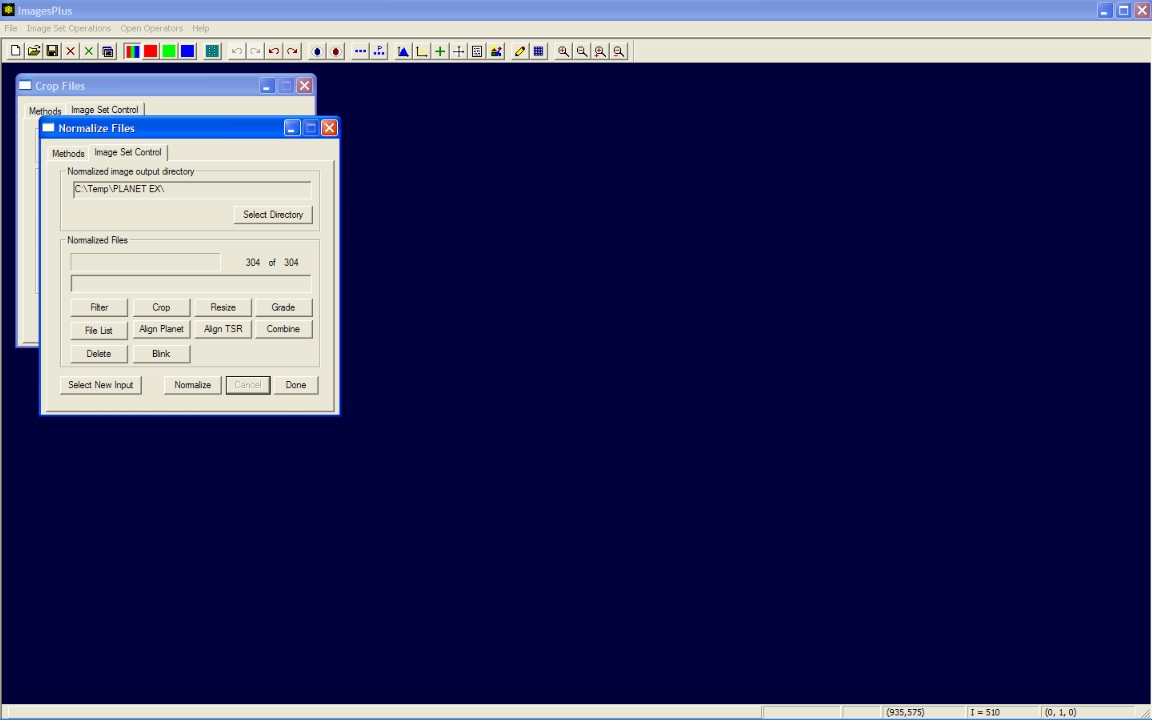
Normalize Files before execution with average brightness and contrast set. Press Normalize to start processing.
 |
- Normalize Files processes each image in the set and adds NR_ as a prefix to each normalized file.
Normalize Files output image set control tab. Press Grade to start grading the normalized file set..
 |
Step 4 - Grade the files by edge sharpness.
- The 304 normalized and cropped Saturn images are selected in Image Set Operations | Grade Files by pressing the Grade button on Normalize Files in step 3.
- Each file is grade by its edge sharpness and then assign a letter grade from A to F and also an edge quality from 0.0 to 1.0. The best image in the set is assigned grade A with edge quality 1.0. By default grades A, B, C, D, and F have edge quality intervals [0.90, 1.0], [0.8, 0.89], [0.7, 0.79], [0.6, 0.69], and [0.0, 0.59], respectively. Grade intervals can be changed.
- Automatic grading assigns a prefix of AG(grade)_ Average(edge quality value)_ to each file.
- Press the Grade button to start grading the image set by edge sharpness.
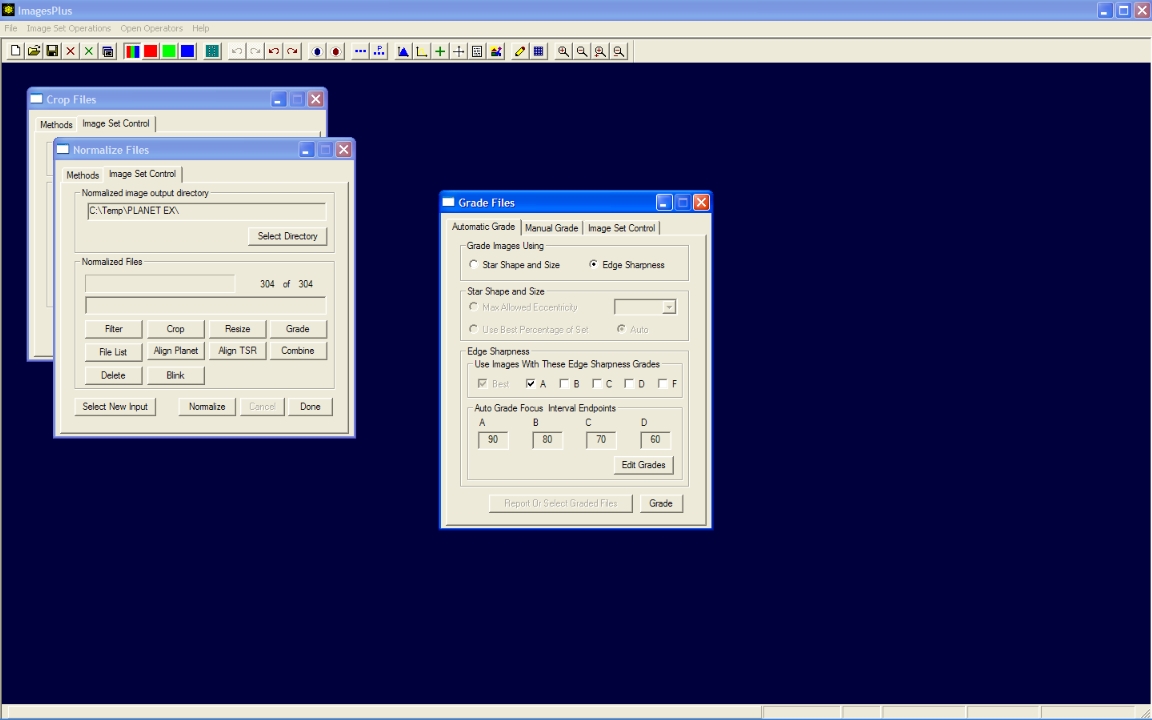
Automatic edge sharpness grading with only grade A images selected for further processing.
 |
- Grade Files saves all of the image files with the selected grades and creates a report file that can be used to edit the grade file list for further processing.
Grade report columns can be sorted and files selected to create a custom grade file list for further processing.
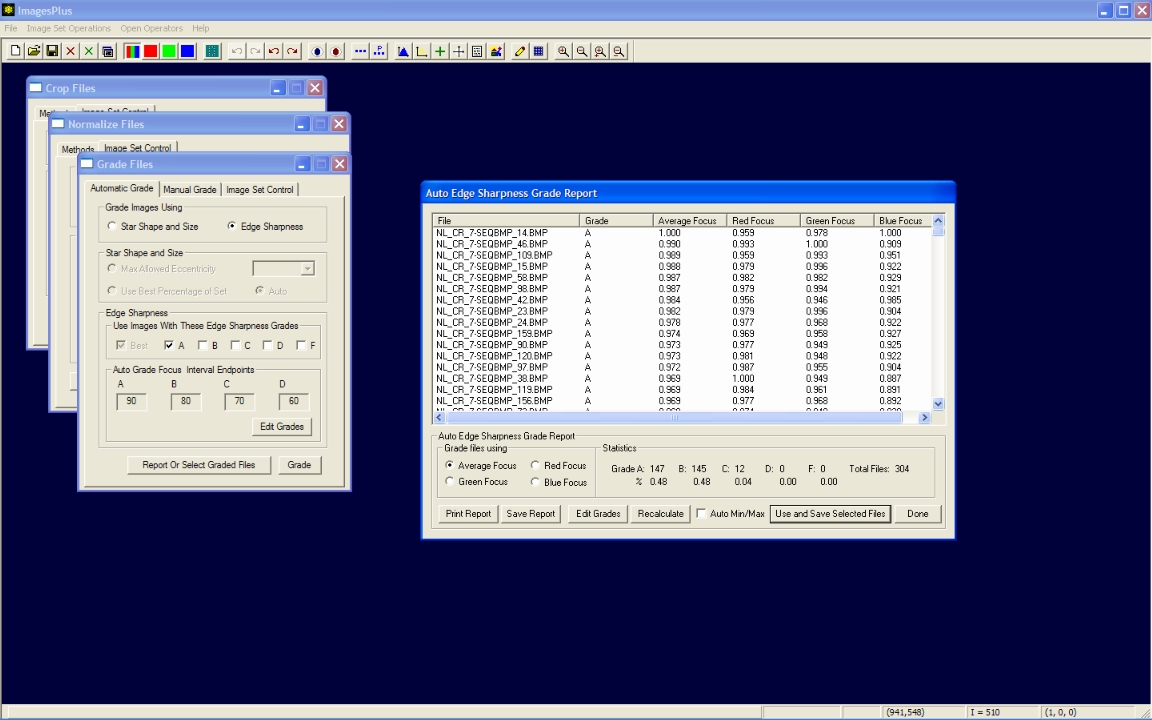 |
- All grade A files are used for the next processing step.
169 of the 304 initial image files are graded as A and will be used for further processing.
 |
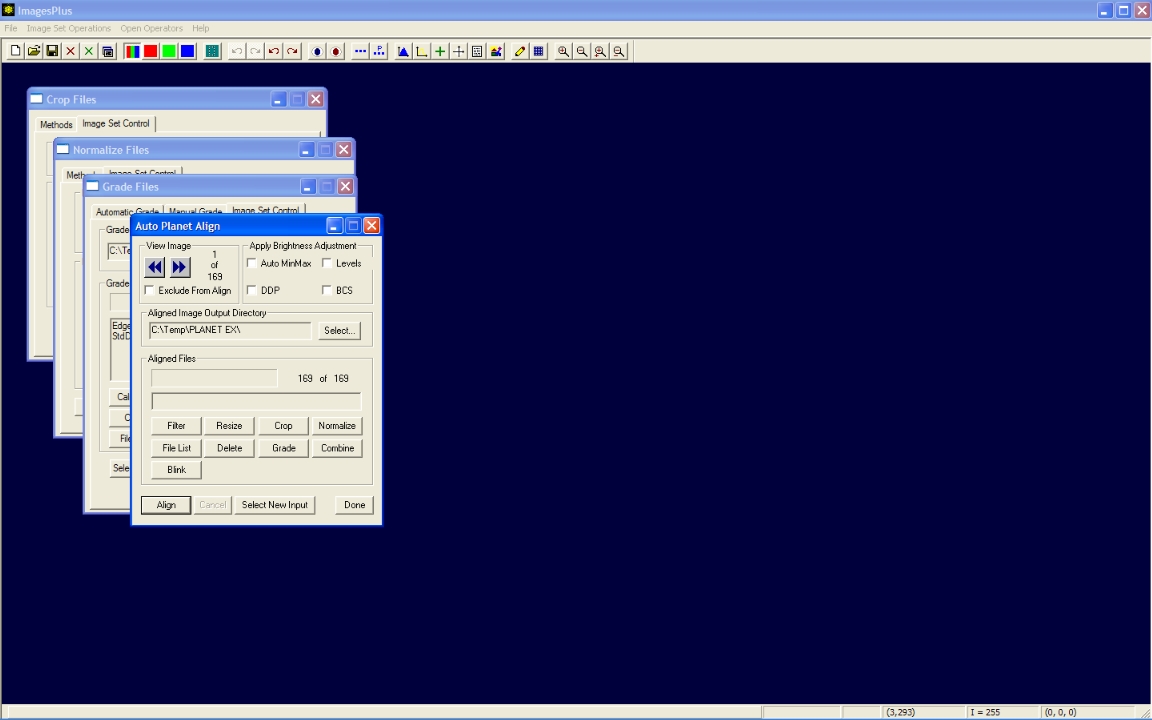
Step 5 - Align the image set to sub-pixel accuracy.
- The 169 grade files are selected in Image Set Operations | Auto Align Planet by pressing the Align Planet button on Grade Files in step 4.
- Auto Align Planet is automatic with no parameters and will adjust the position of Saturn in each image so that the image set can be stacked.
- Press the Align button to start sub-pixel alignment of each image in the set.
Auto Align Planet can display each image and apply a brightness increase for display and inspection. One or more images can be excluded from the alignment process. Press Align to start processing.
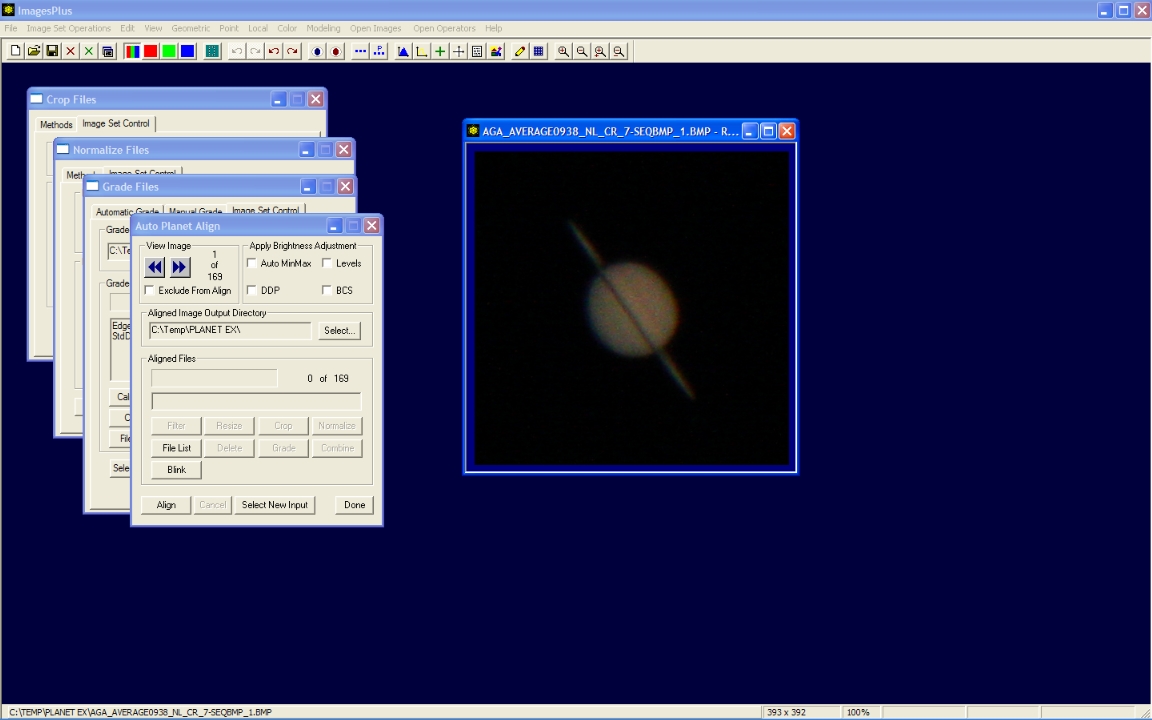 |
- Auto Align Plant aligns each image in the set and adds AN_ as a prefix to each aligned image file.
Auto Align Planet output of 169 image files. Press Combine to start stacking the aligned image set.
 |
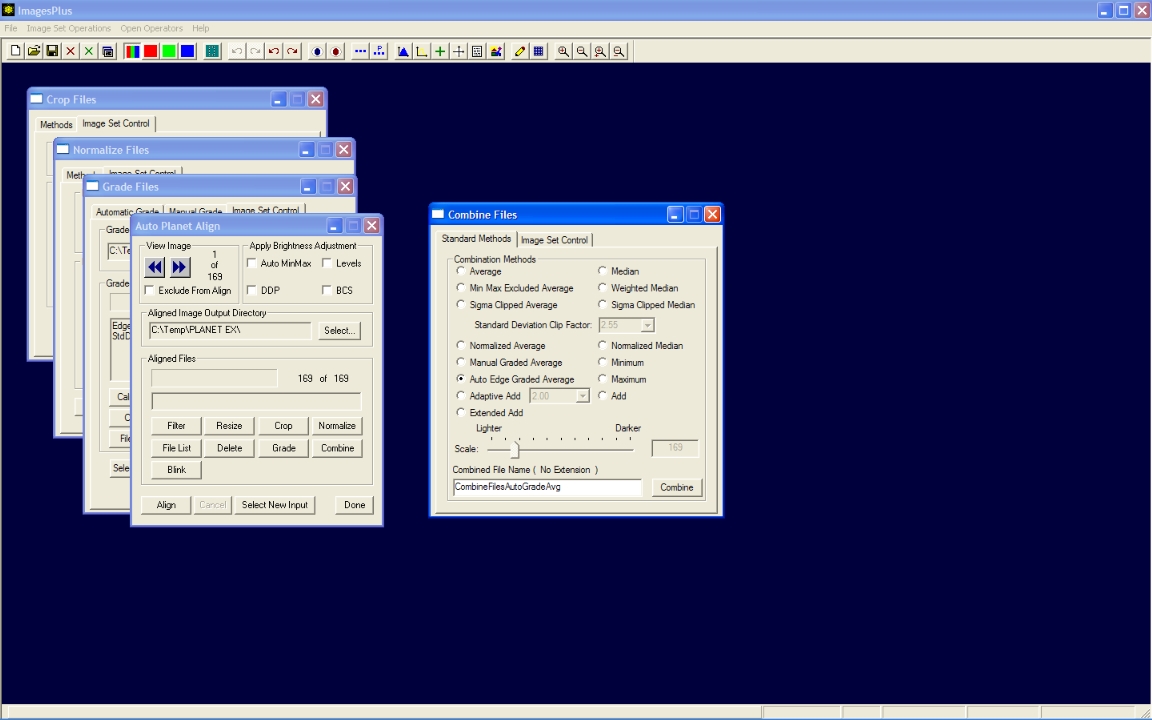
Step 6 - Stack the 169 aligned images of Saturn.
- The aligned image set is selected in Image Set Operations | Combine Files by pressing the Combine button on Auto Planet Align in step 5.
- A weighted average based on the edge grade quality value between 0.0 and 1.0 that is assigned to each image file during grading is used to combine the image set.
- The default output file name of CombineFilesAutoGradeAvg is assigned to the stacked image file.
- Press the Combine button to start stacking the image set.
Combine Files stacks the graded image set using the auto edge graded average method. Press Combine to start stacking the image set.
 |
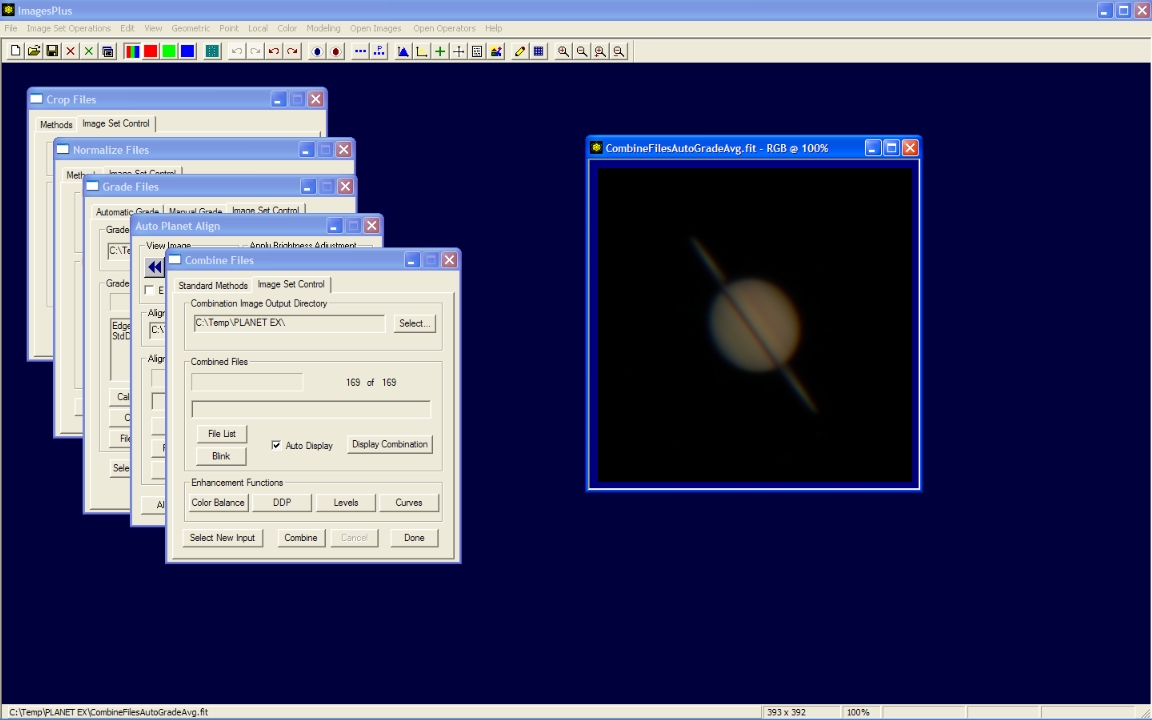
- Combine Files stacks the 169 graded images using a weighted average based on the edge quality value between 0.0 and 1.0.
Combine Files output from stacking 169 image files. Stacked image of Saturn on right.
 |
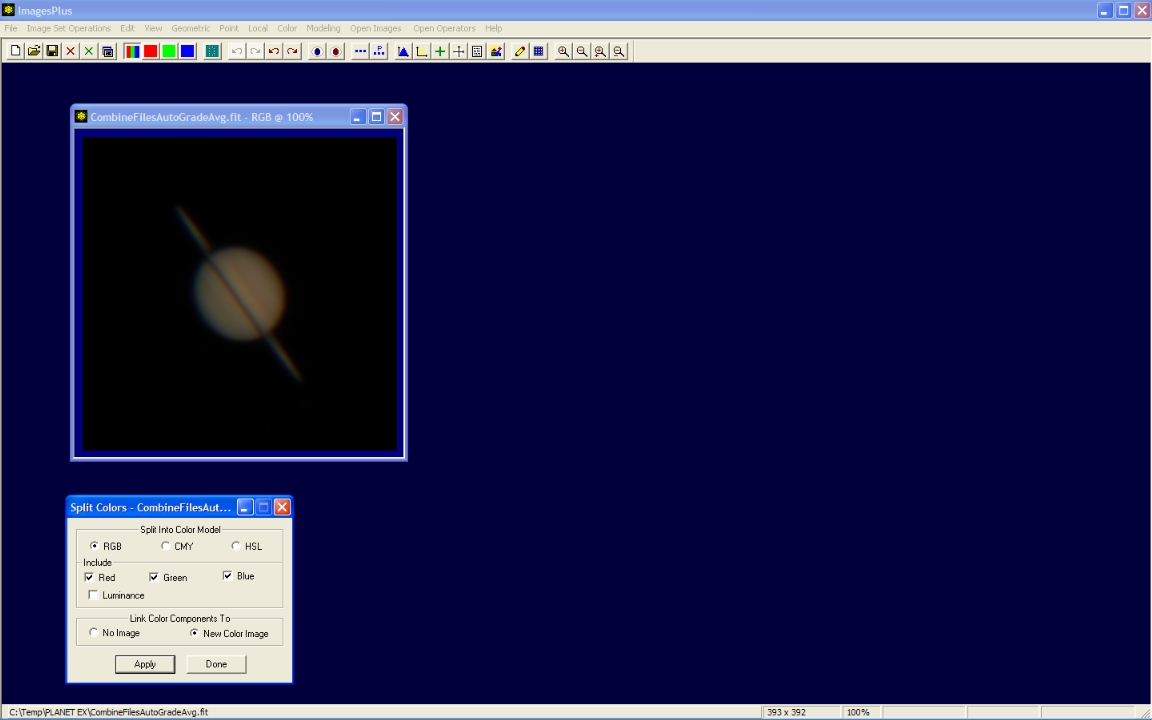
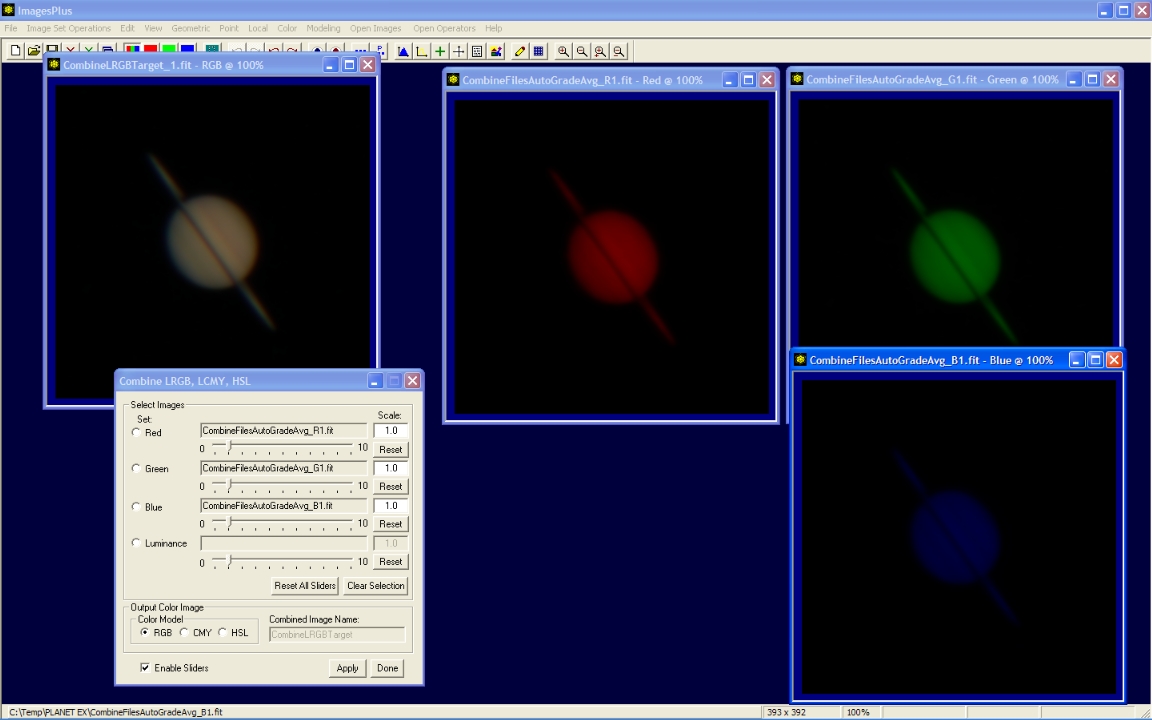
Step 7 - Adjust the red, green, and blue image components to remove the blue edge on the left side of Saturn and the red edge on the right side.
- The Color | Split LRGB command with New Color Image option is used to display the red, green, and blue components of Saturn.
Initial image before red, green, and blue component split.
 |
- The color components are linked to the new color image of Saturn by the Combine LRGB command that is setup automatically by the Split LRGB command shown above.
Combine LRGB command used to link the red, green, and blue components to the color version. Filters can be applied to the color components then the color image is rebuilt by pressing the Apply button on Combine LRGB.
 |
- The Geometric | Auto Align | All Planetary Images command is applied to the open images. This commands aligns the red, green, and blue component images.
- The color image is rebuilt with the aligned components by pressing the Apply button on Combine LRGB.
The blue and red edge of Saturn is removed by aligning the color components. Check the single frame of Saturn at the top of this page and you will find that each live view image file contains this blue red edge.
 |
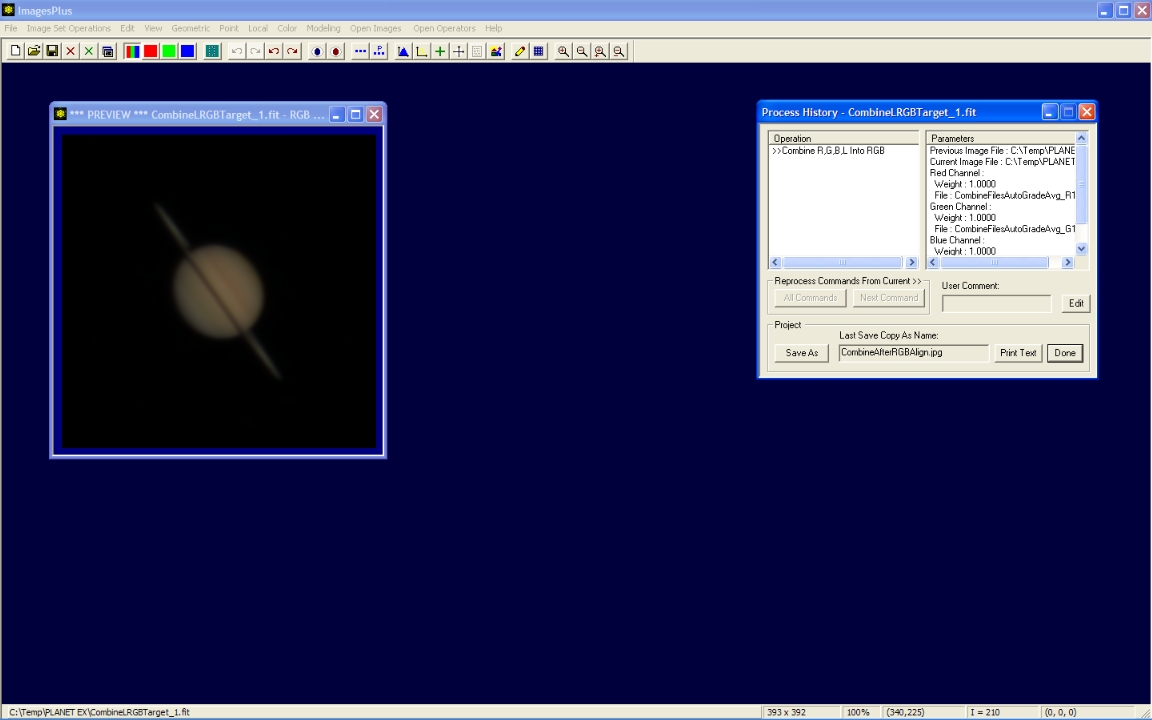
Step 8 - Brightness Levels Adjustment
- The initial stacked image on left is a little too dark.
- Levels is used to set the white point near the right side of the histogram to increase the brightness and contrast.
- The Process History window on right is used to track changes to an image and also supports unlimited undo and redo.
Initial image before levels adjustment with Process History window on right.
 |
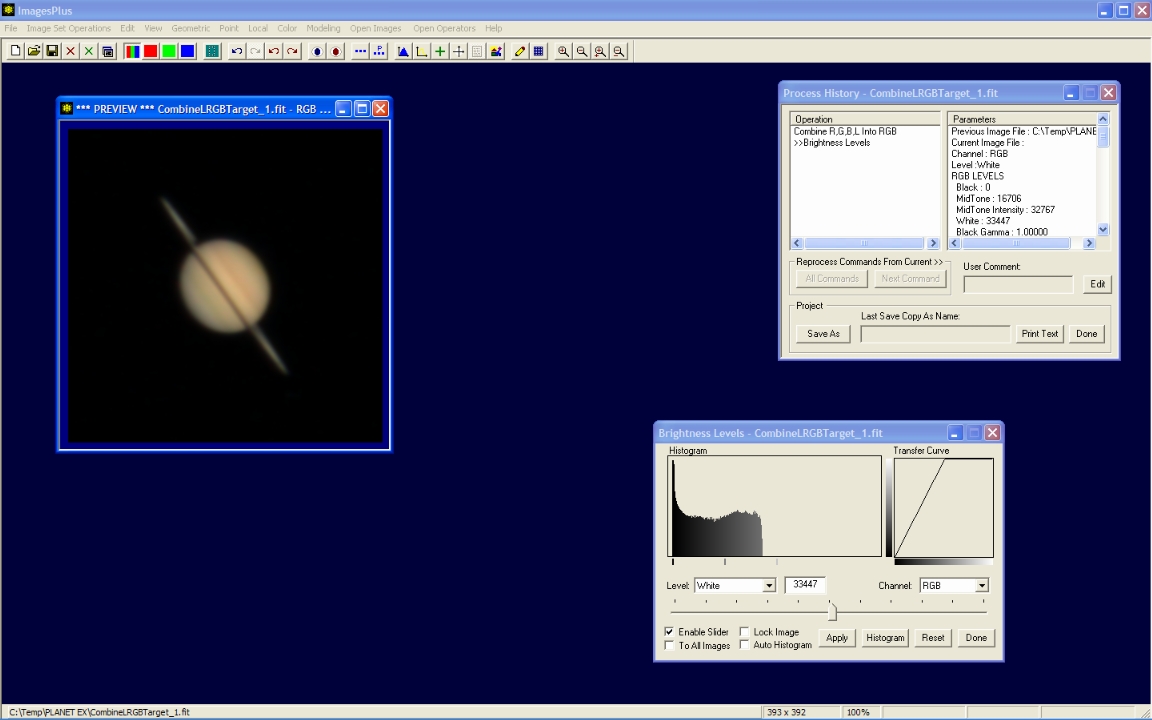
- The Color | Brightness Levels command is applied to the initial image.
Levels applied to the image to increase brightness and contrast. The Process History window tracks the parameters used by levels.
 |
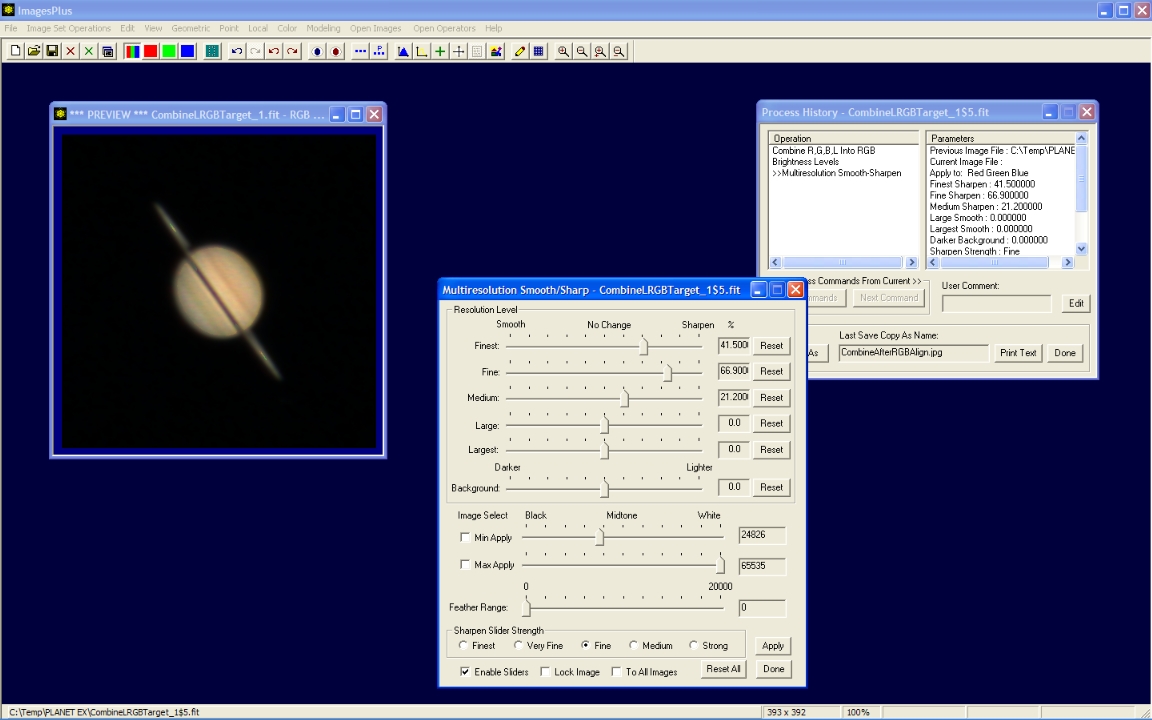
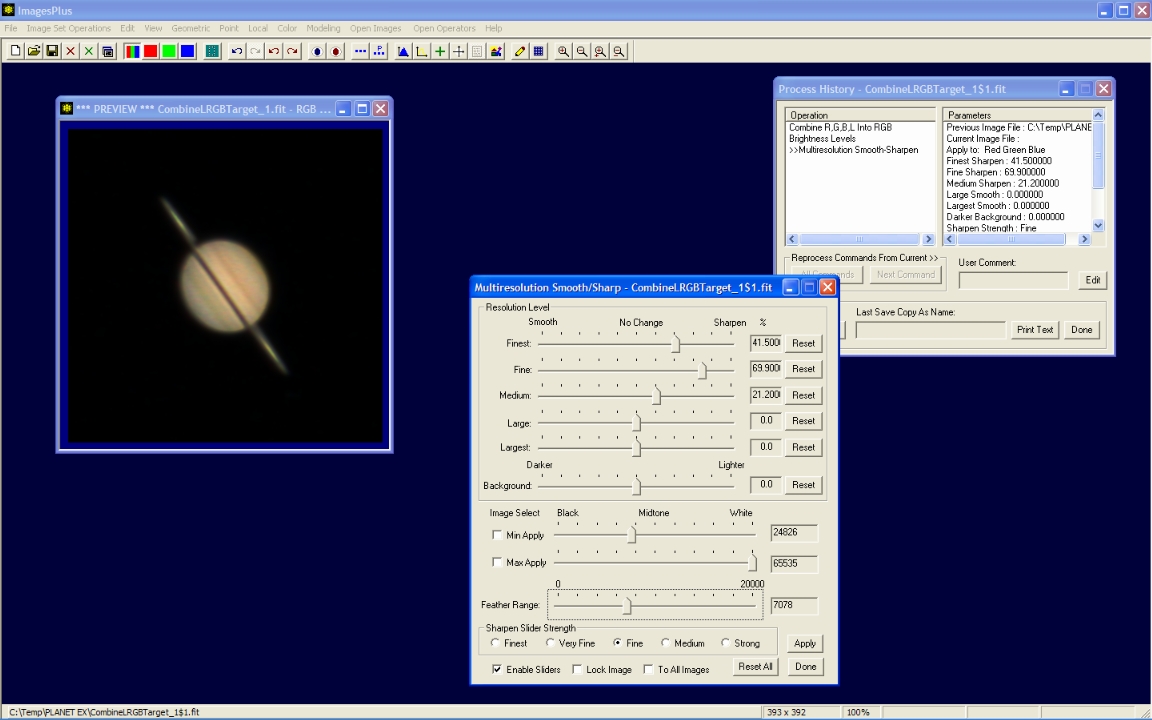
Step 9 - Sharpen Only Saturn.
- The Local | Multiresolution Smooth/Sharpen tool is used to sharpen just Saturn and its rings. The dark background is not changed.
- The range of Saturn's pixel values that are sharpened is selected by checking the Min Apply box on Multiresolution. A left-click on the limb of Saturn as shown by the red dot in the image below sets the Min Apply slider to 24826. The Max Apply slider is set to 65535 by default so Multiresolution smoothing or sharpening will be applied to all pixel values between 24826 and 65535.
Selecting the range of pixel values to be sharpened. Check the Min Apply box then left-click on the limb of Saturn as shown by the red dot in the above image.
 |
- Wavelet sharpening is applied to only the pixels in the selected min/max range of brightest pixel values. Since the brightest pixels are all found in Saturn only Saturn is sharpened and the dark background is not changed.
The Finest, Fine, and Medium sliders are moved to the right to sharpen Saturn.
 |
- The Feather Range slider is adjusted towards the right from 0 to 7078 to blend the sharpened areas into areas that are not sharpened. This removes the sharpening artifact in Saturn's rings visible in the previous image with Feather Range = 0.
Feather range is used to blend the sharpening action into the darker areas outside of the apply to range of [24826, 65535].
 |
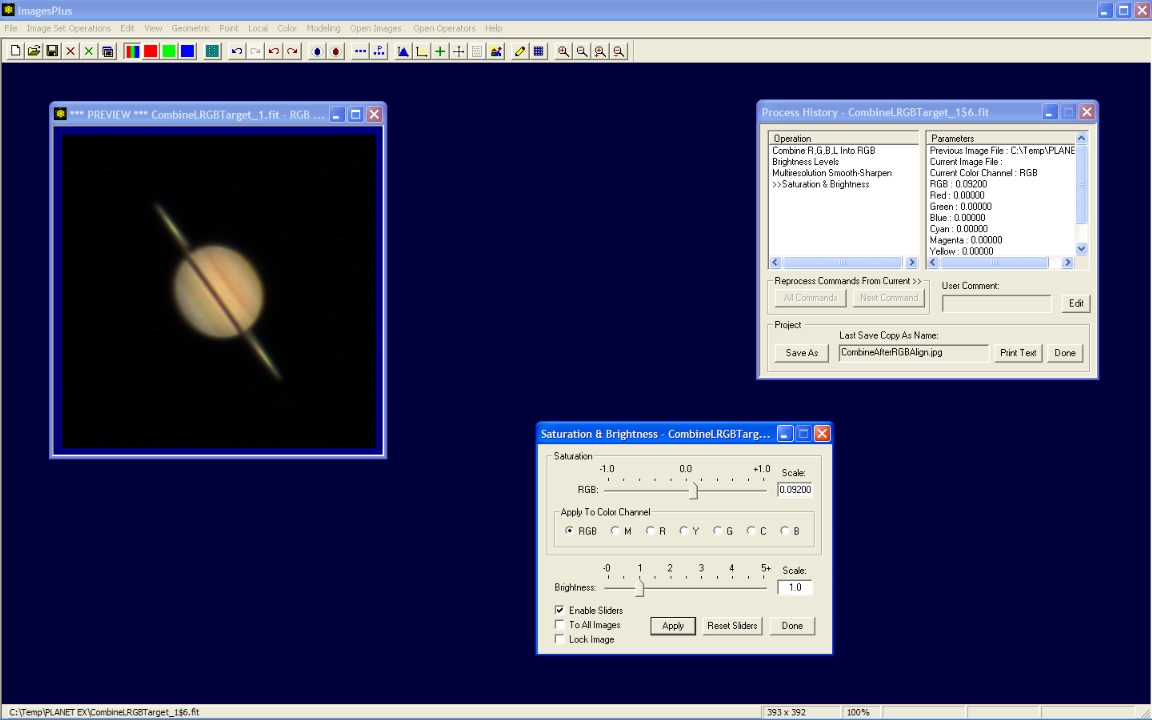
Step 10 - Increase color saturation.
- The Color | Saturation and Brightness tool is used to increase the color saturation of Saturn.
Saturn with increased color saturation.
 |
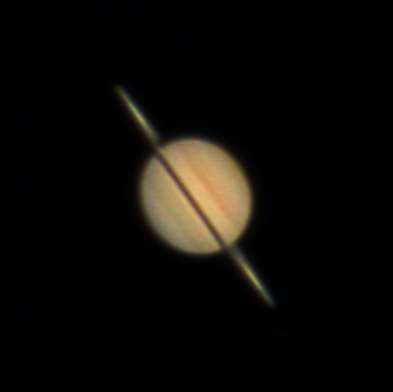
Final image of Saturn. Best 169 of 304 live view frames. Canon 50D with 5x zoom and 203mm TMB APO at F36.
 |
Copyright © 2009 MLUnsold Digital Imaging. All Rights Reserved.