Sharpen Midtones & Highlights using a Custom Luminance Mask
This tutorial explains how to create a custom luminance mask from a color image. A custom luminance mask allows you to mix red, green, and blue to emphasize different colors.
The mask is used with Multiresolution (wavelets) to sharpen the midtones and highlights of an image with no change to the darker background.
Similar steps can be used to apply any stretch, contrast, deconvolution, or color adjustment filter with blend mode, opacity, and mask.
Step 1) Create Custom Luminance Mask
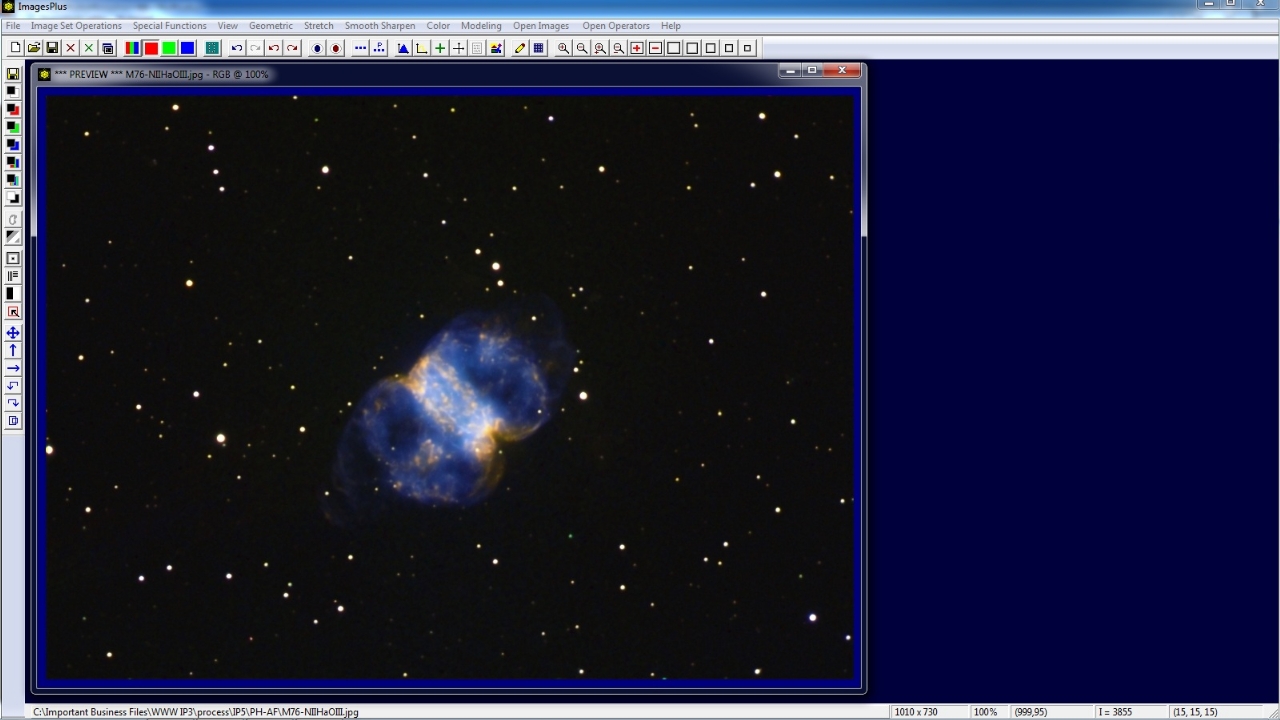
Initial narrow band image of M76 with red = NII, green = Ha, and blue = OIII.
 |
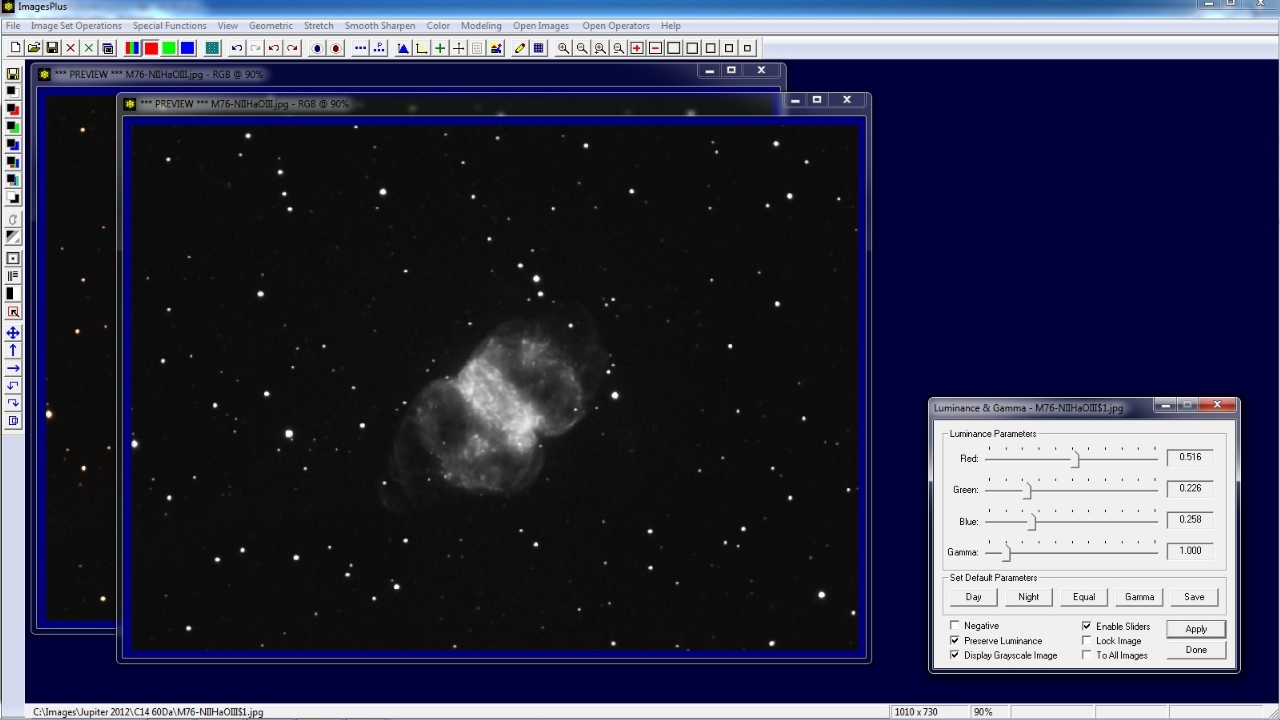
The Custom Luminance button on the left vertical toolbar is used to open the Luminance & Gamma tool and create a grayscale image from the initial image of M76.
Note that the grayscale image contains RGB in its top image window caption bar.
RGB in an image window top caption bar indicates that the image is a three channel color image. The grayscale image is a 3 channel color image with red = green = blue at each pixel.
Since the yellow and red area of M76 have the most detail to sharpen the red slider is moved to the left to increase brightness of the yellow and red areas in the grayscale image.
 |
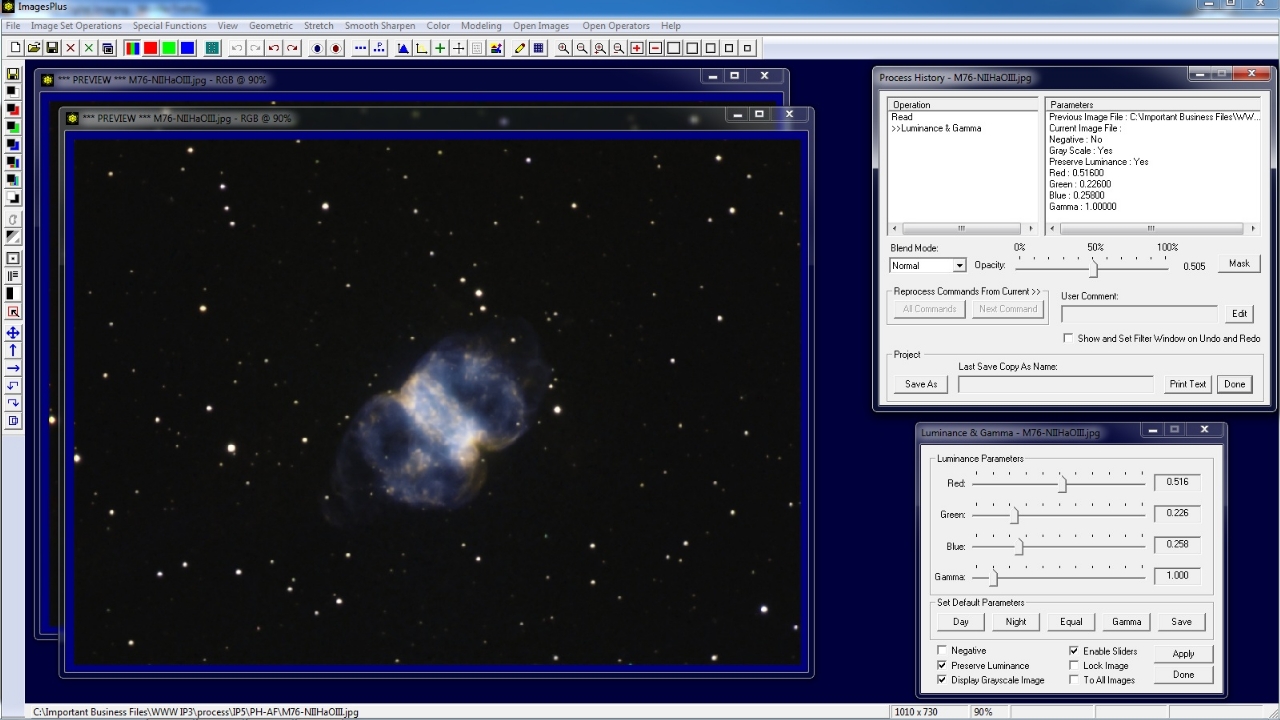
Open the Process History window and move opacity between 0.50 and 1.00 to compare the grayscale image with the color M76 image. Remember brighter mask areas reveal the filter effect that the mask is used with
while darker mask areas block the filter effect and reveal the image layer below or the image before the filter is applied. Maker sure opacity is set to 1.0 before the custom luminance image is converted to a mask.
 |
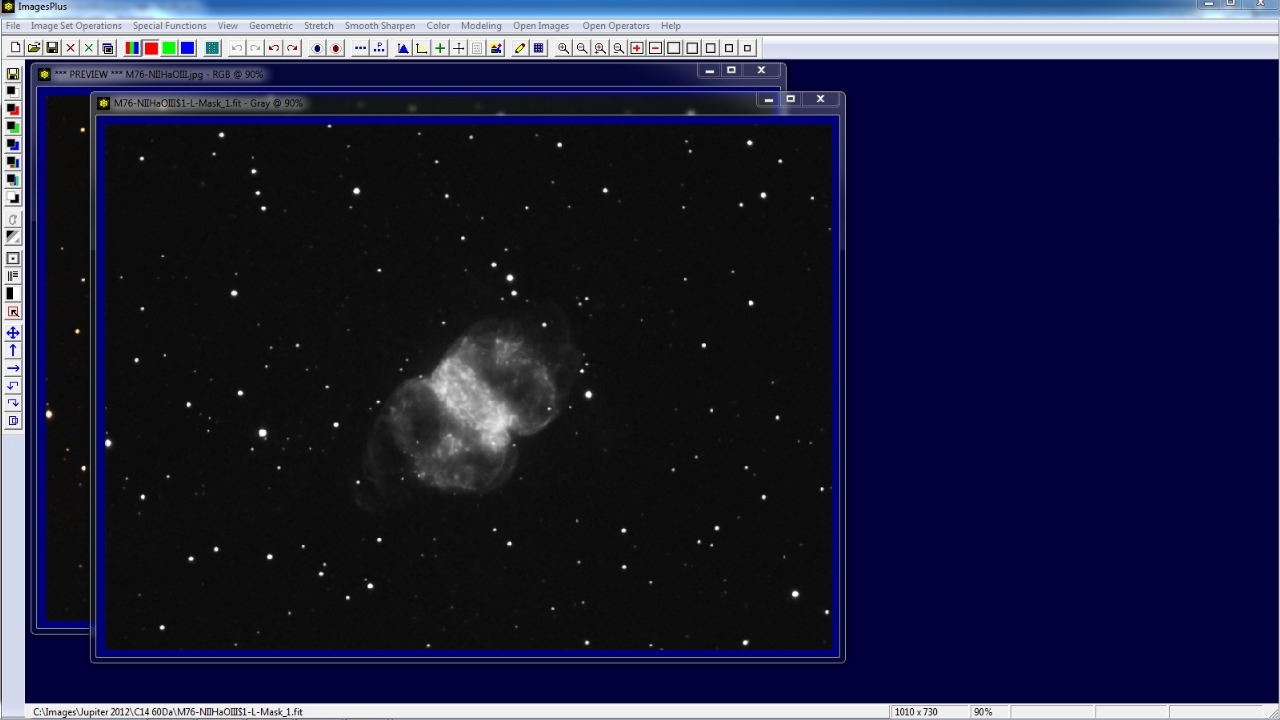
Use the Luminance Mask button on the left vertical toolbar to convert the grayscale image to a single channel luminance mask with Gray in its top window caption bar. Close the grayscale RGB image and the Luminance & Gamma tool.
 |
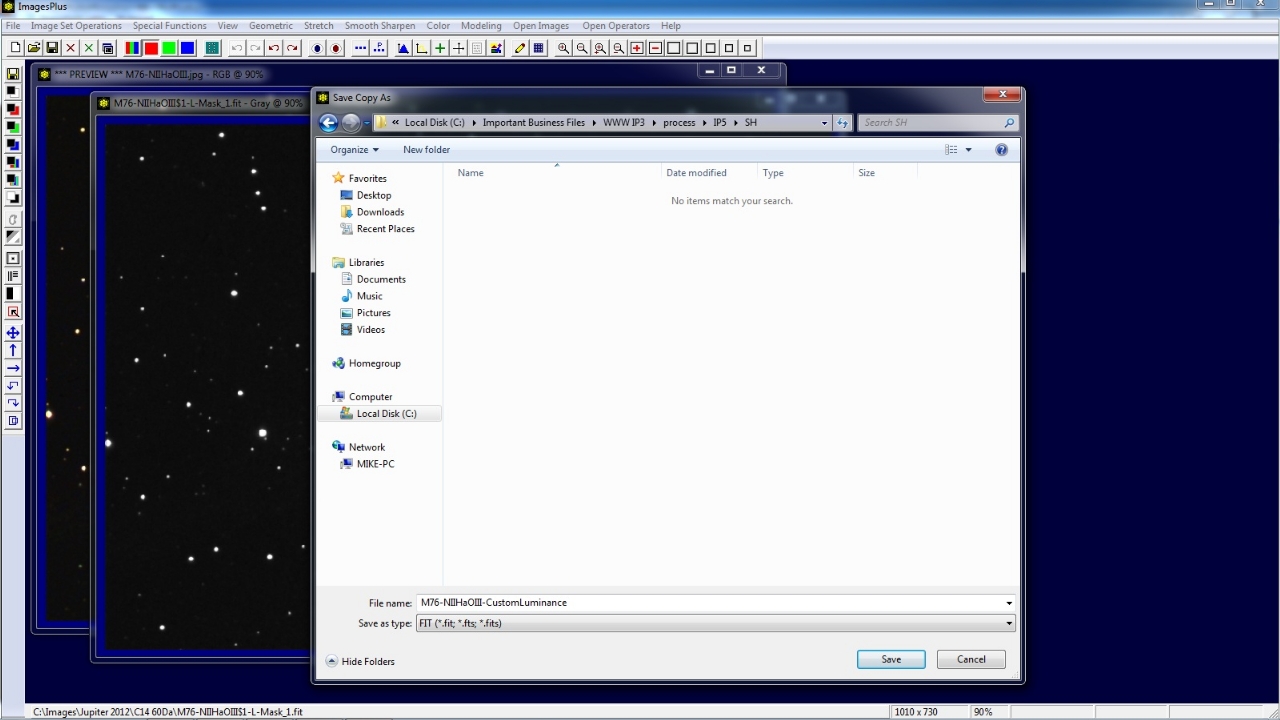
Use the Save As then Copy Mask toolbar button on the left vertical toolbar to name and save the custom luminance mask. The mask is now ready to be assigned to a filter using the Process History window.
 |
Step 2) Sharpen the Image
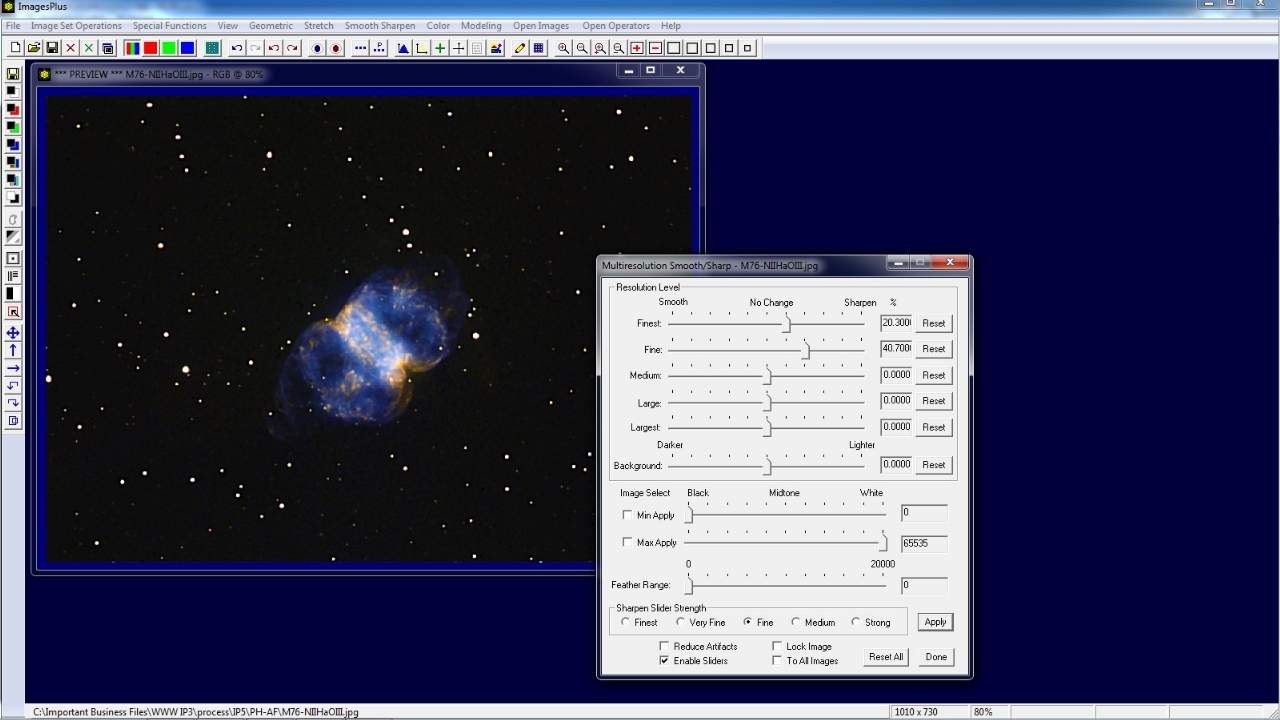
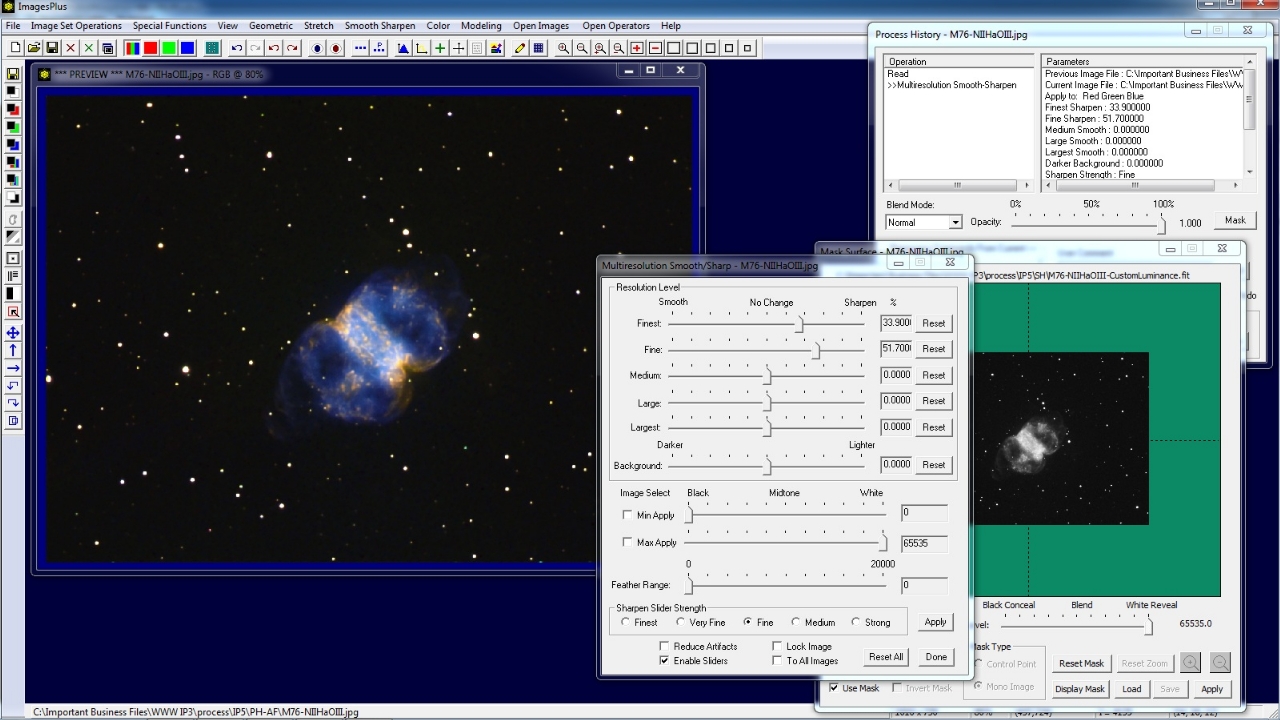
Open Multiresolution (wavelet) from the Smooth Sharpen main menu. Adjust the Finest and Fine sliders to the right to sharpen the image. Since a mask is not assigned to Multiresolution the entire image is sharpened.
M76 is sharpened but note the dark haloes around stars and background noise.
 |
Step 3) Use the Process History Window to Assign the Custom Luminance Mask Saved in Step 1 to Multiresolution Sharpening
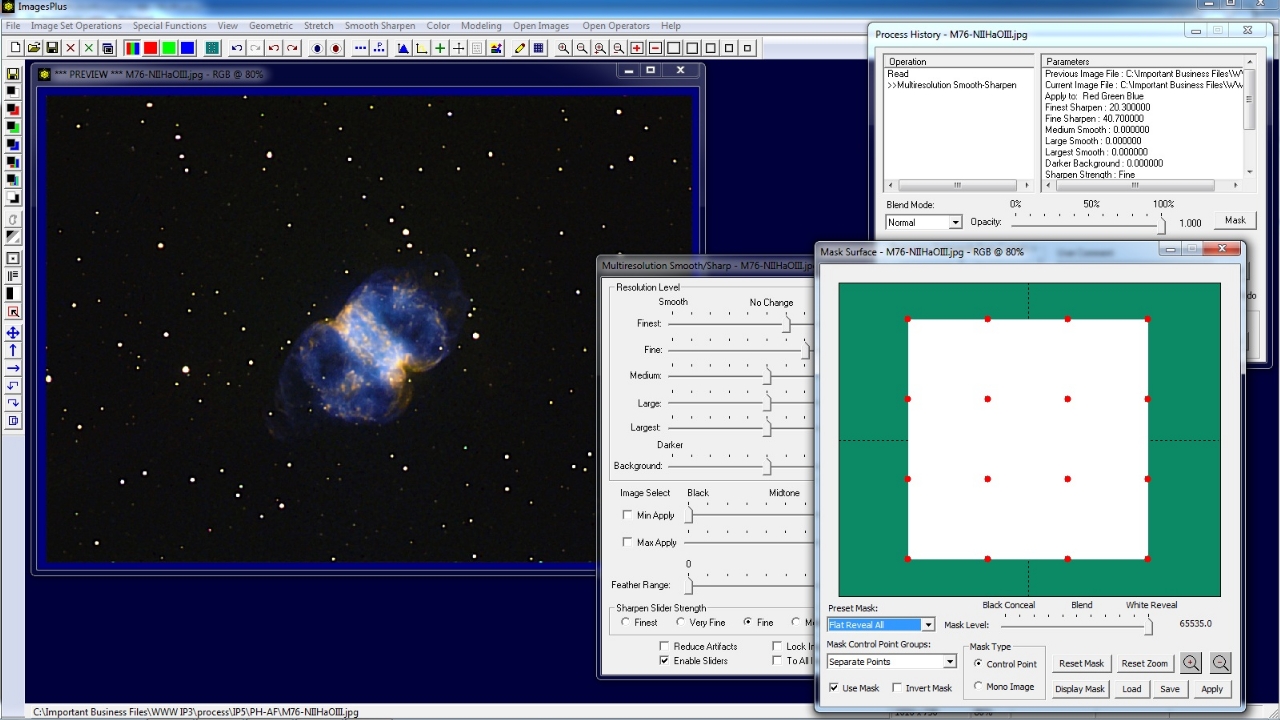
Open the Process Histiory window and with Multiresolution as the current command pointed to by >> in the Operation list press the Mask button.
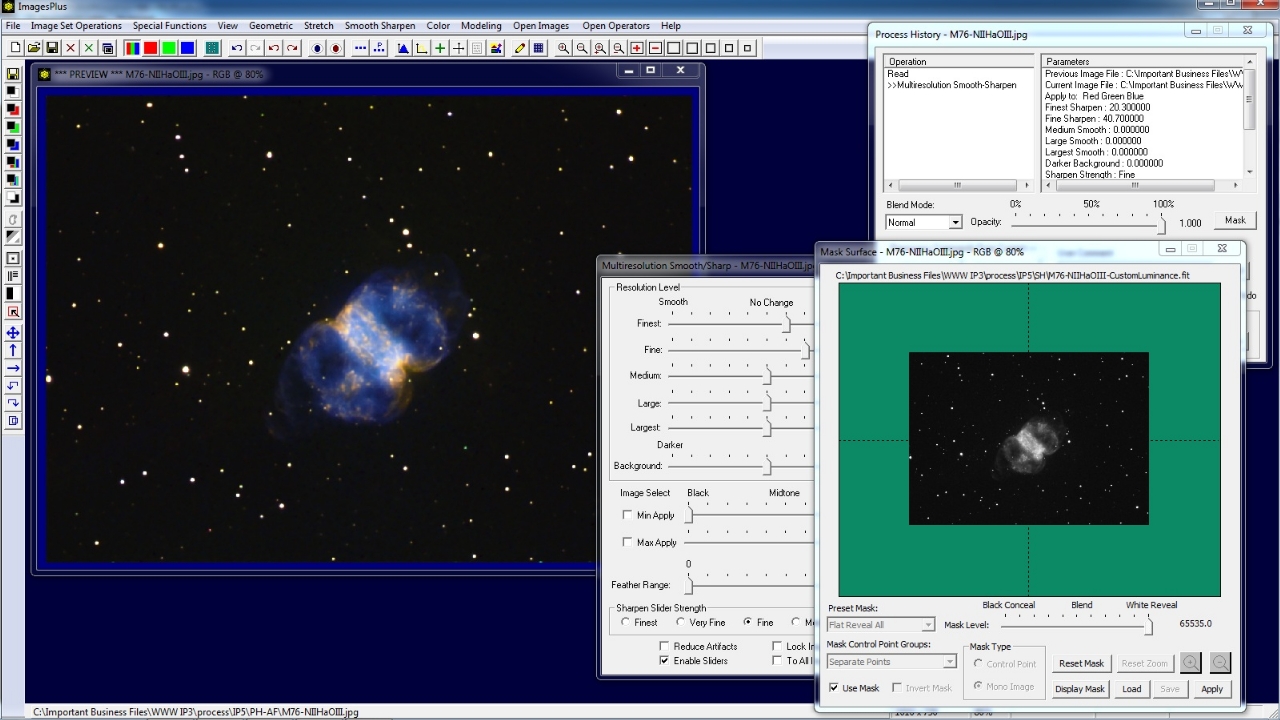
The Mask Surface window is displayed and set to the default all white control point mask.
 |
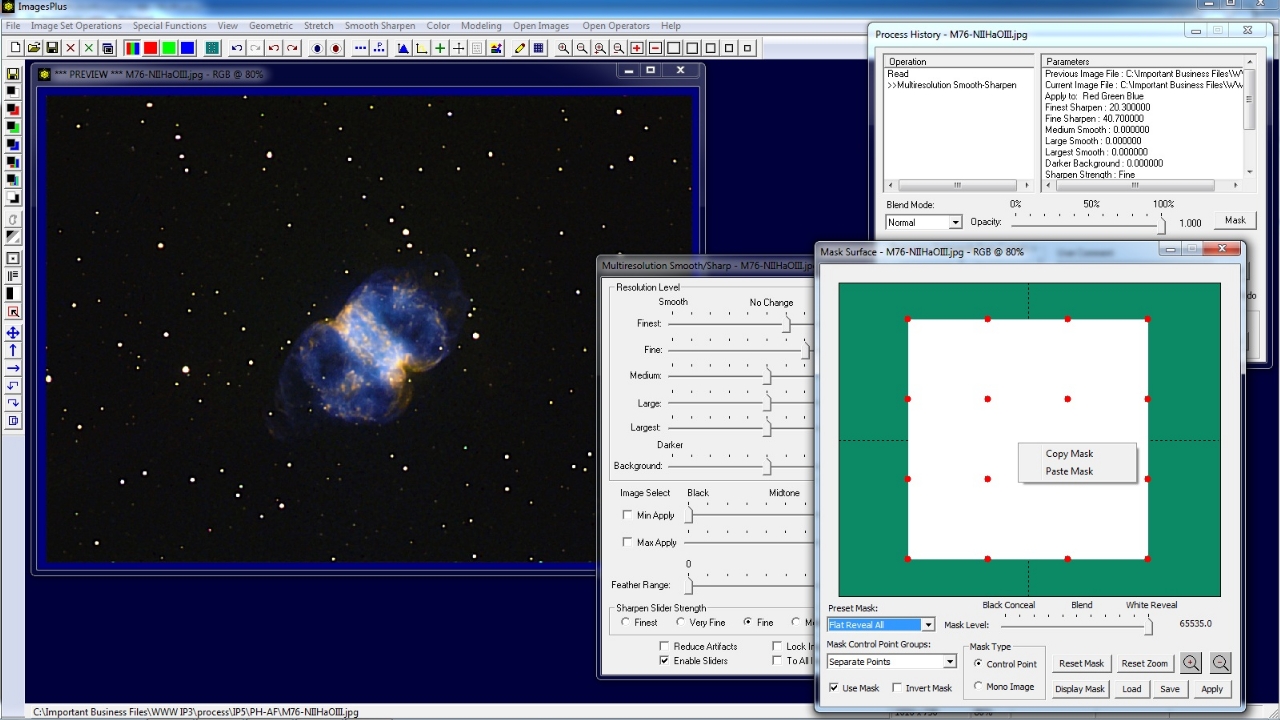
Right click on the white mask area and select Paste. Since the last mask saved was the custom luminance mask created in step 1 above it is assigned to the Multiresolution tool. Note that you can also right click on the mask area and select Copy to copy a mask to a different filter of the same image or different image.
 |
The custom luminance mask is assigned to multiresolution and controls where sharpening is appled. Brighter mask areas get more sharpening then darker mask areas.
 |
Step 4) Modify Multiresolution Sharpening Parameters As Needed
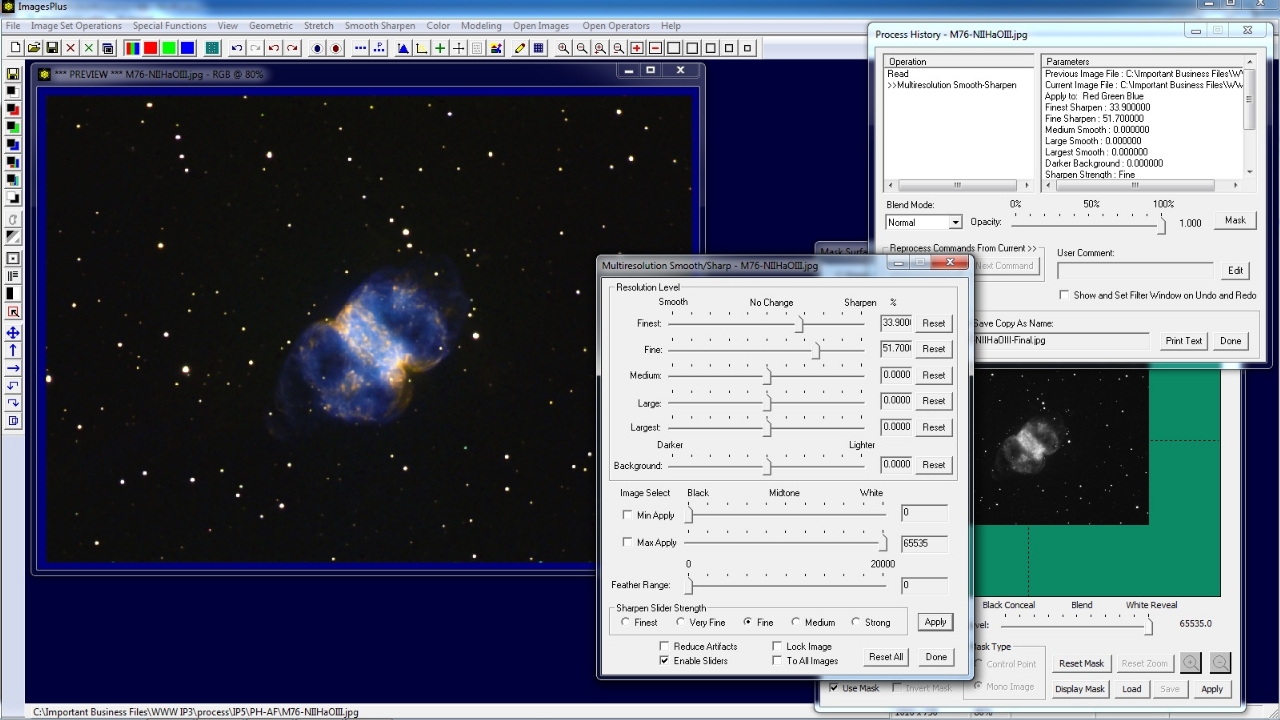
Increase or decrease the Finest and Fine sliders to fine tune sharpening with the custom luminance mask. The Min Apply, Max Apply, and Feather Range sliders on Multiresoultion can also be used to control the luminance range where mask controlled sharpening is applied.
 |
Step 5) Modify the Mask As Needed
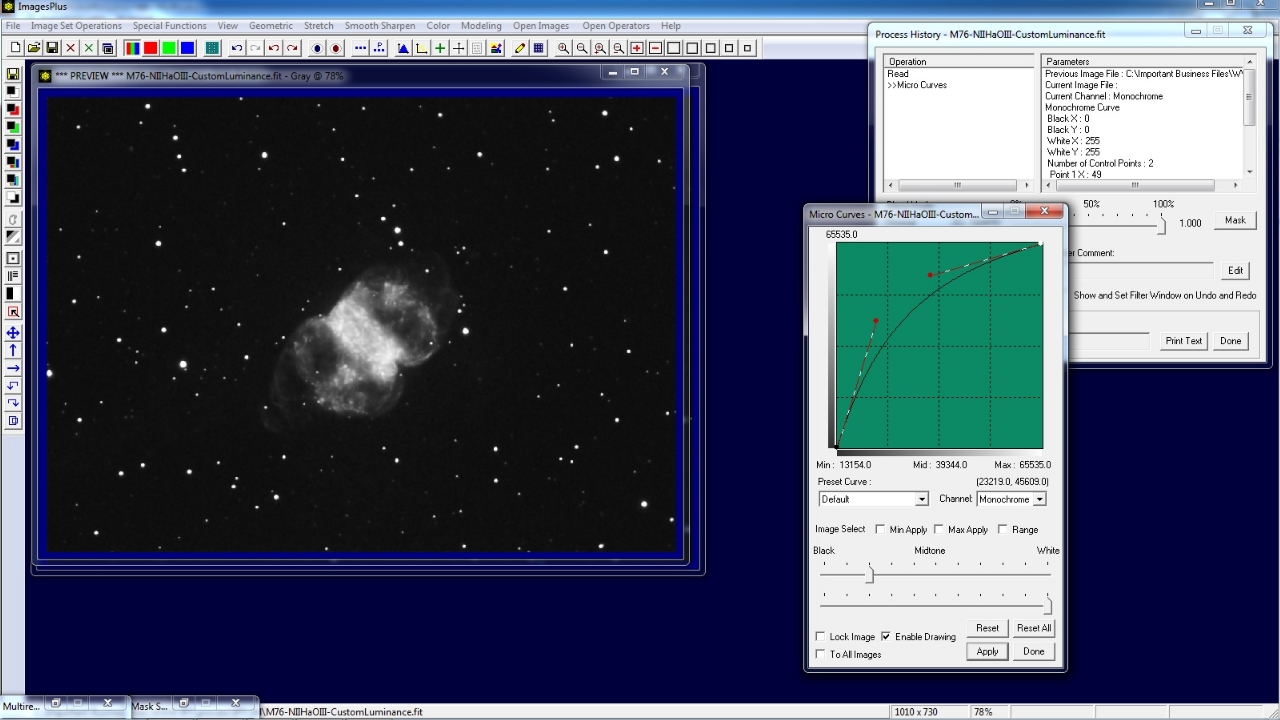
Press the Display Mask button on the Mask Surface window to display the custom luminance mask. Minimize the Multiresolution and Mask Surface windows.
Any filter in ImagesPlus can be used to modify the mask since it is an image. In this case Micro Curves is used to increase brightness of the midtones and highlights so that more sharpening is applied in these areas.
 |
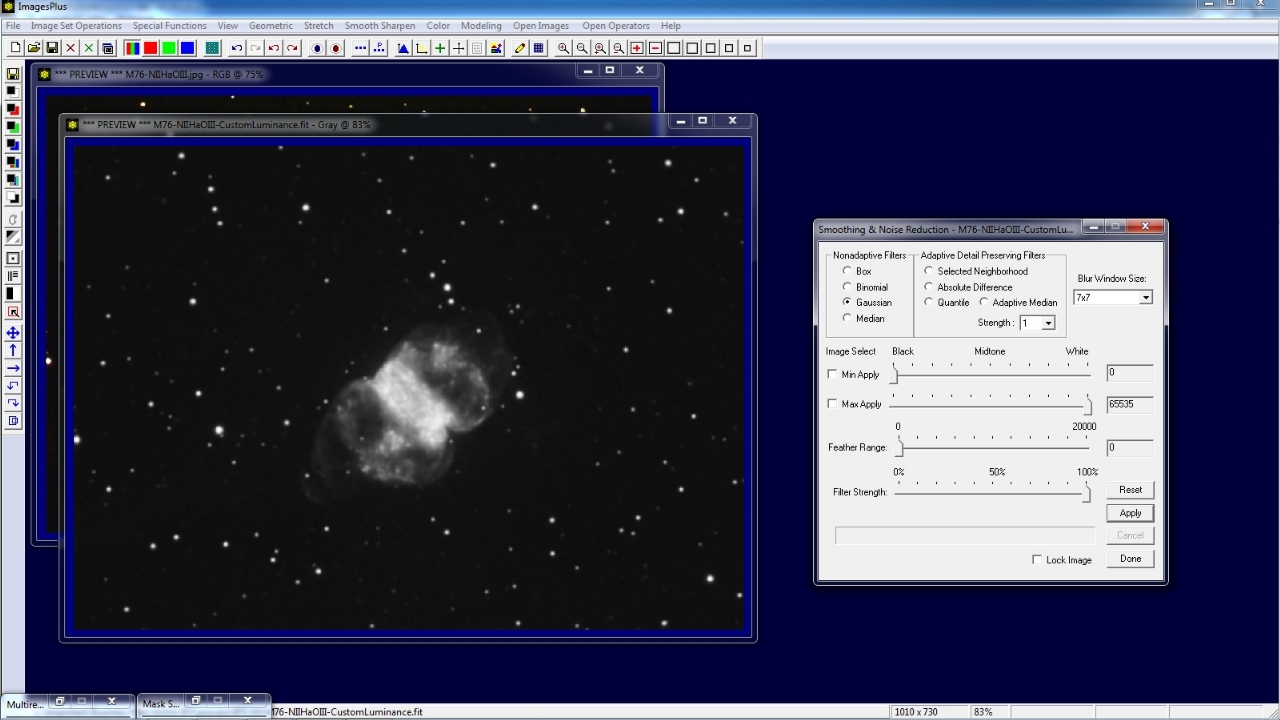
A mild Gaussian blur is applied to the mask to blend sharpened areas into unchanged areas of M76.
 |
Use the Save button on the top toolbar to save and replace the modified mask. Close the mask image. Restore the Multiresolution and Mask Surface windows then press Apply on Mask Surface to apply the modified mask.
You could also press Apply or change parameters on Multiresolution after the modifed mask is saved to update the M76 image.
 |
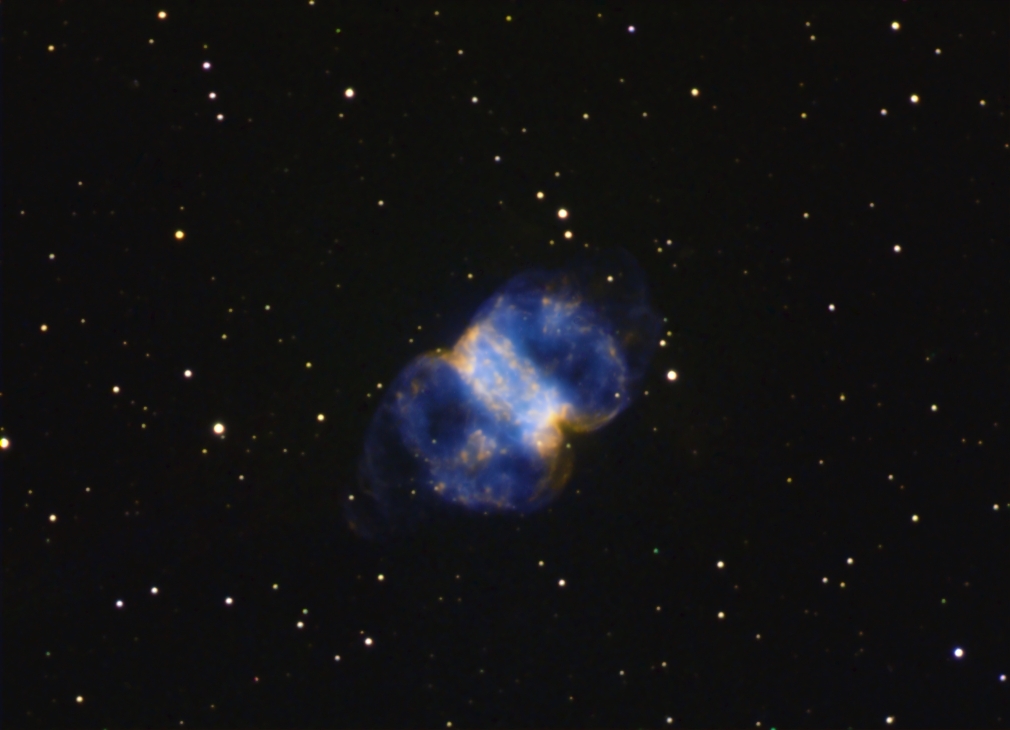
Initial M76 narrow band image before midtone highlight mask controlled sharpening.
 |
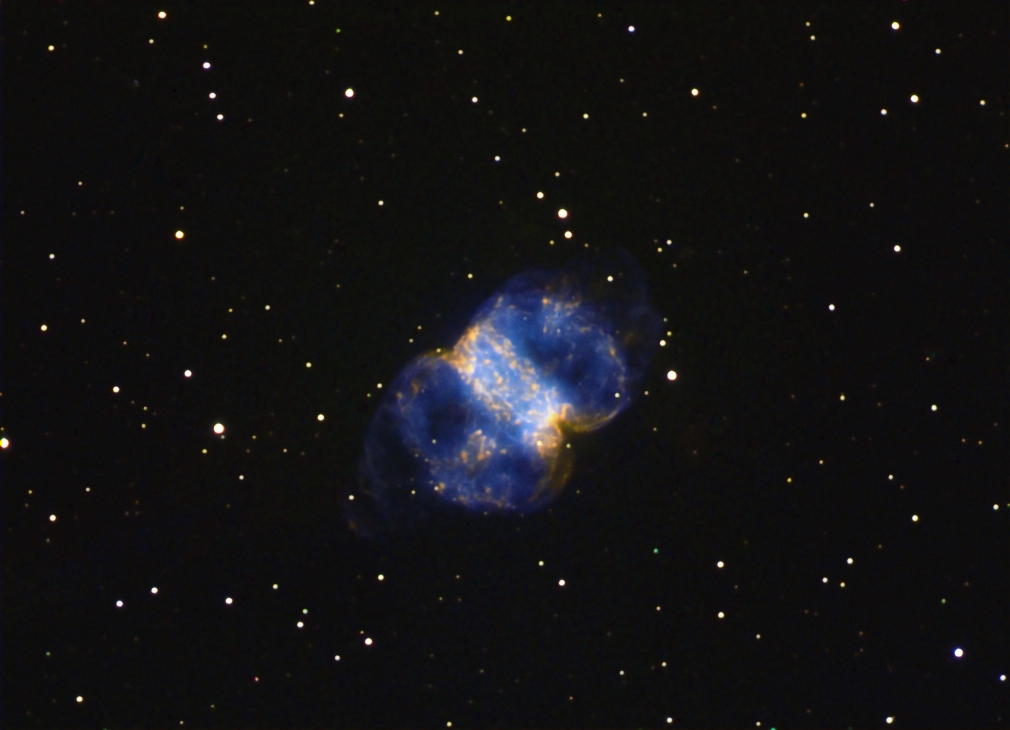
M76 narrow band image after midtone highlight mask controlled sharpening.
 |
Copyright © 2012 MLUnsold Digital Imaging. All Rights Reserved.


