Step 1
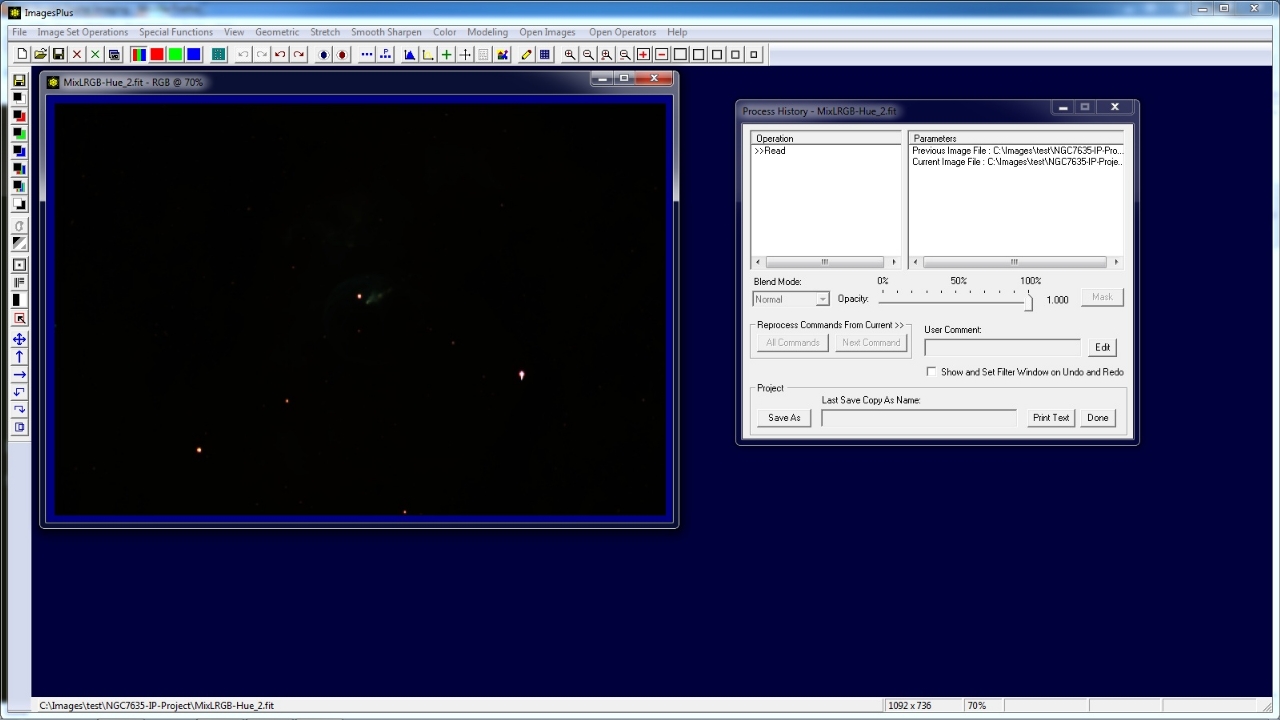
- Open an image then use the Process History toolbar button to display the Process History Window.
- Note that >>Read is inserted as the first line of the Operation list of the Process History window.
- >> always points to the current operation.
Initial image as it appears when first opened. Process History window is on right. The first line of the Operation list of Process History is always a Read operation when an imaged is opened. Operations that create a new image like Mosaic, Image Math, Combine LRGB, or Mix LRGB & Hue will have a descriptive first line such as New Image, Image Math, Combine, or Mix LRGB & Hue.
 |
Step 2
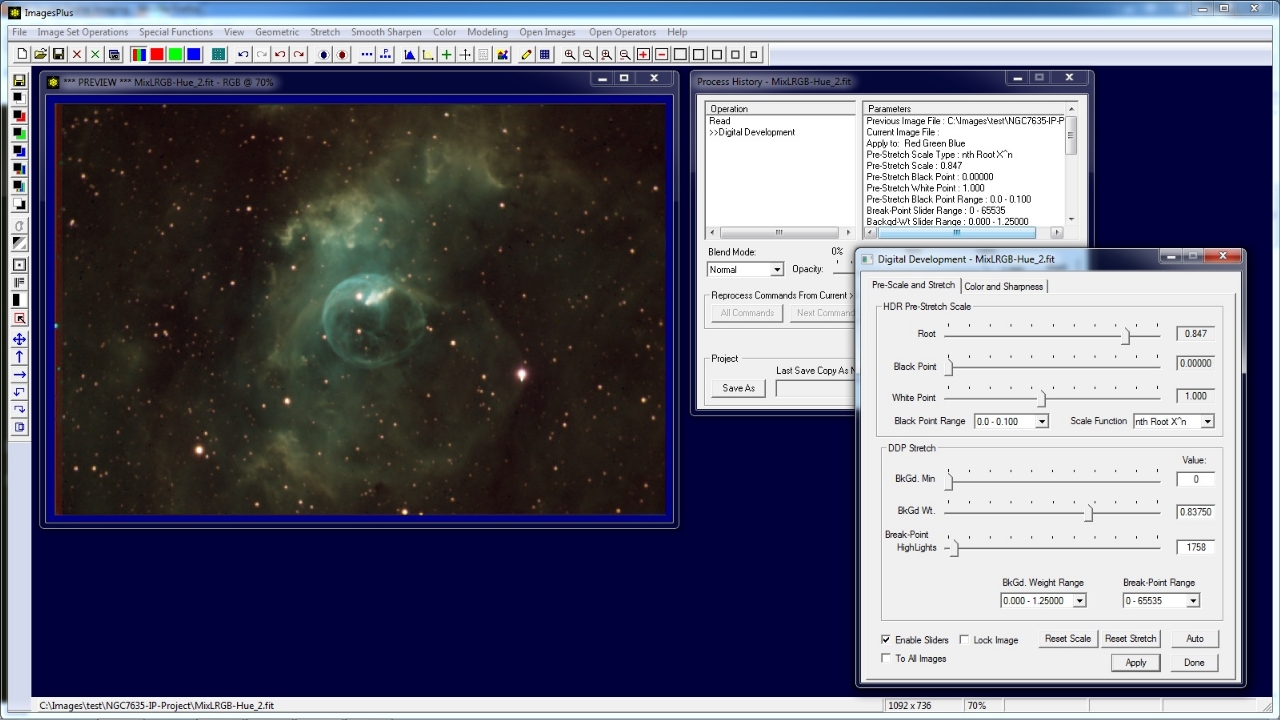
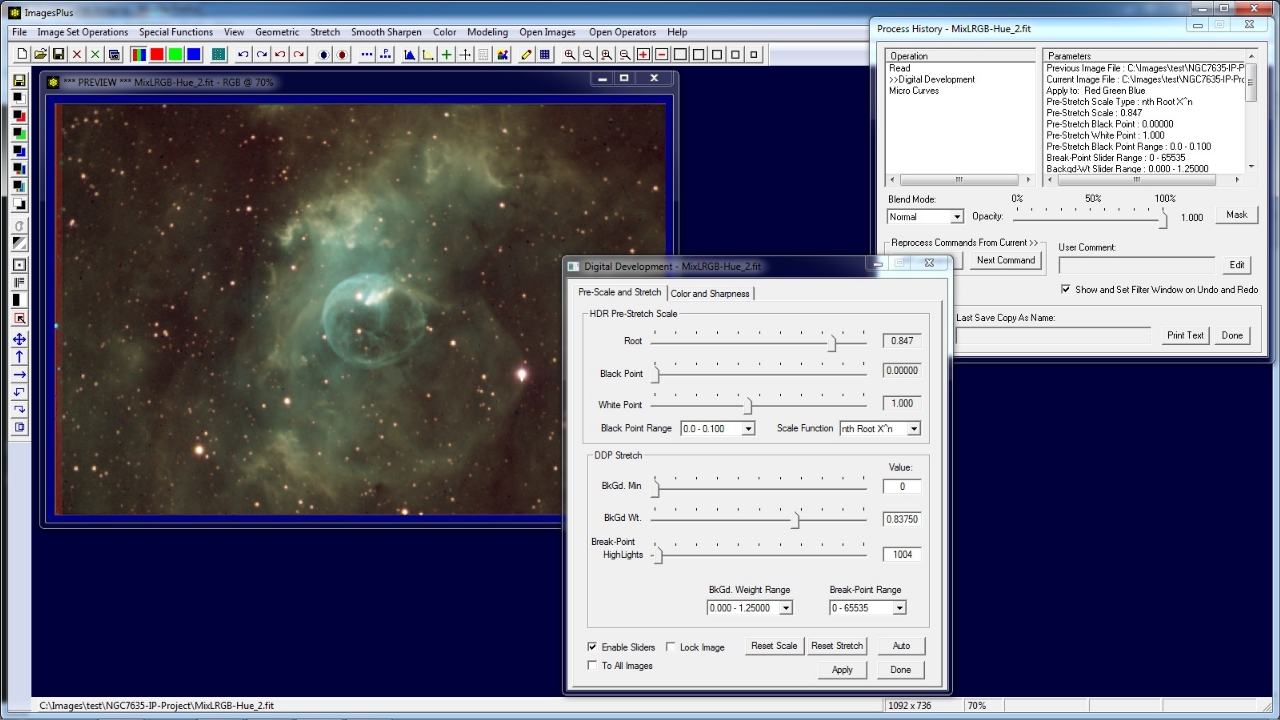
- Stretch | Digital Development is applied to the image to increase brightness.
- Digital Development is inserted after read in the operation list and pointed to by the current operation pointer >>.
- Digital Development parameters are shown on the Parameters window of Process History.
- Since Digital Development is the current operation parameters can be changed without inserting a new operation in the list.
Digital Development is applied to the initial image. The Digital Development operation is inserted after the initial Read and maked as the current operation by >>.
 |
Step 3
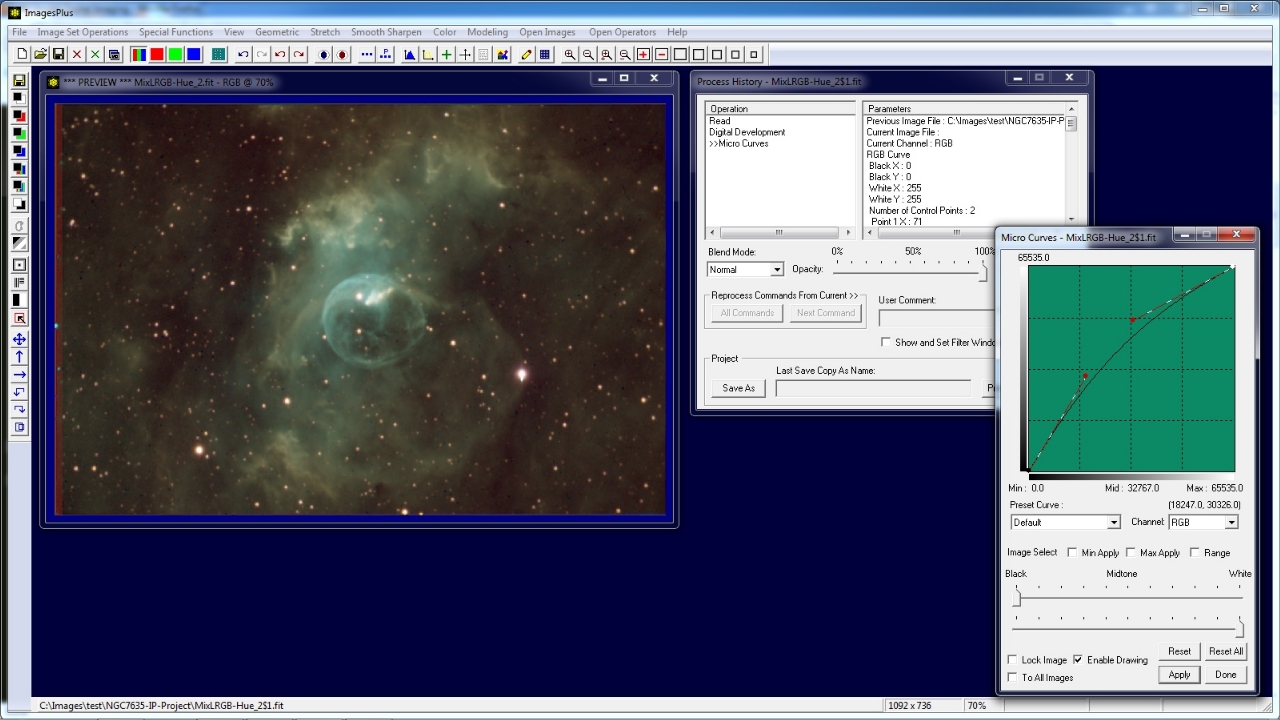
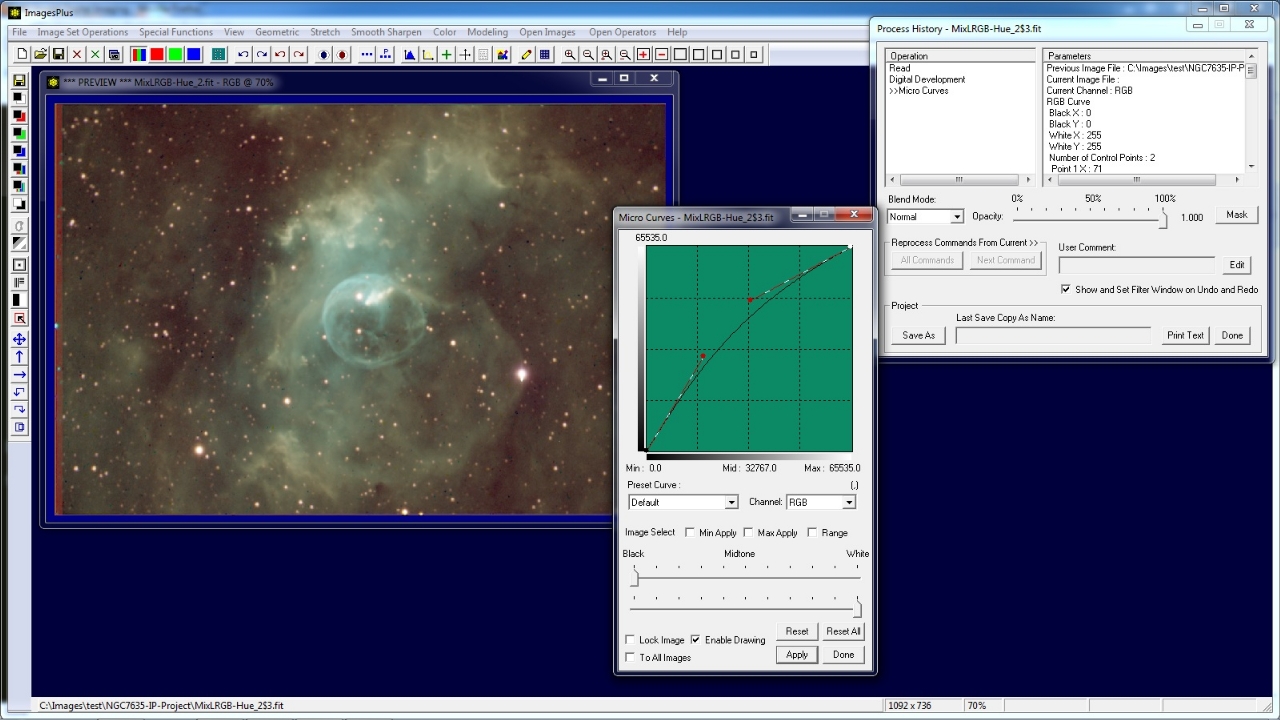
- Stretch | Micro Curve is applied next.
- Micro Curve is inserted after Digital Development since Digital Development was the current operation pointed to by >> and Micro Curve is a different operation.
- Micro Curve is now the current operation pointed to by >> with parameters shown in the Parameters window of Process History.
- Since Micro Curve is the current operation Micro Curve parameters can be change without inserting additional operations in the Process History list.
Micro Curve is inserted after Digital Development and is the current operation pointed to by >>.
 |
Step 4
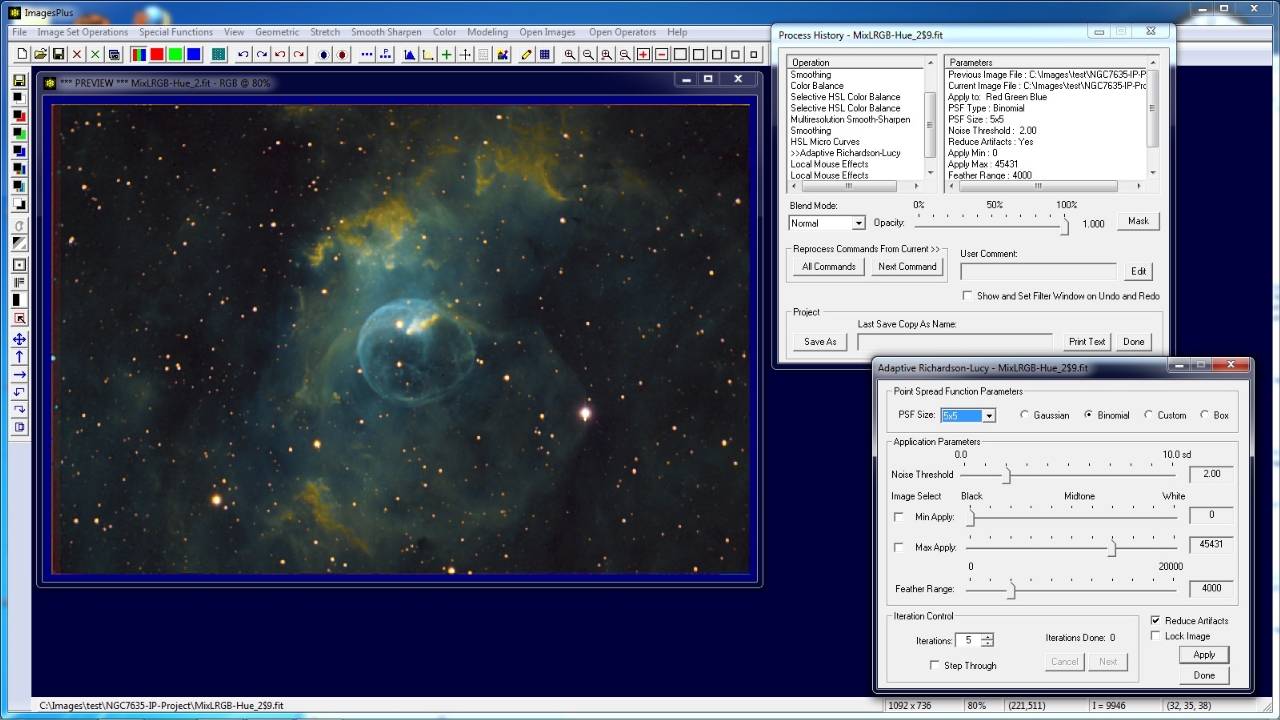
- Suppose you want to change Digital Development to increase brightness.
- Since Micro Curve is current command use the Undo toolbar button to step back to the Digital Development operation.
- If the Show and Set Filter Window on Undo and Redo box on Process History is checked then the Digital Development window is opened and set to the correct parameter.
Digital Development could also be set as the current operation by a double-click on Digital Development in the Operation list of the Process History window.
- Digital Development is now set as the current operation and parameters can be changed without inserting a new operation in the process history list.
- Below the Break-Point slider of Digital Development was increased from 1758 in step 2 to 1004 to make the image brighter.
The Undo toolbar button or a double-click on Digital Development in the Operaion list of Process History is used to set Digital Development as the current operation.
The Break-Point slider on Digital Development is used to increase brightness.
 |
Step 5
- Since Digital Development has changed the Micro Curve operation needs to be reapplied, deleted, or replaced by a different operation.
- Use the Next Command on the Process History window to apply the Micro Curve operation to the modified Digital Development image.
Micro Curve operation is applied to the modified Digital Development image using the Next Command on the Process History window.
Note that the image now appears a little to bright. Micro Curve could now be adjusted. The next step 6 will insert a Levels operation after the modified Digital Development operation.
 |
Step 6
- To insert a Levels operation after Digital Development use the Undo toolbar button or double-click on Digital Development in the operation list of Process History to set it as the current operation.
- Open Stretch | Levels then adjust the black point to the left side of the histogram and apply to the image.
- Since Digital Development is the current operation and Levels is a different operation Levels is inserted in the operation list after Digital Development.
Levels is inserted after Digital Develoment to set the black point. Micro Curve is no longer needed and will be deleted in step 7.
 |
Step 7
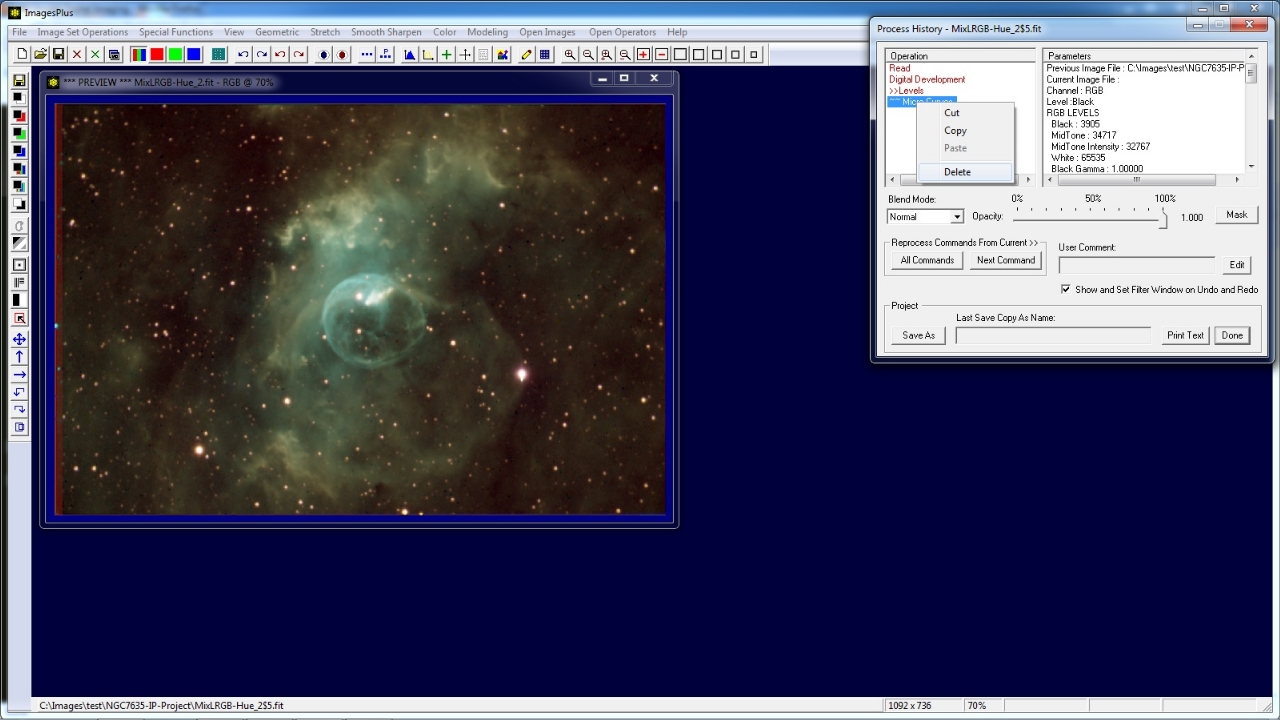
- The Micro Curve operation is no longer need and should be removed from the operation list.
- Note the red text and ~~Micro Curve in the Operation list. Red text indicates that Micro Curve and any other operation in the operation list after Levels need to be updated or deleted.
- To delete select Micro Curve in the operation list then right click and select delete.
- After Micro Curve is deleted from the operation list >>Levels will be the current operation and all text will appear black.
To delete Micro Curve from the Operation list select Micro Curve in the list then right-click and select delete.
 |
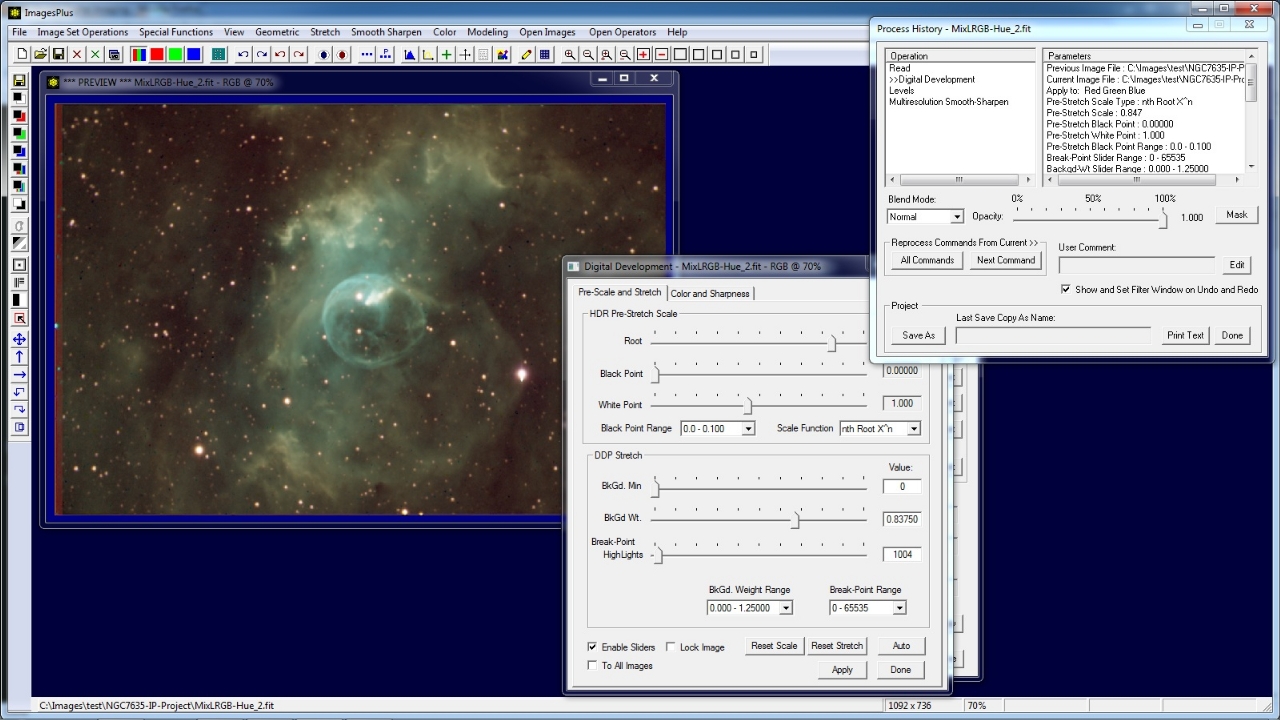
Step 8
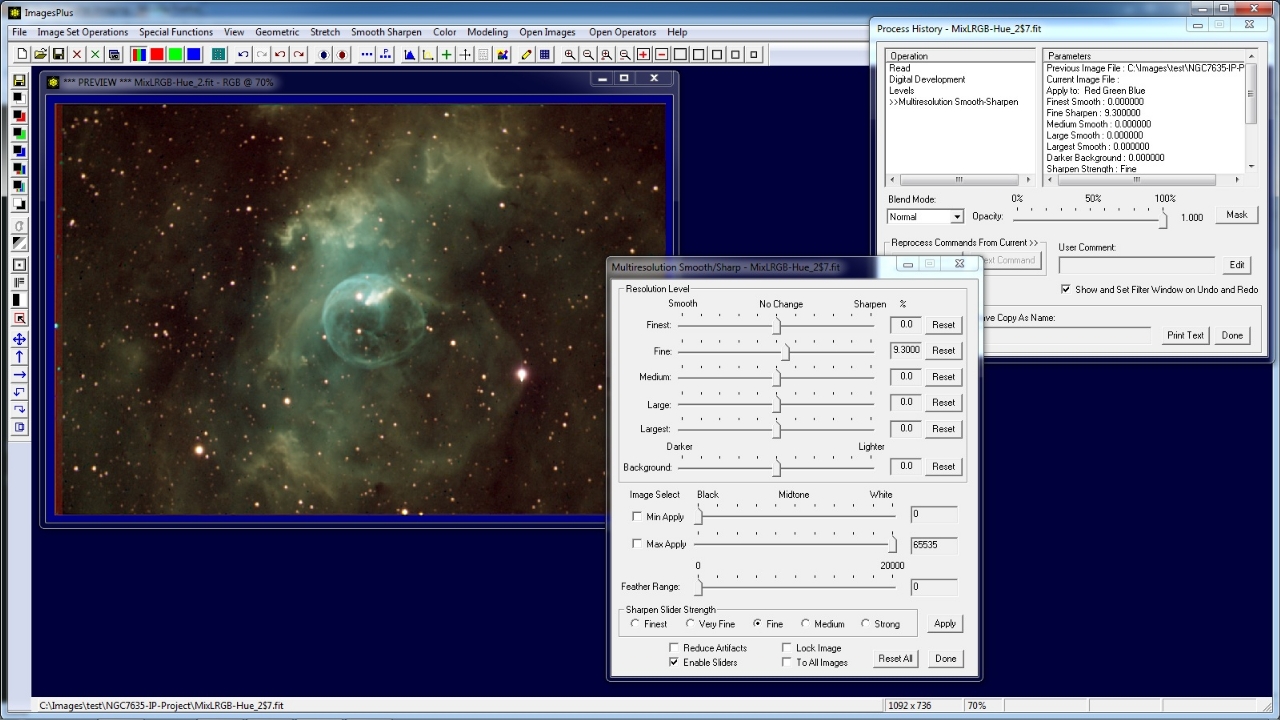
- A mild Multiresolution Smooth-Sharpen opertion is applied after Levels.
- Levels was the current command pointed to by >>. Since Multiresolution Smooth-Sharpen is a different operation it is inserted after Levels in the Operation list.
- Multiresolution Smooth-Sharpen is now the current command pointed to by >>.
- Since Multiresolution Smooth-Sharpen is the current operation its parameters can be modified without inserting a new opertion in the list.
A mild Multiresolution Smooth-Sharpen opertion is applied to the image and inserted in the operation list after Levels.
 |
Step 9
- At this point three operations Digital Development, Levels, and Multiresolution Smooth-Sharpen have been applied to the image.
- The all black text in the operation list indicates that the operations are consistent. That is the initial read image was used as input to Digital Development.
The output image of Digital Development was used as input to Levels. The ouptut image of Levels was used as input to Multiresolution Smooth-Sharpen.
- Undo, Redo and double-click on an operation can be used to scroll through the image as it appears after each operation and display the operation window set to the parameters that created the image.
The Undo, redo, and double-click on an operation in the list can be used to scroll through the changes to the image and display the operation window used at each step.
Operations can be modified, deleted, inserted, or copied to a Process History list of a different image. Steps 10-12 show how to copy, paste, and apply operations from one image to another.
 |
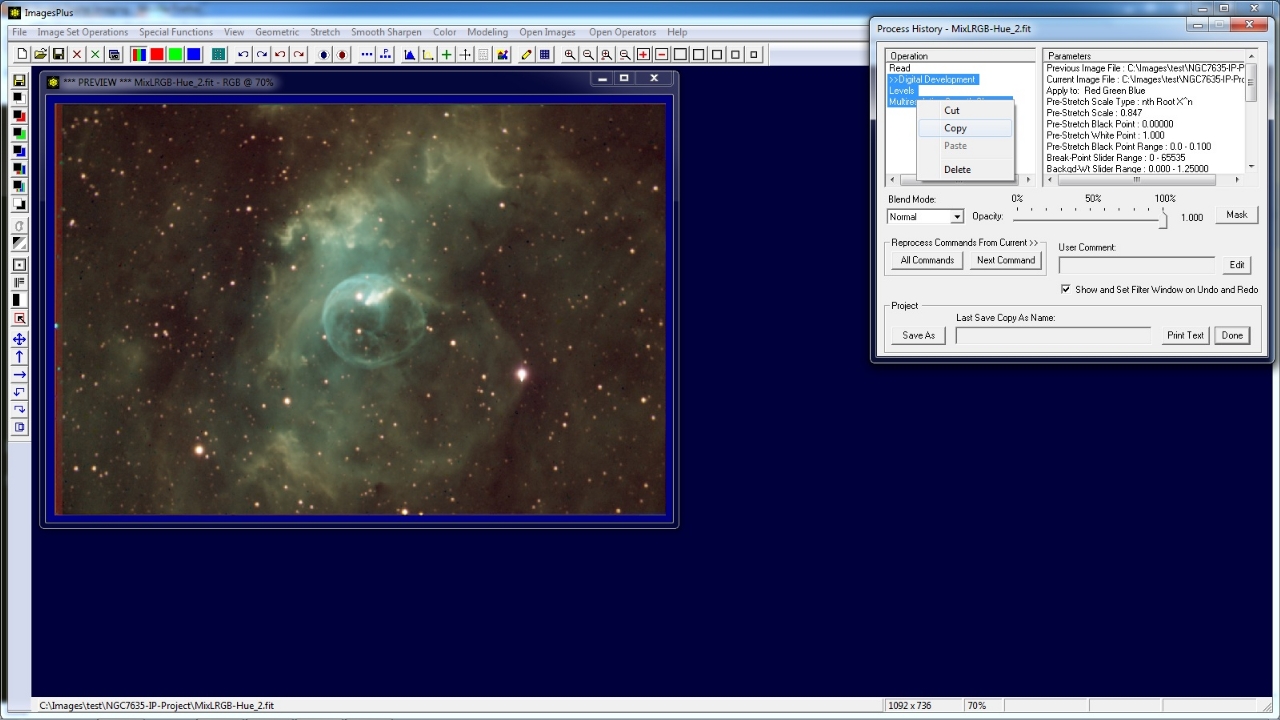
Step 10
- Suppose you want to copy operations from the current image to a new image.
- Select one or more operations in the Operation list of the image's Process History window then right-click on the selection and select copy.
Three operations selected for copy.
 |
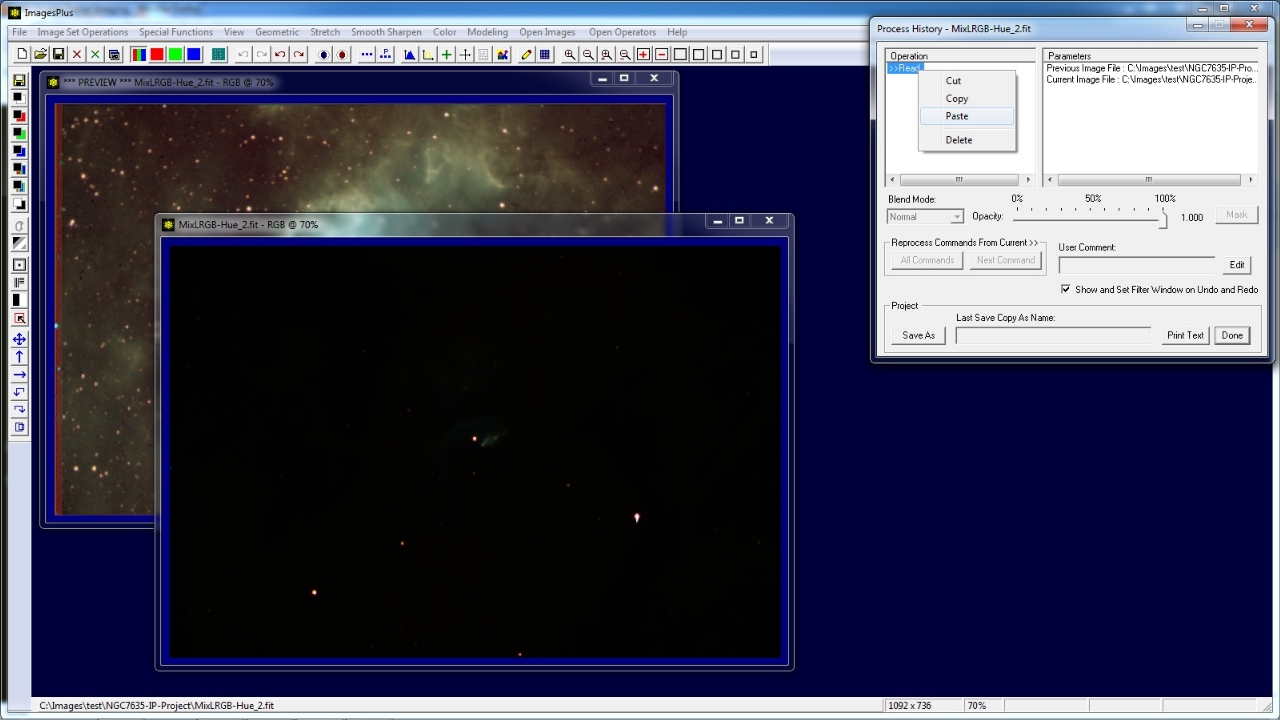
Step 11
- Select or open a new image then select a operation in the image's Process History Operation list.
- Right-click on the selected operation then select Paste to insert the copied operations after the selected operation.
- It is also possible to copy and paste operations in the same operation list.
A new image is opened and the Read operation is selected. Paste will insert the copied operations after Read as shown below.
 |
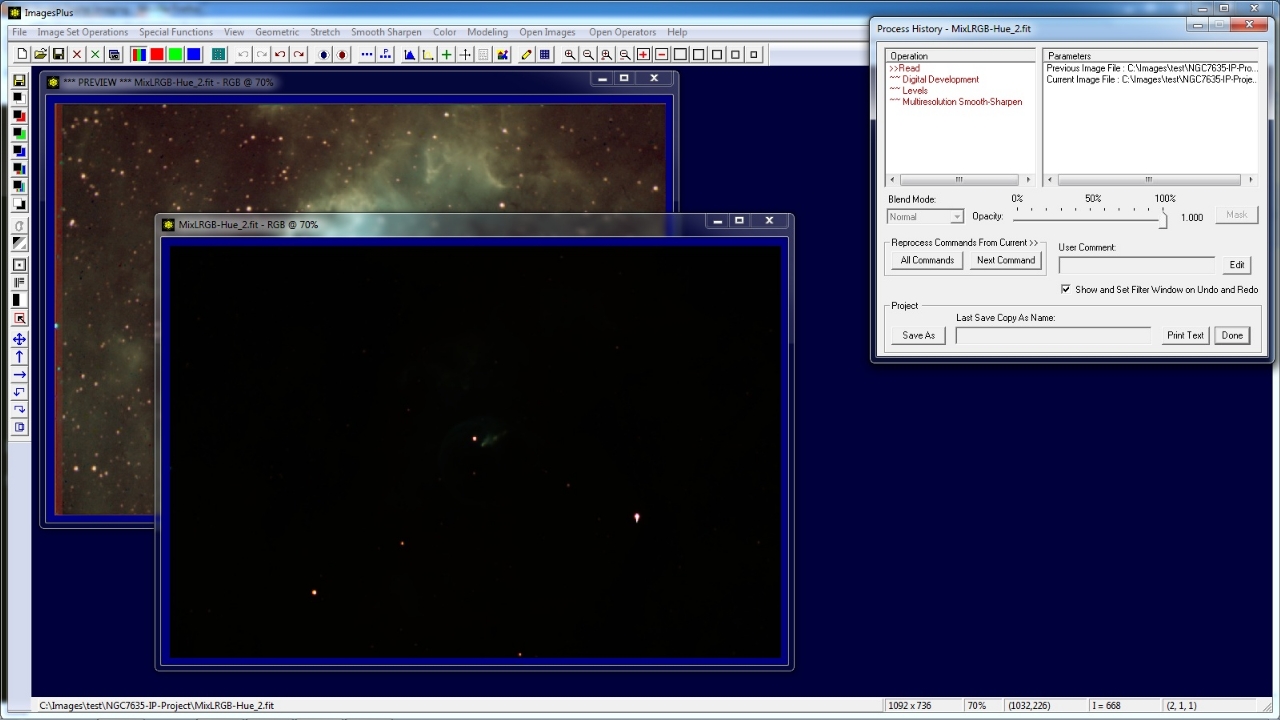
Copied operations inserted after the Read operation. The red text indicates that the new opereations need to be applied to the image. Step 12 applies the operations to the image.
 |
Step 12
- Use the All Commands button on Process History to apply all copied operations to the image.
- All Commands can be canceled bu holding Shift+Ctrl.
- Or use the Next Commands button to apply each operation to the image.
The second image has the same operations applied.
 |
Copyright © 2012 MLUnsold Digital Imaging. All Rights Reserved.