A monochrome DSLR is a DSLR with its Bayer color filter array removed. A monochrome DSLR can be used with luminance, red, green, blue, and narrow band filters to create monochrome image sets with better resolution than a DSLR with a Bayer color filter array. The Image Set Operations | Automatic Image Set Processing Tool can be used to process a set of light, dark, flat, and bias frames from a monochrome DSLR. The steps below show how to process a set of light frames captured by Scott Rosen using a monochrome DSLR with an H-alpha filter. The H-alpha light frames will be calibrated with dark and flat frames then aligned and stacked. The stacked H-alpha image will be a single channel grayscale image with better resolution and the same width and height as a color image from the same DSLR model.
Monochrome Image Set Processing Example
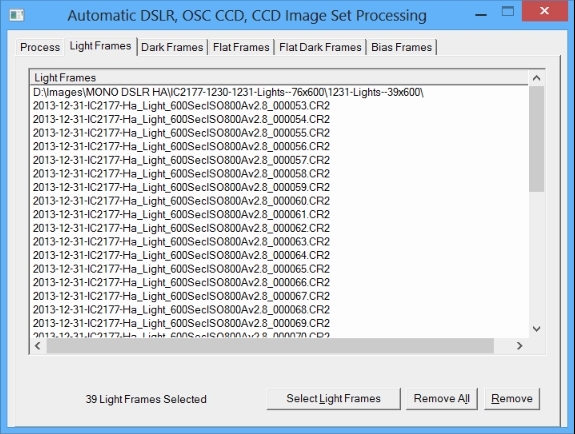
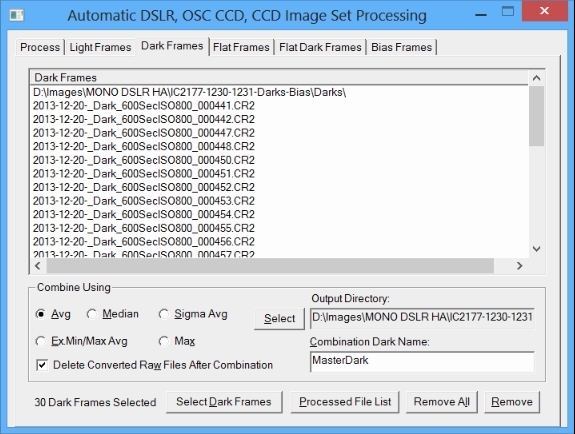
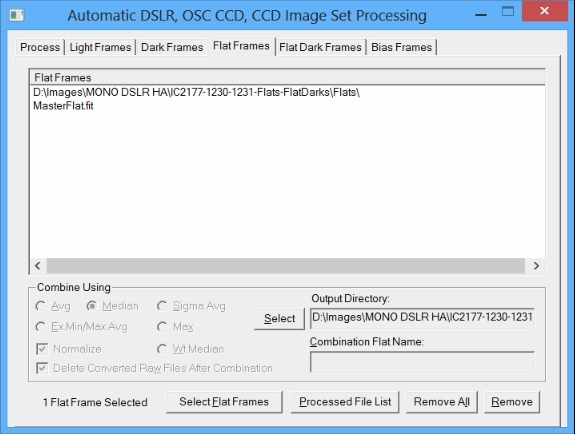
Step 1) Select the monochrome light, dark, and flat images in Image Set Operations | Automatic Image Set Processing
Select raw light frames on the Light Frames tab.
 |
Raw dark frames are selected on the Dark Frames tab.
 |
A single master flat is selected on the Flat Frames tab since the master flat was already built during a previous run using raw CR2 flat files. It is important to use the same Bayer raw conversion such as Bayer At Capture WB on the Process Tab for all light, flat, bias, and dark frames.
 |
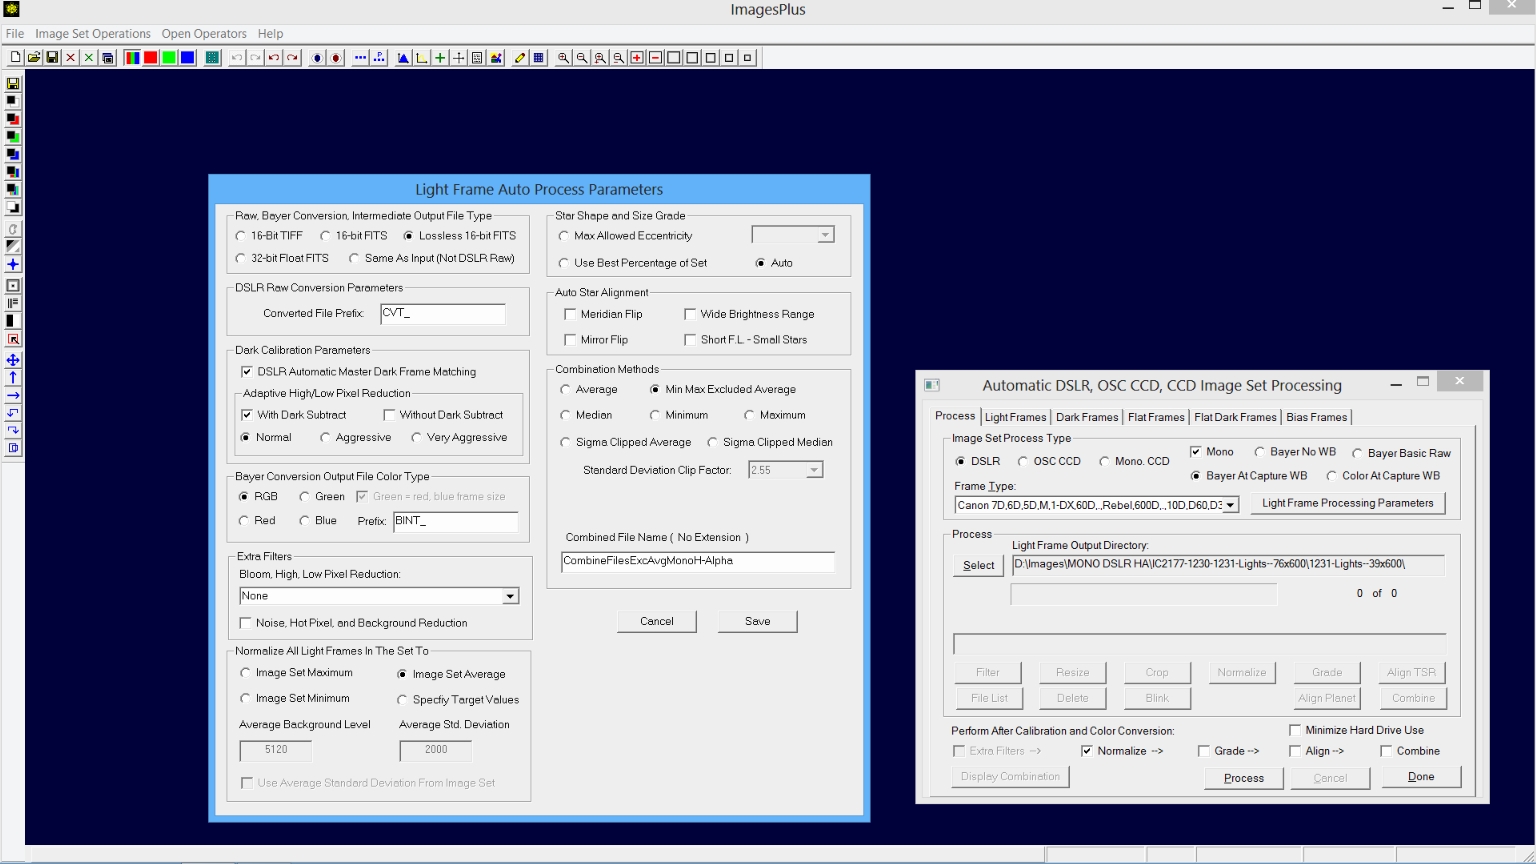
Step 2) Select processing parameters on the Process Tab and Light Frame Parameter Window.
Dark calibration parameters are set as shown in the Light Frame Auto Process Parameter window since dark frames are selected on the Dark Frames tab. DSLR is selected as the image set process type with Bayer At Capture WB or Bayer No WB. The Mono box is checked so that a single channel monochrome grayscale images is created from the raw DSLR image. Check Normalize at the bottom of the Auto Image Set Process window then press the Process button. The raw CR2 light frames will be converted to single channel monochrome images, calibrated, and normalized.
 |
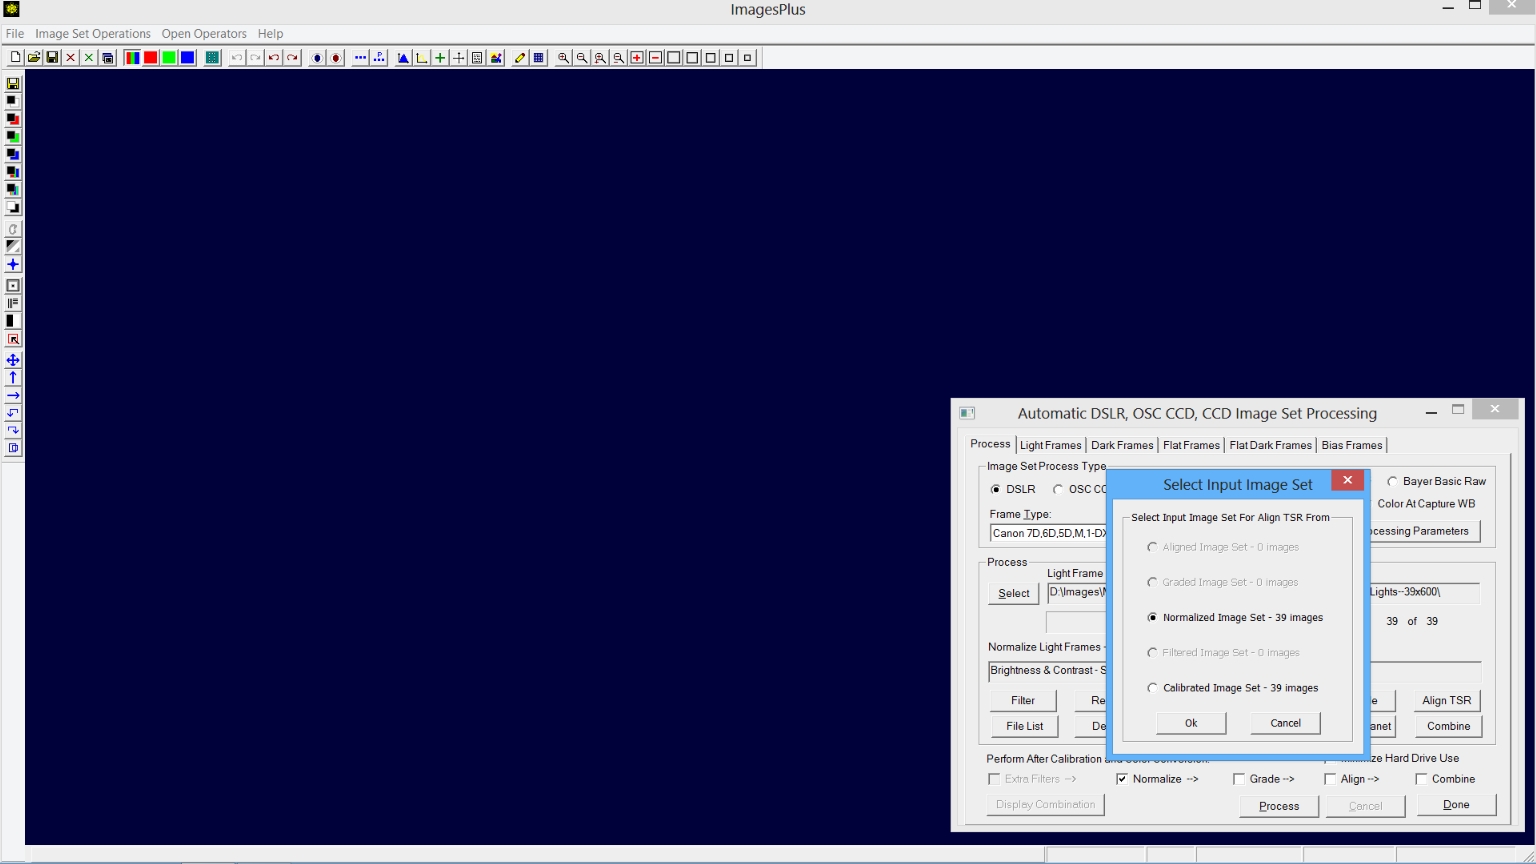
After Auto Image Set Processing is finished press the Align TSR button. The Select Input Image Set window will appear so that you can select the input image set for Align TSR. Select Normalized Image Set then press OK.
 |
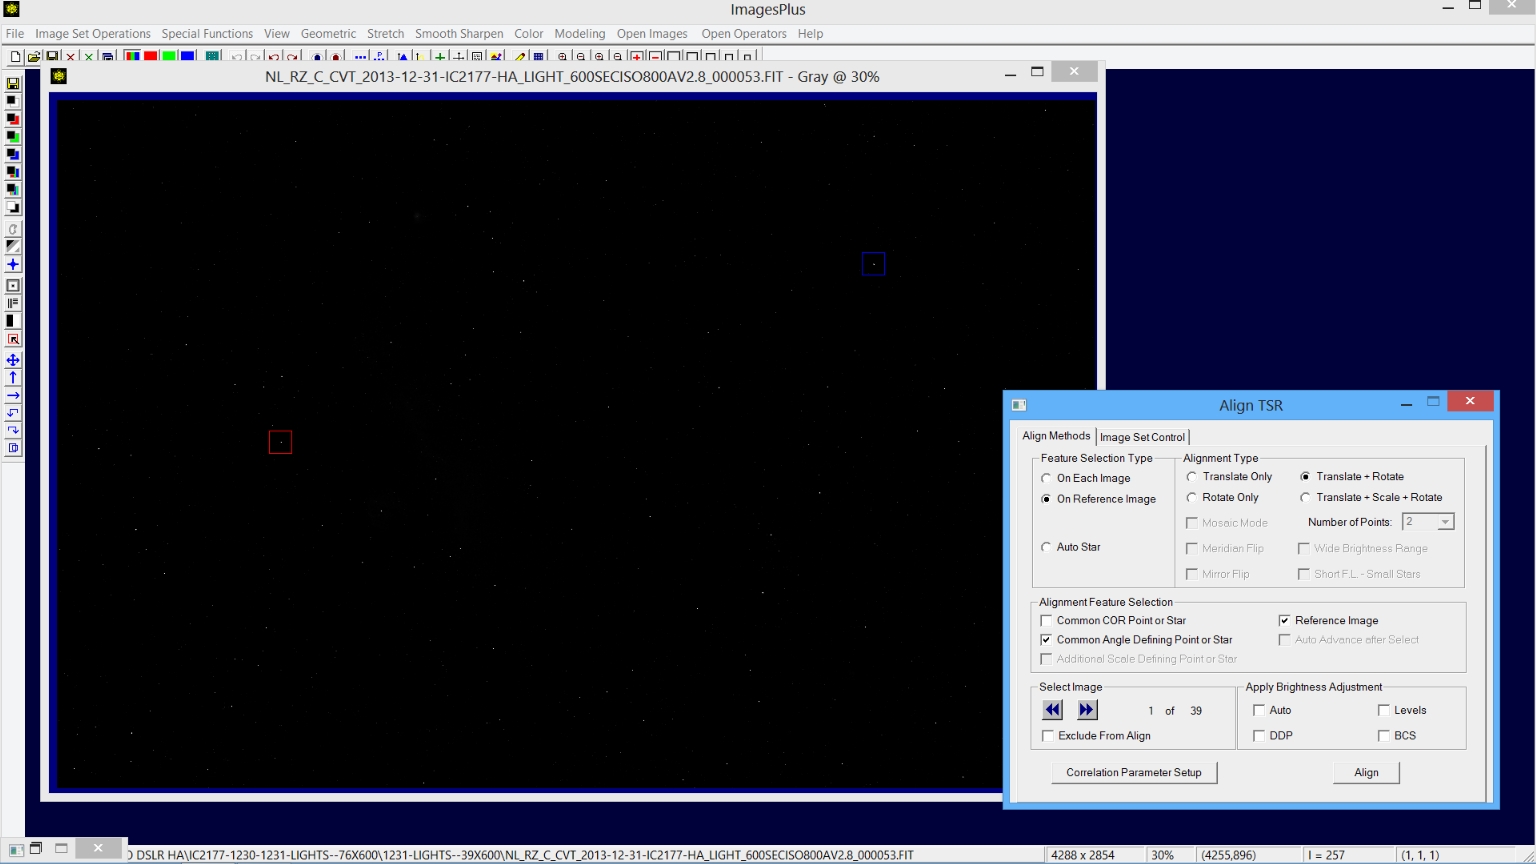
Step 3) Align the calibrated monochrome H-alpha image set.
Image Set Operations | Align TSR is opened and loaded with the normalized and calibrated files by pressing the Align TSR button on Auto Image Set Processing after auto image set processing is finished as shown in step 3 above. Select On Reference with 2 star Translate + Rotate then check the Common COR (center of rotation) Point or Star box. Now center the red box with cross-hair on an isolated well defined star that is not overexposed and left-click. Check the Common Angle Defining Point or Star box then position the blue square on a second well defined star that is not overexposed and left click. On Reference alignment mode requires 2 stars to be selected on the reference image. Press the Align button to align all of the H-alpha images using the 2 selected stars.
 |
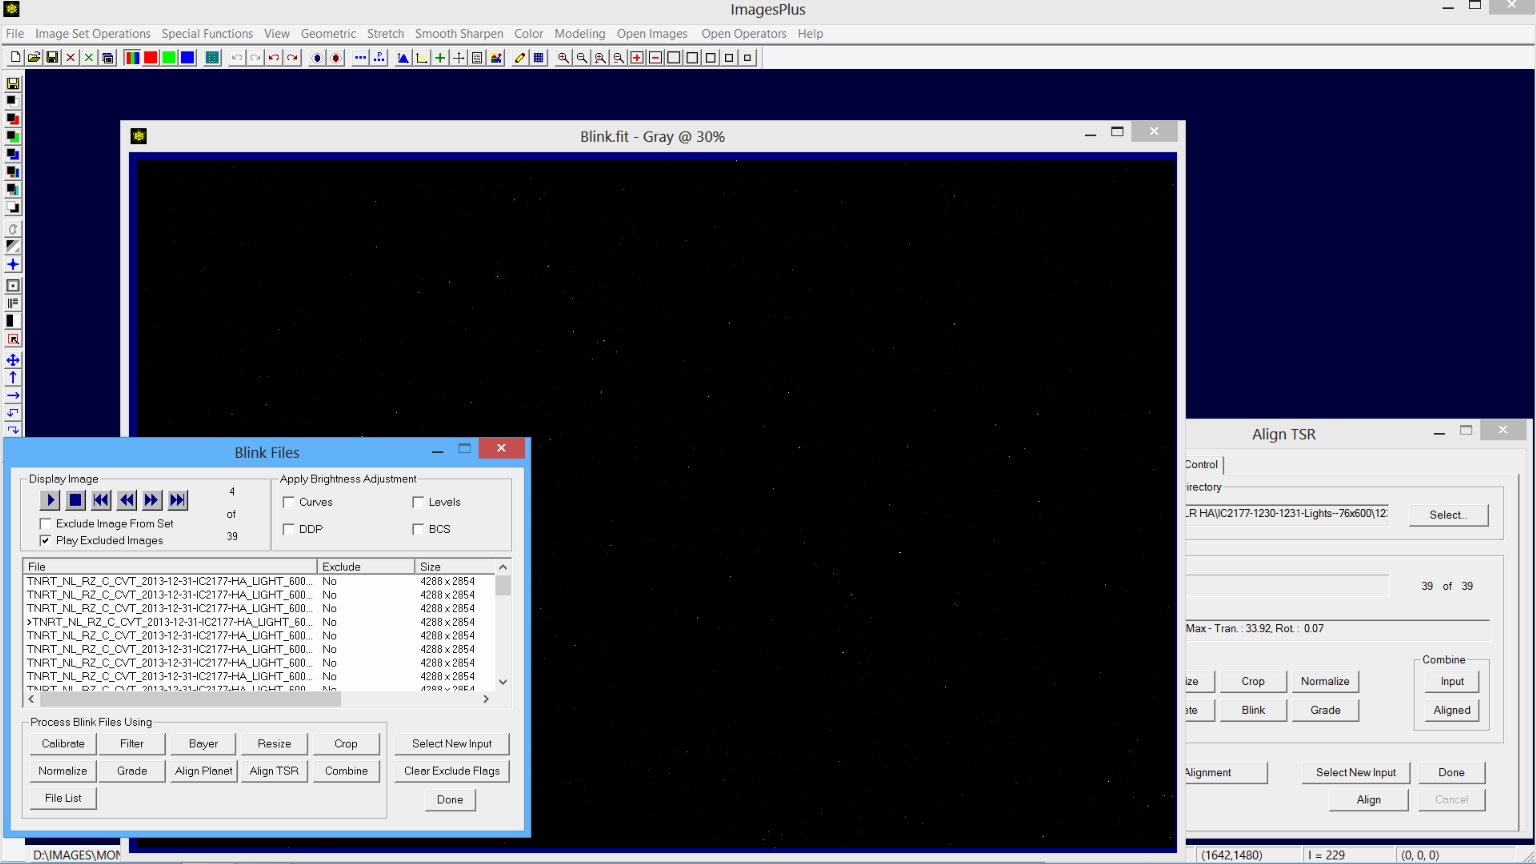
Step 4) Optional blink inspection of the aligned files to remove bad frames.
Image Set Operations | Blink Files is opened and loaded with the aligned files by pressing the Blink button on Align TSR after two star On Reference alignment is finished. Blink inspection of the aligned files allows you two exclude bad frames from the aligned image set before stacking. Press Combine on Blink Files to load Combine Images with the image set without excluded frames.
 |
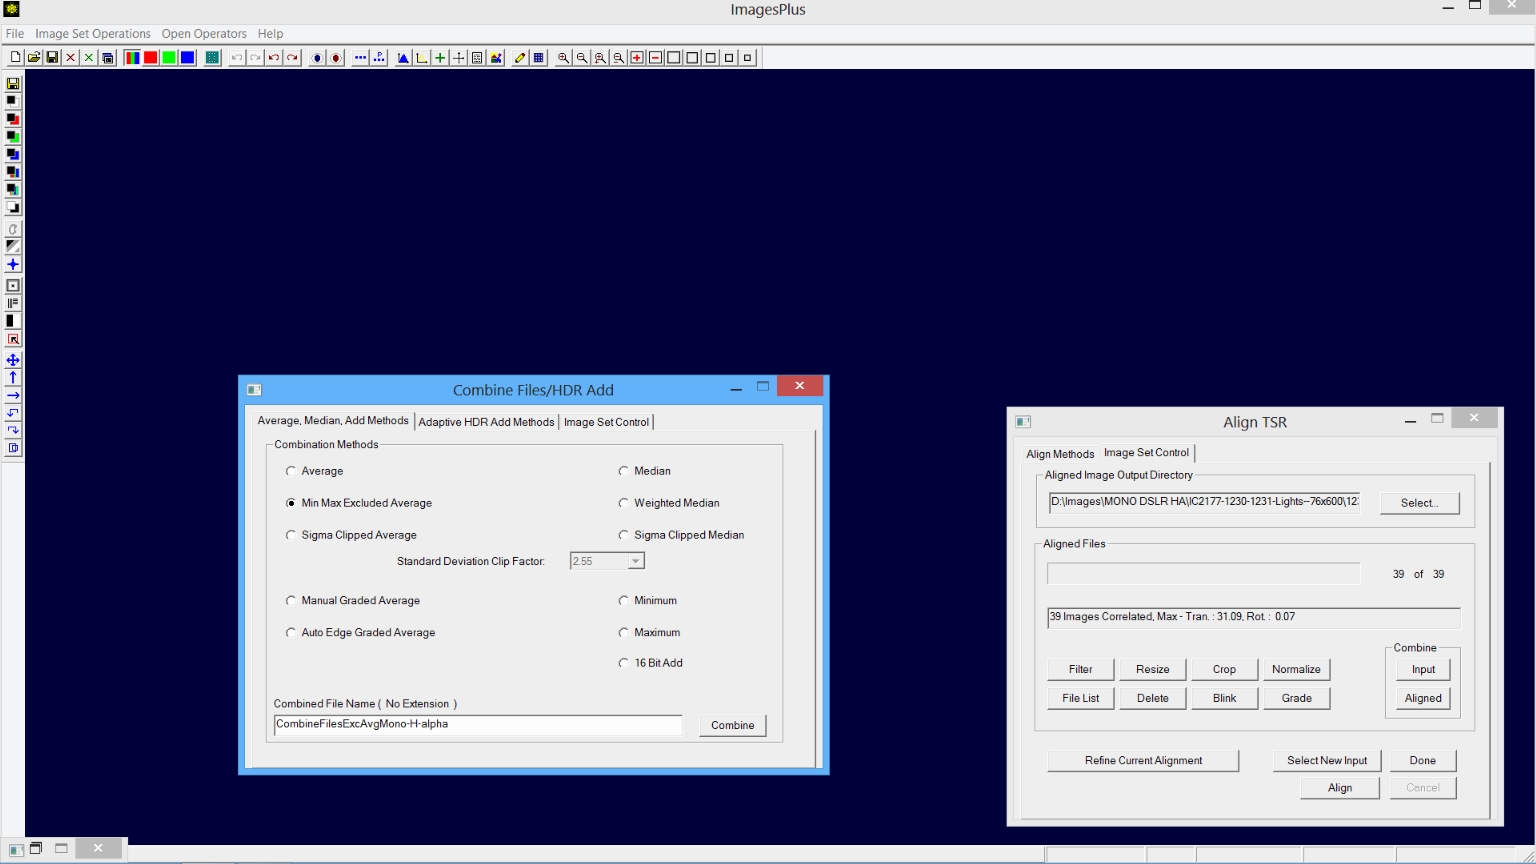
Step 5) Combine the calibrated and aligned H-Alpha images.
Images Set Operations | Combine Files is opened and loaded with the aligned H-alpha images by pressing the Combine | Aligned button on Align TSR after two star On Reference alignment is finished. Excluded Min/Max Average is selected as the combination method on Combine Files and the combination name is set to CombineFilesExcAvgMono-H-alpha. Press Combine to stack the aligned H-alpha images and display the combination CombineFilesExcAvgMono-H-alpha.fit.
 |
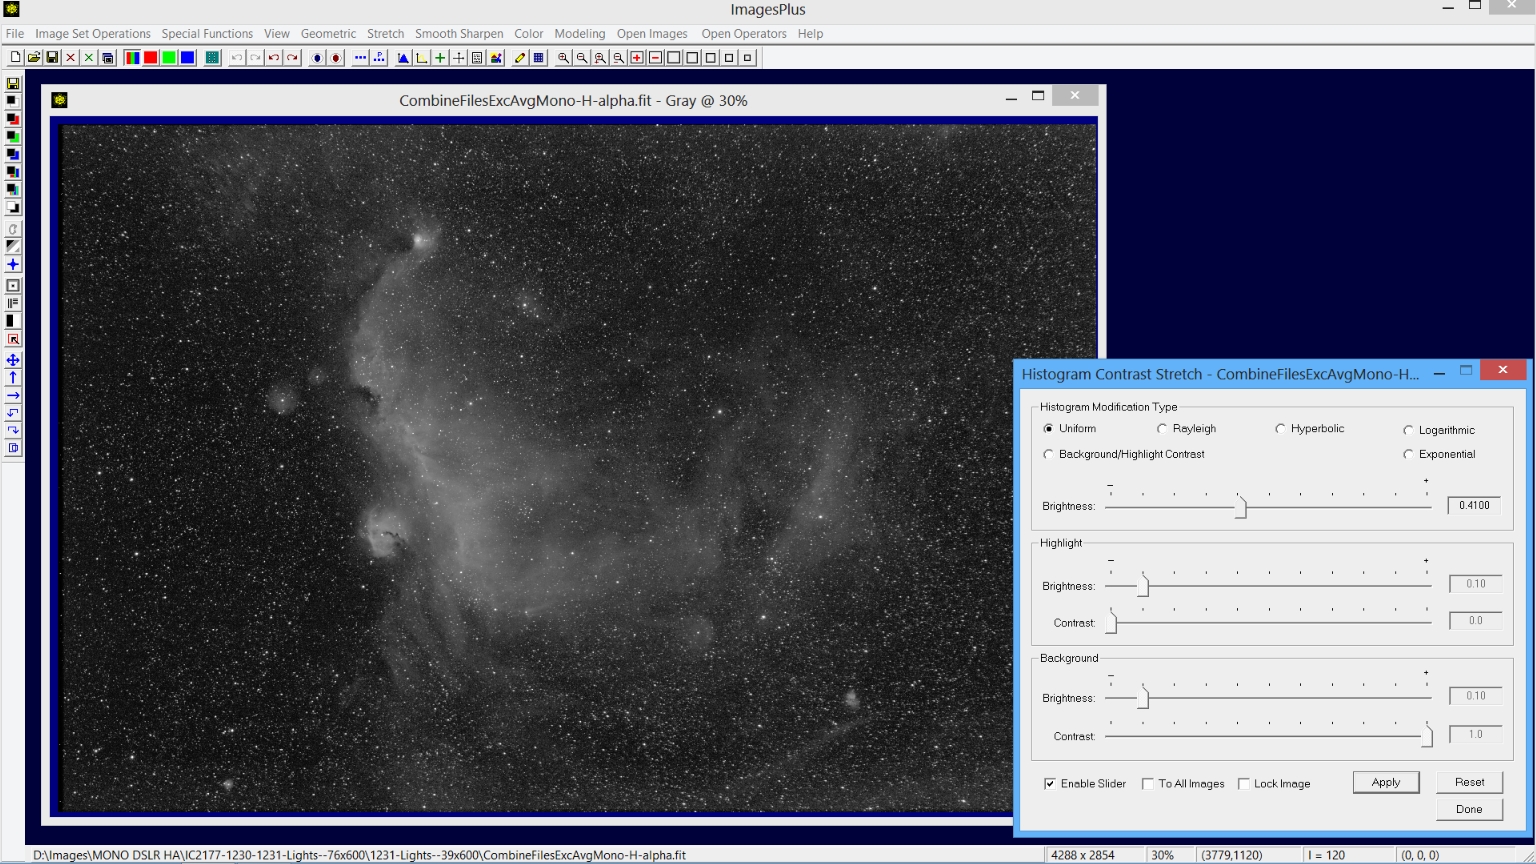
Step 6) Using the processed H-alpha image.
The final calibrated, aligned, and stacked image is a single channel grayscale image with the same width and height as a color image from the same camera model. The Stretch | Histogram Contrast Stretch tool was used to brighten the image. For an example of using the processed H-alpha image to enhance an RGB image see H-alpha with RGB Processing example using the Feature Mask© tool .
 |
Copyright © February 21, 2014 MLUnsold Digital Imaging. All Rights Reserved.