Multiple luminance layering is a technique to reduce noise in the composite image. Color data often has more noise than luminance data taken with longer exposure time. Multiple luminance layers are applied with opacity < 100% to reduce noise in the composite image.
Combine Image & Mosaic can be used to build a multiple luminance composite image using images from a DSLR, one shot color CCD, and monochrome CCD.
Combine Image & Mosaic allows direct modification of each image layer and its mask to perfect the composite image blend.
This tutorial explains how to build a color image from luminance L, red R, green G, and blue B images from a monochrome CCD. Luminance will be layered twice to create a LLRGB color image.
Similar steps can be used to build a multiple luminance image using a color image from a DSLR or one shot color CCD and a synthetic luminance frame created from the color image.
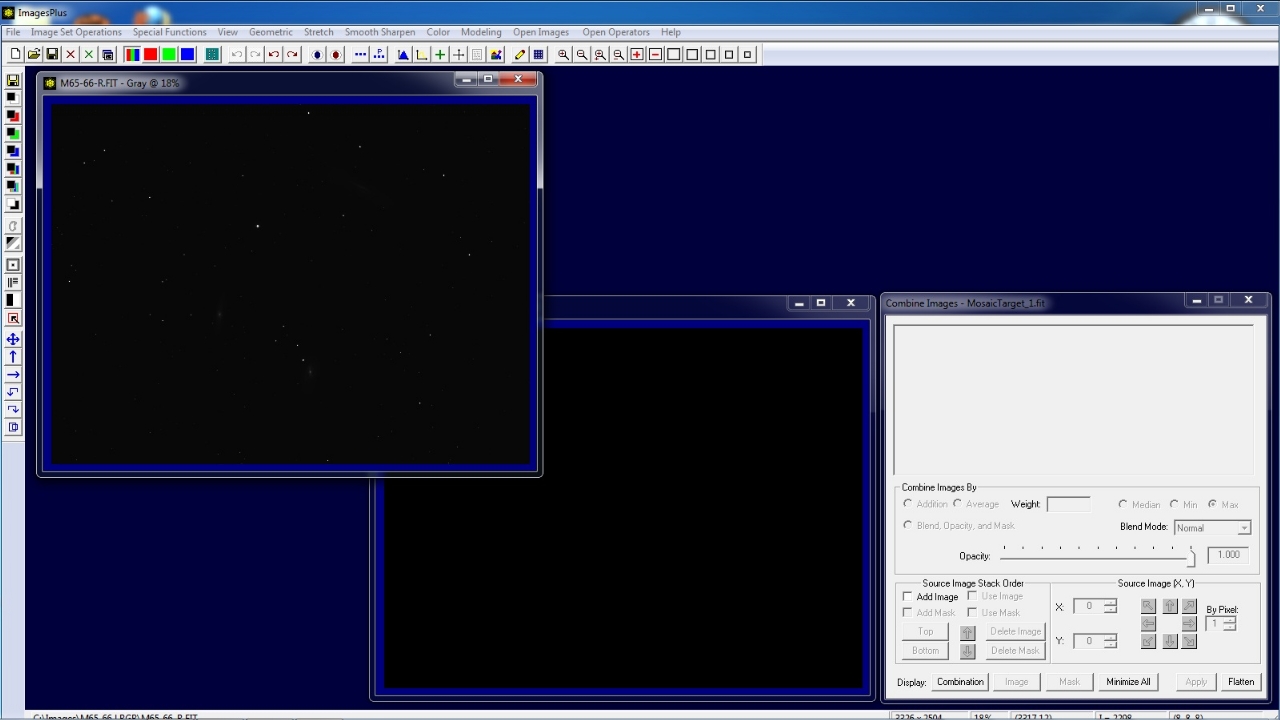
Step 1) Add Red Layer
Open the red image then open the Special Functions | Mosaic Setup tool and enter a decriptive name for the composite image.
 |
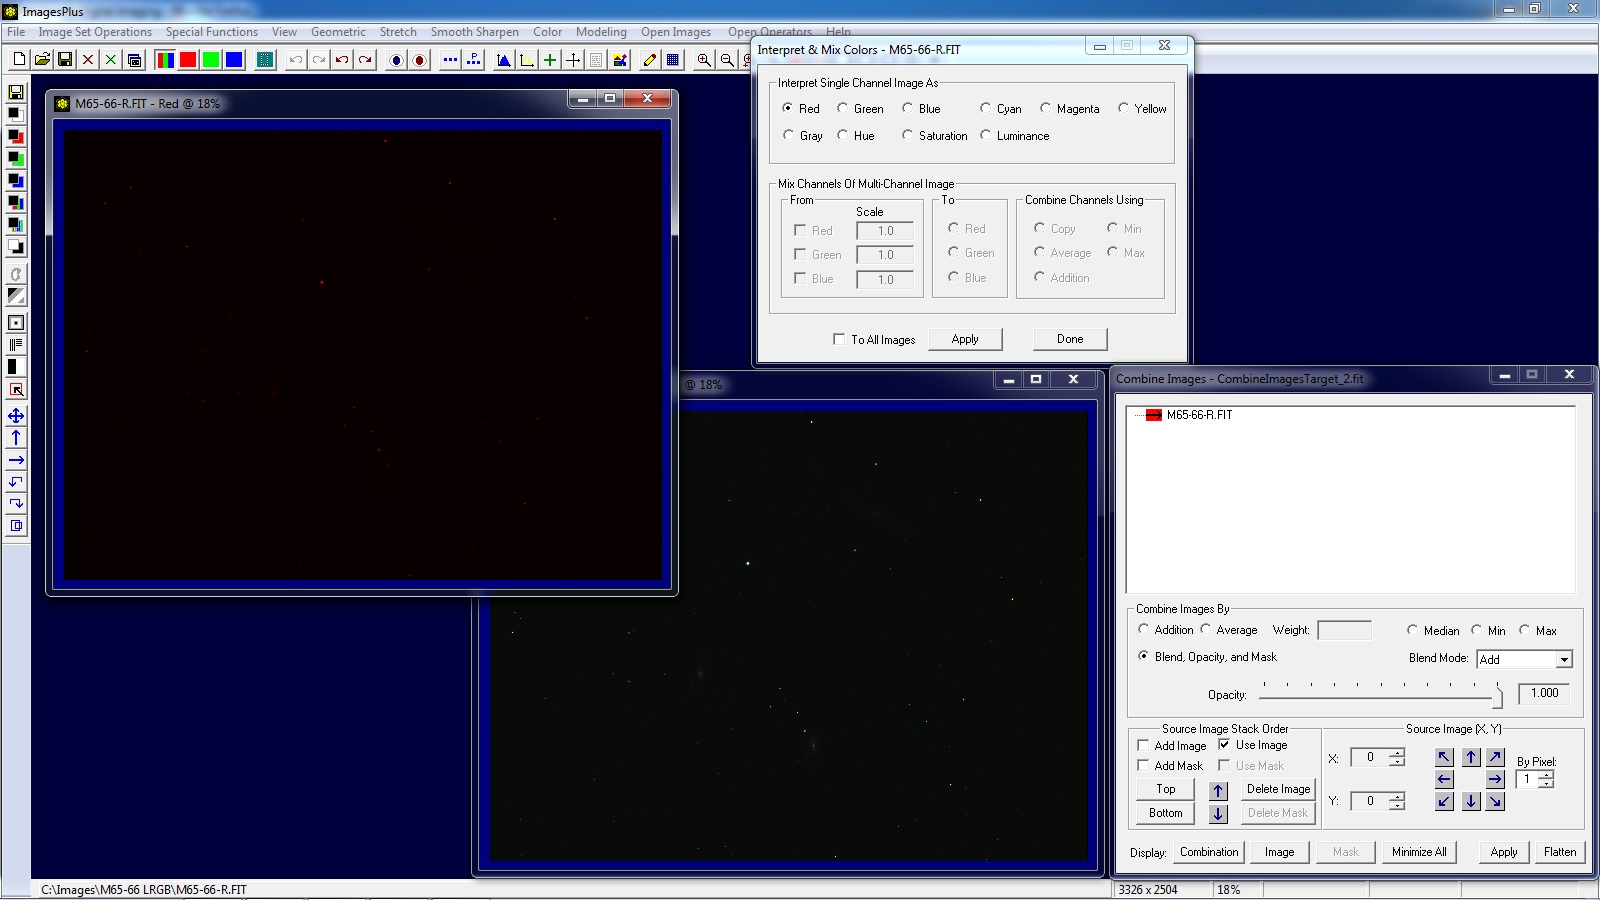
Open the Color | Interpret - Mix Colors tool and set it to Red then apply to the red image. To add the red image as a layer check the Add Image box on Combine Image & Mosaic then left click on the red image.
Set Blend, Opacity, and Mask as the operation type then set Add as the blend mode for the red layer.
 |
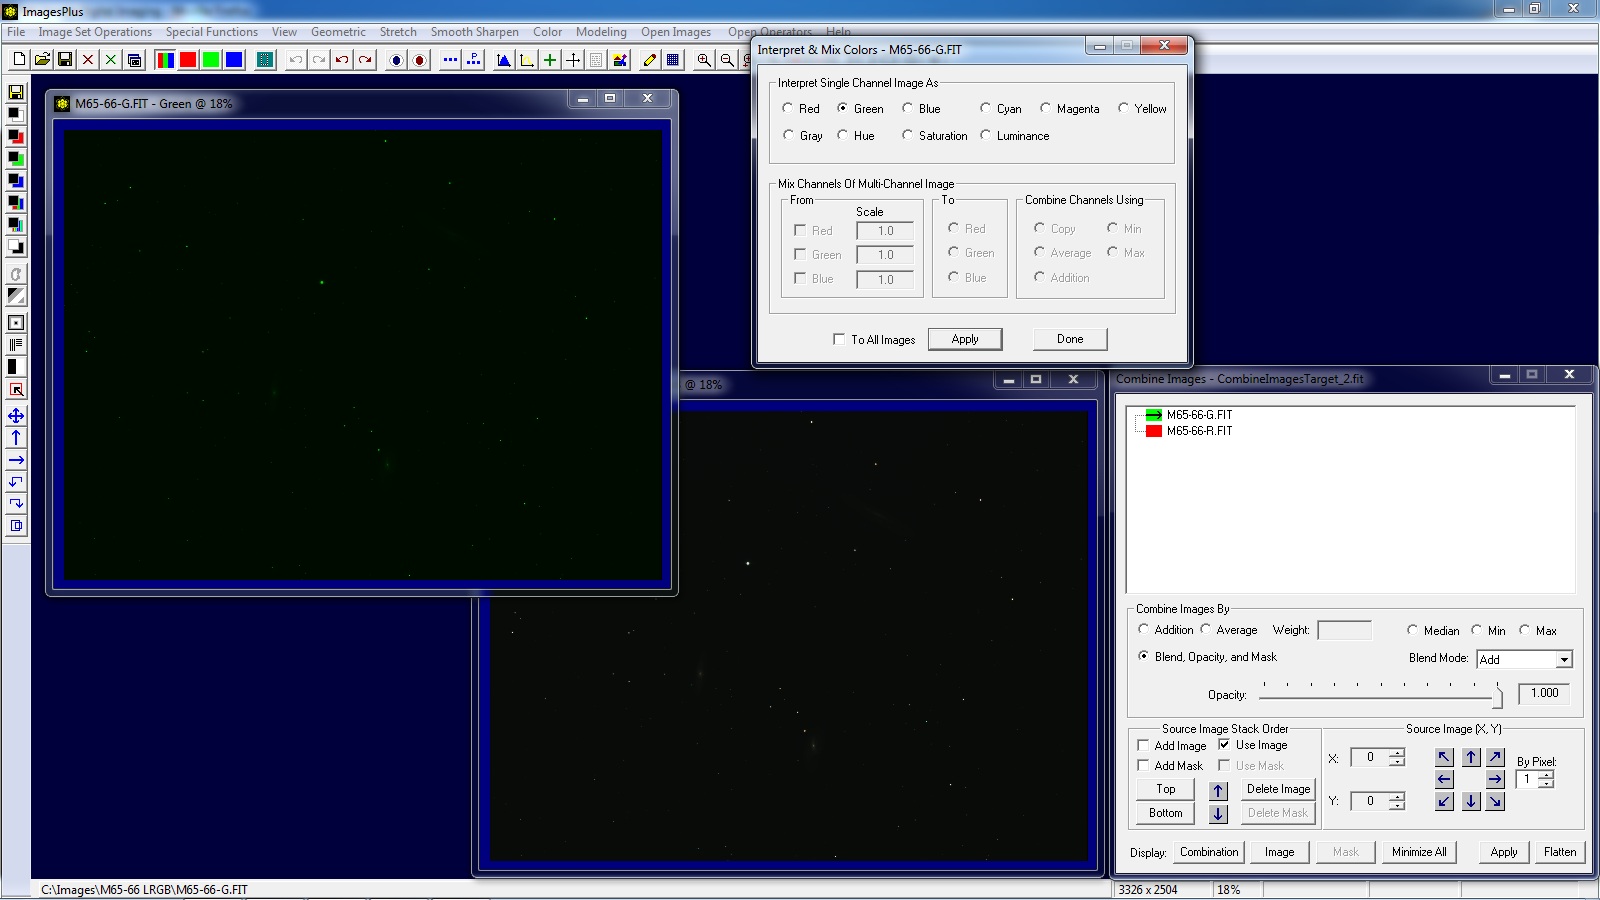
Step 2) Add Green Layer
Open the green image then set the Interpret - Mix Colors tool to green and appy it to the green image. To add the green image as a layer check the Add Image box on Combine Image & Mosaic then left click on the green image.
Set Add as the blend mode for the green layer.
 |
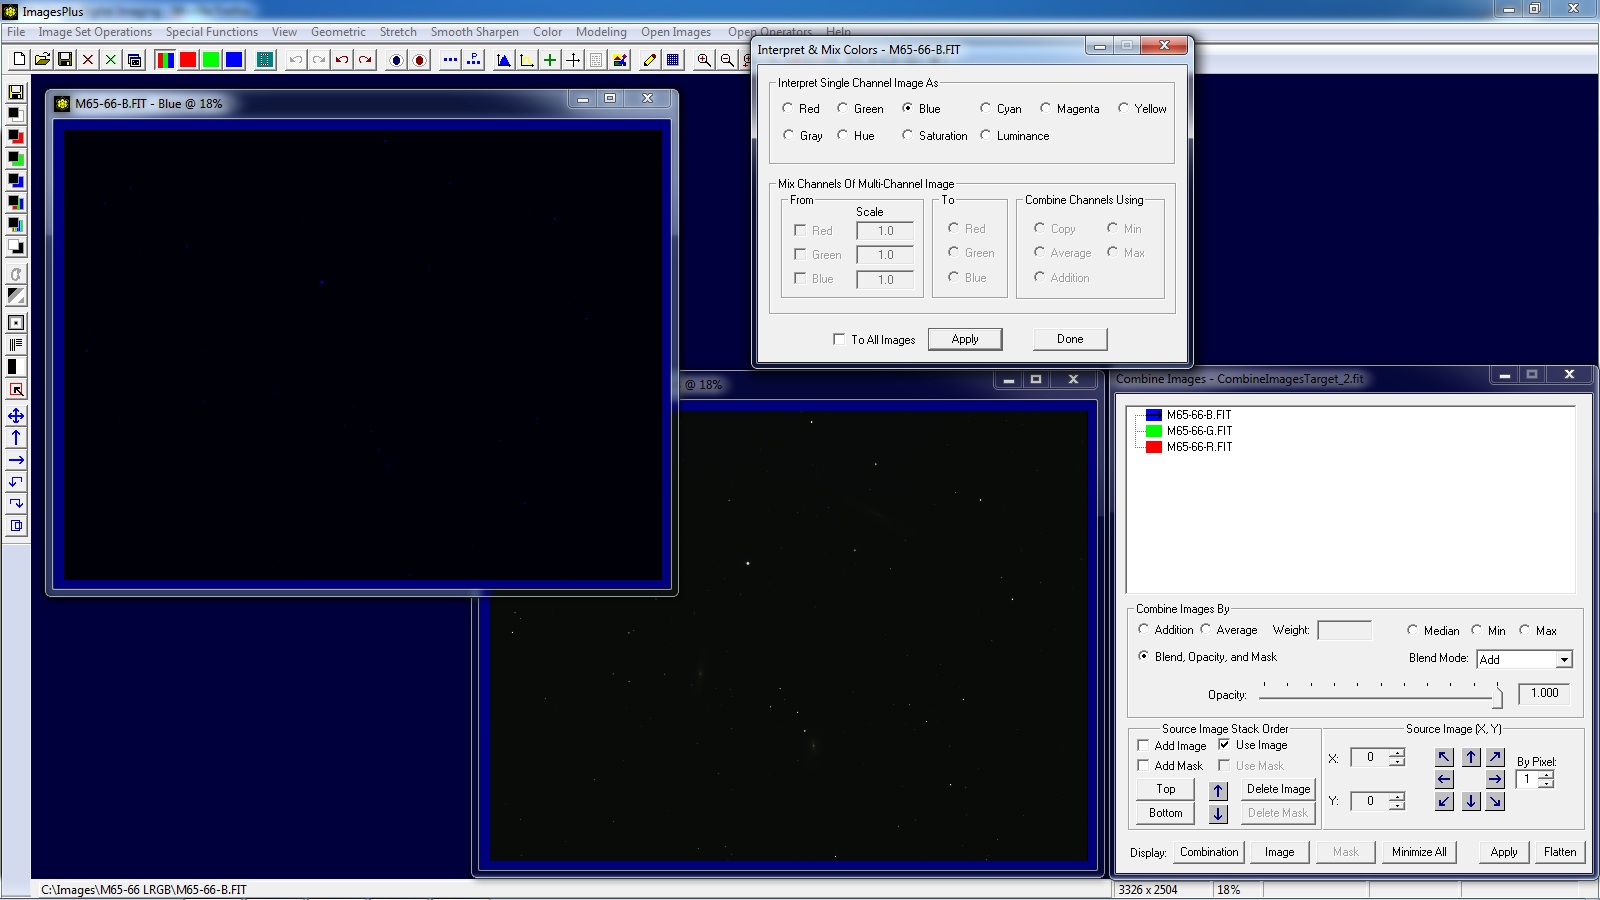
Step 3) Add Blue Layer
Open the blue image then set the Interpret - Mix Colors tool to blue and appy it to the blue image. To add the blue image as a layer check the Add Image box on Combine Image & Mosaic then left click on the blue image.
Set Add as the blend mode for the blue layer.
 |
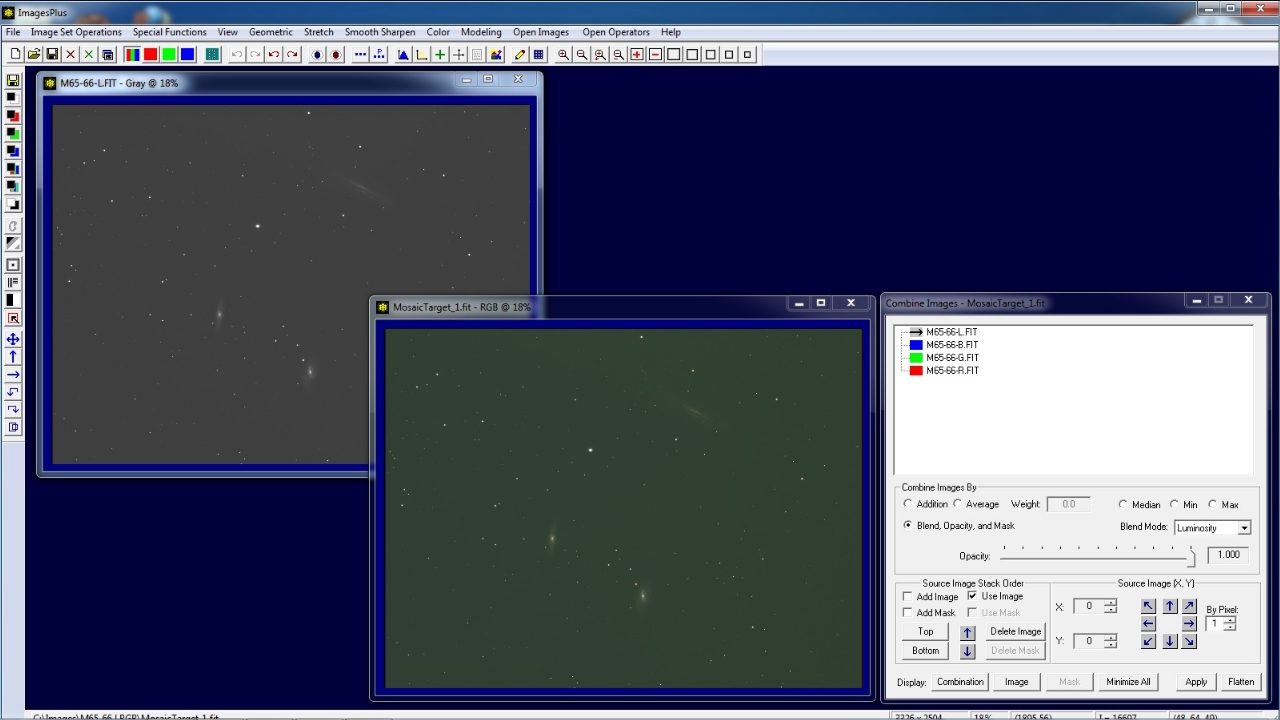
Step 4) Save Red, Green, and Blue Layers as a Color RGB Image
A luminance layer could be added at this point by adding a luminance image to the layer stack with its blend mode set to Luminosity. But the red, green, and blue images would be stretched independent of each other since they are separate images.
If the red, green, and blue images are put together into a single RGB color image then digital development can be used to stretch the color image and adjust color. So this tutorial will first save red, green, and blue data in a single RGB color image before adding luminance layers.
 |
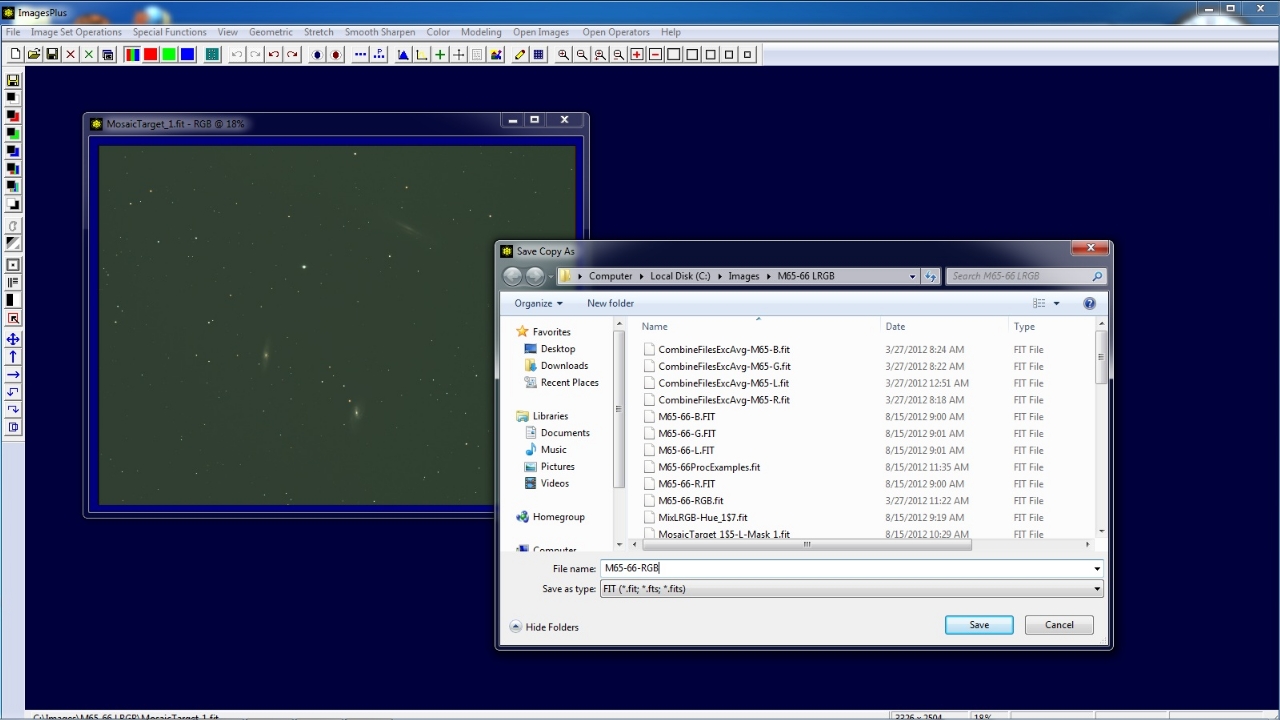
Red, green, and blue layers will be saved in a color RGB image before adding luminance layers. Press Flatten on Combine Image & Mosaic to close the tool then close the red, green, and blue images.
 |
Use File | Save Copy As to save the RGB color image with a descriptive name. In this case the color image is saved as M65-66-RGB.fits.
 |
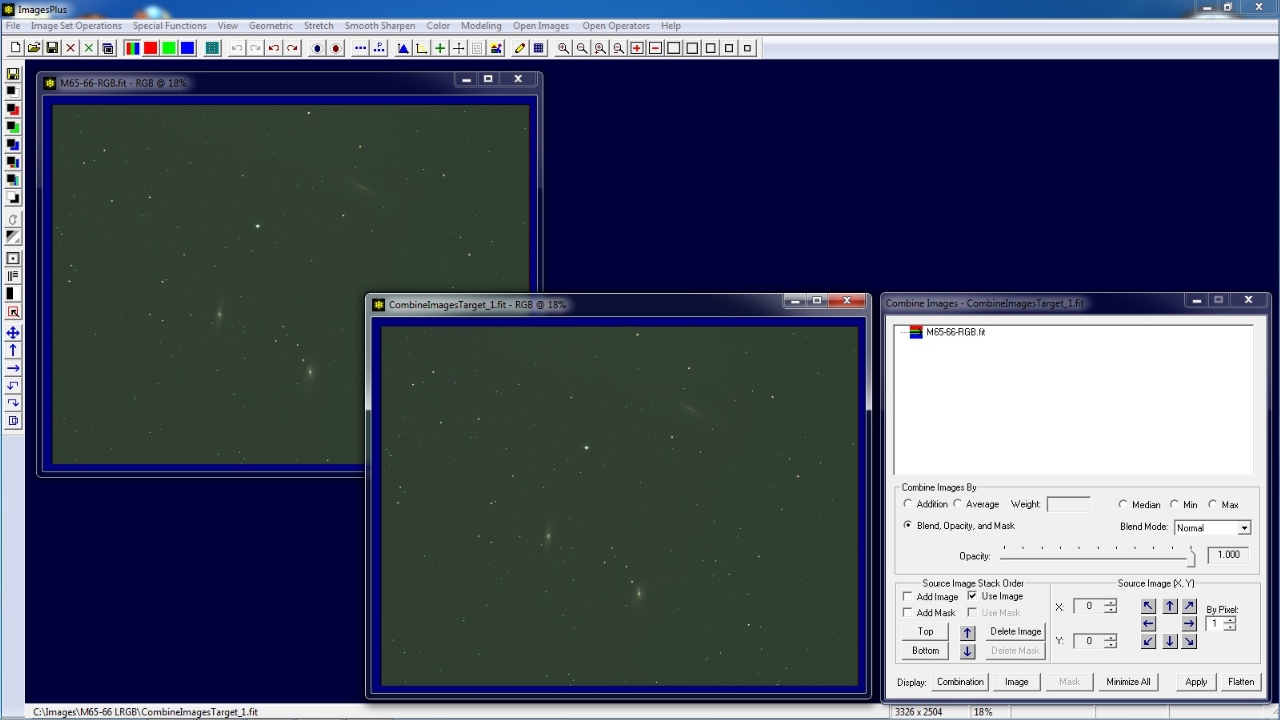
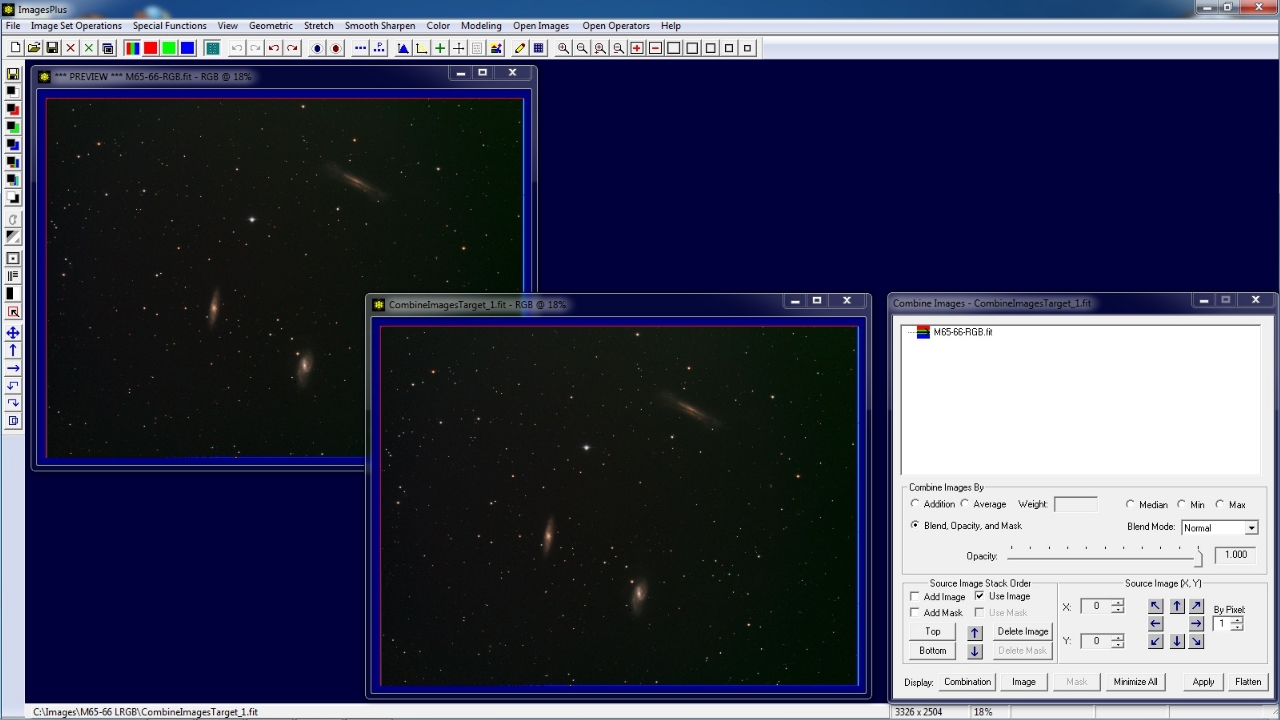
Step 5) Add RGB Layer - (Starting Point for DSLR and one shot color CCD)
Open the color RGB image M65-66-RGB.fits then select Special Functions | Combine Image Using | Blend Mode, Opacity, and Masks from the main ImagesPlus menu.
 |
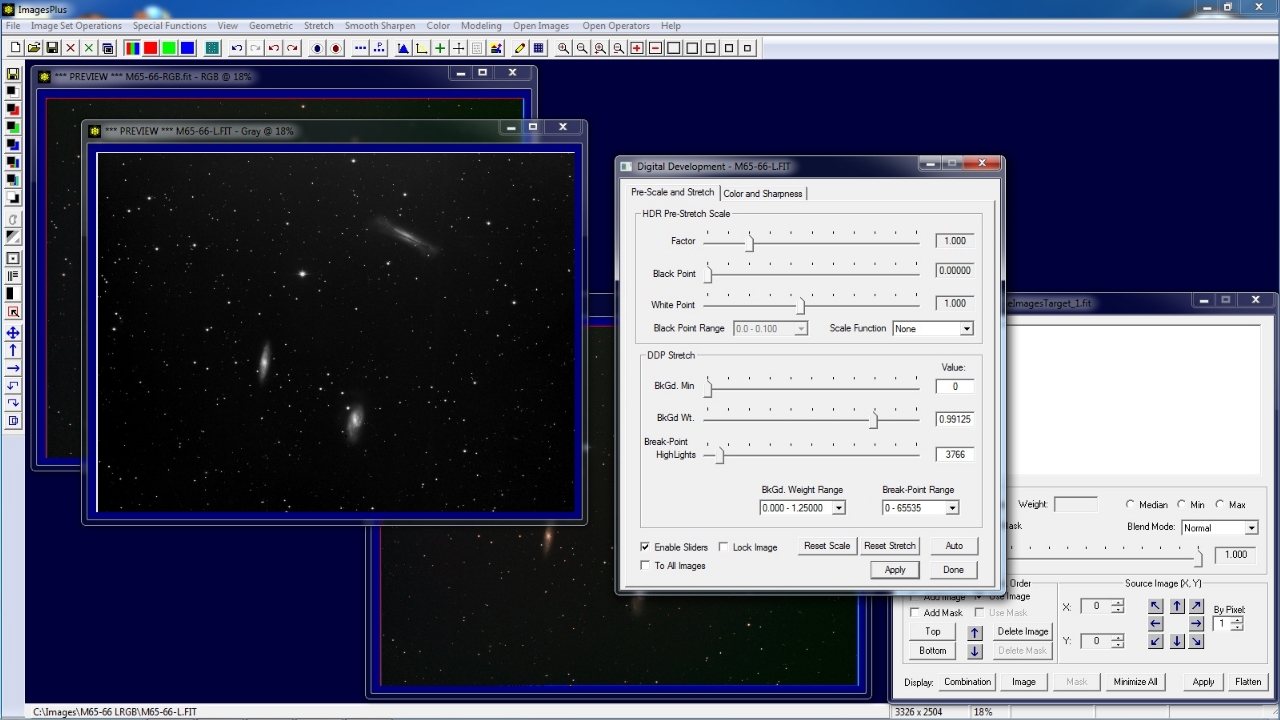
Step 6) Use Digital Development to Increase Brighness and Emphasize Color of the RGB Layer
When using digital development first adjust the break-point and backgound wt. sliders on the Pre-Scale and Stretch tab to brighten the color image. The optional nth-root pre-stretch scale function and power slider could also be used to increase brightness
of fainter areas of the image without blowing out the brightest areas.
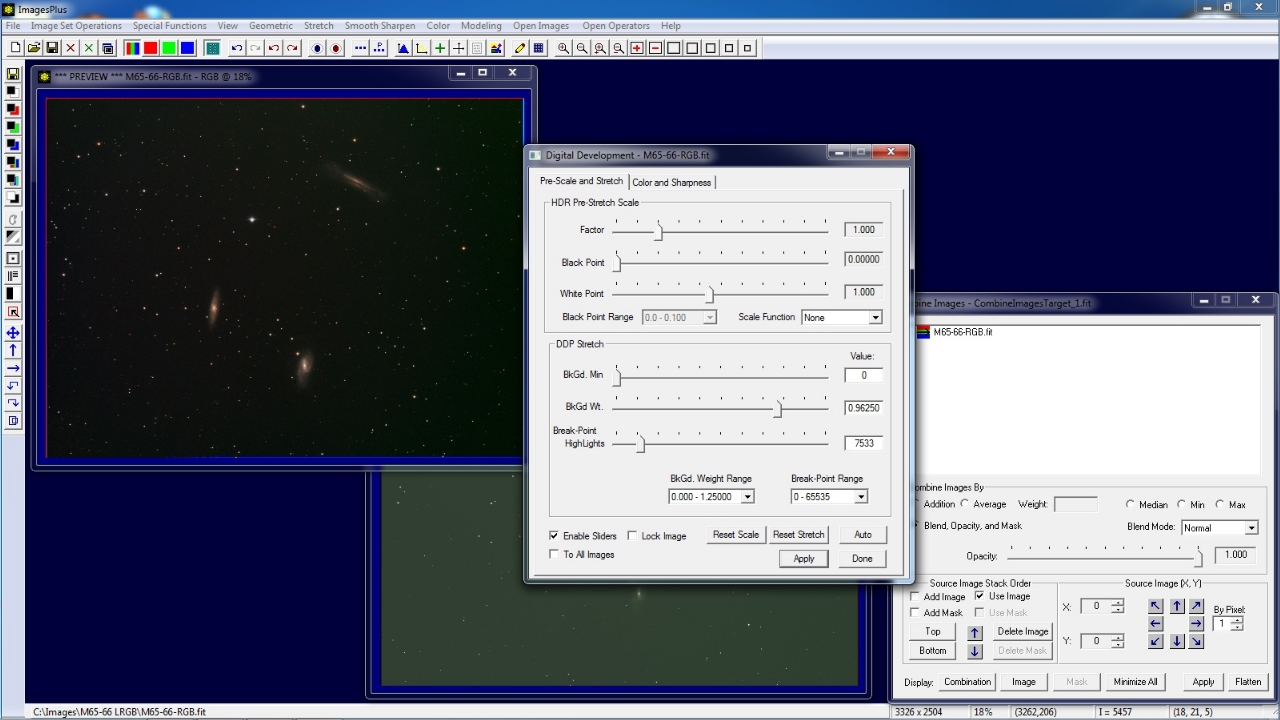 |
The color emphasis red, green, and blue sliders can be use to offset color compression from a very aggressive brightness increase.
 |
Close Digital Development then press Apply on Combine Image & Mosaic to update the composite image.
 |
Step 7) Increase Brightness of the Luminance Image with Digital Development
Open the luminance image then apply digital development to increase brightness.
 |
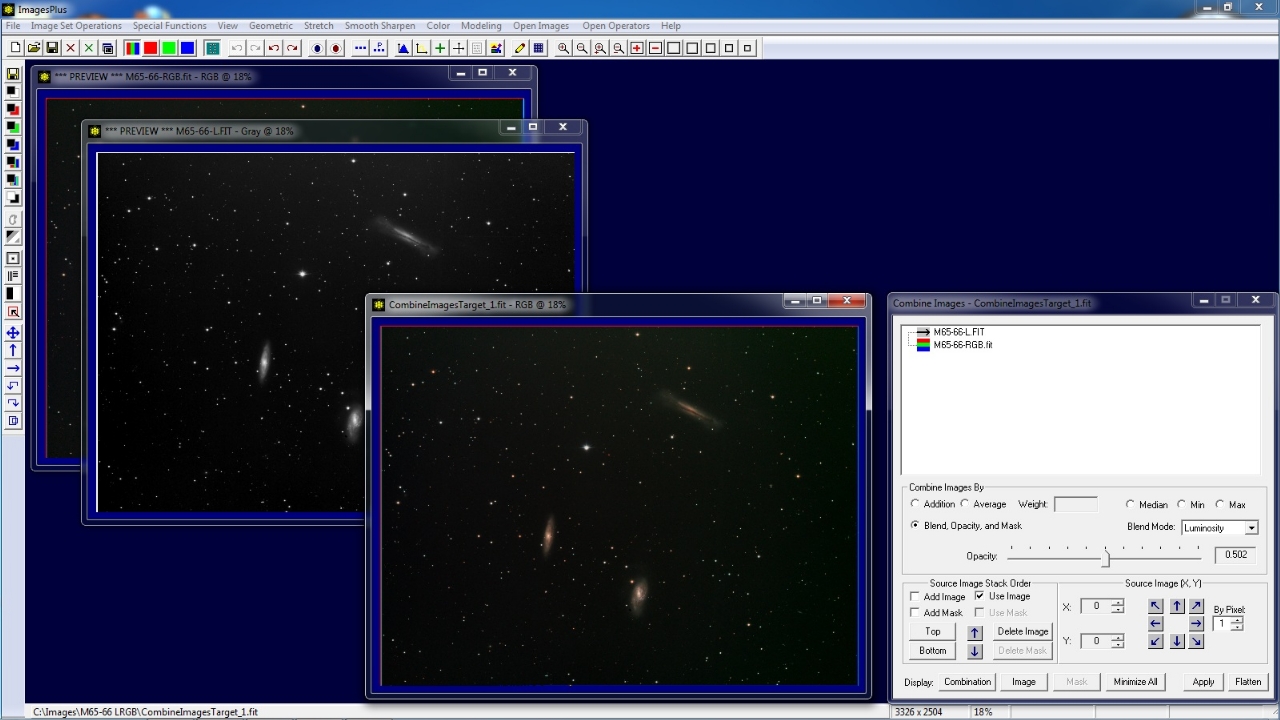
Step 8) Add First Luminance Layer to Make LRGB Composite
To add the first luminance layer check the Add Image box on Combine Images & Mosaic then left click on the luminance image. Set the blend mode of the luminance layer to Luminosity and its opacity to ~0.50. In this case the luminance layer is averaged with the luminance from the RGB image.
If opacity of the luminance layer was 1.0 or 100% then the luminance layer would 100% replace the luminance of the RGB image. Multiple luminance layers are blend using opacity < 100% to control noise.
 |
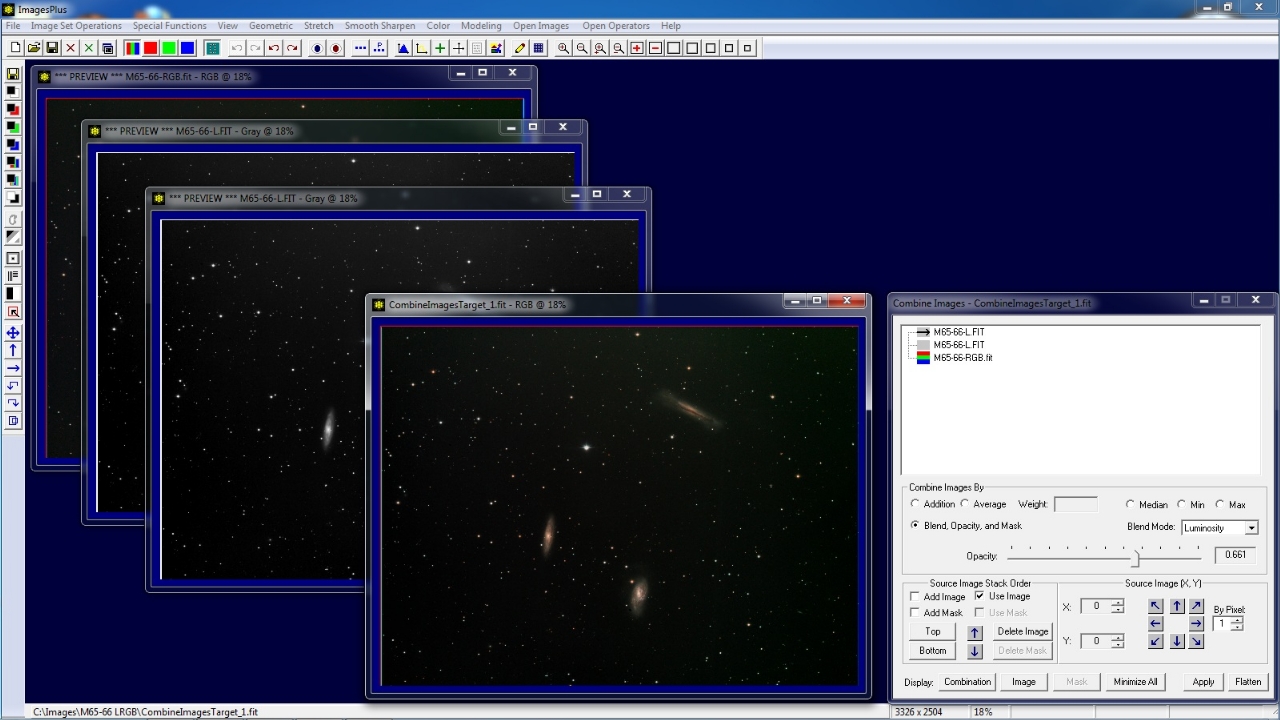
Step 9) Add Second Luminance Layer to Make LLRGB Composite
Left click on the luminance image to activate then use the Duplicate (...) button on the top toolbar to duplicate the luminance image.
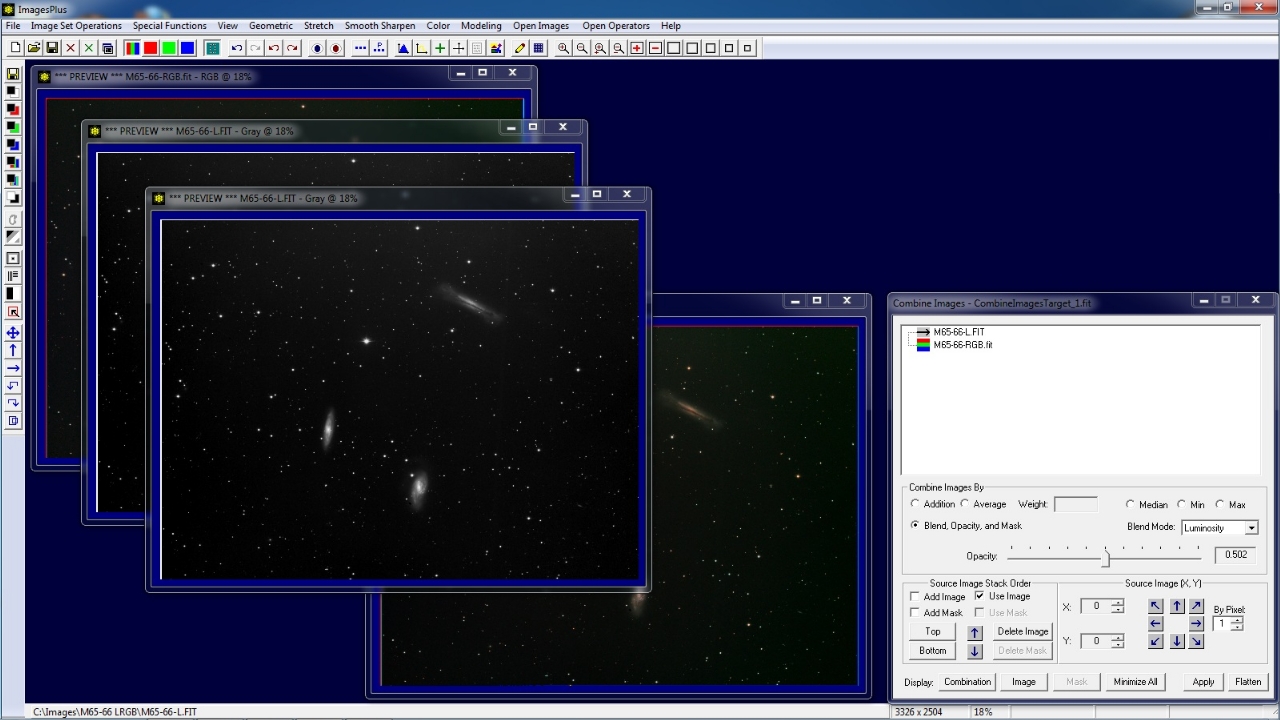 |
Check the Add Image box on Combine Images & Mosaic then left click on the duplicate luminance image. Set the blend mode of the second luminance layer to Luminosity and set its opacity to ~0.65. The second luminance layer blends a little more of the top luminace layer wuth the color LRGB image created by the layers below.
Additional luminance layer can be added and the color data smoothed a little to further reduce noise.
 |
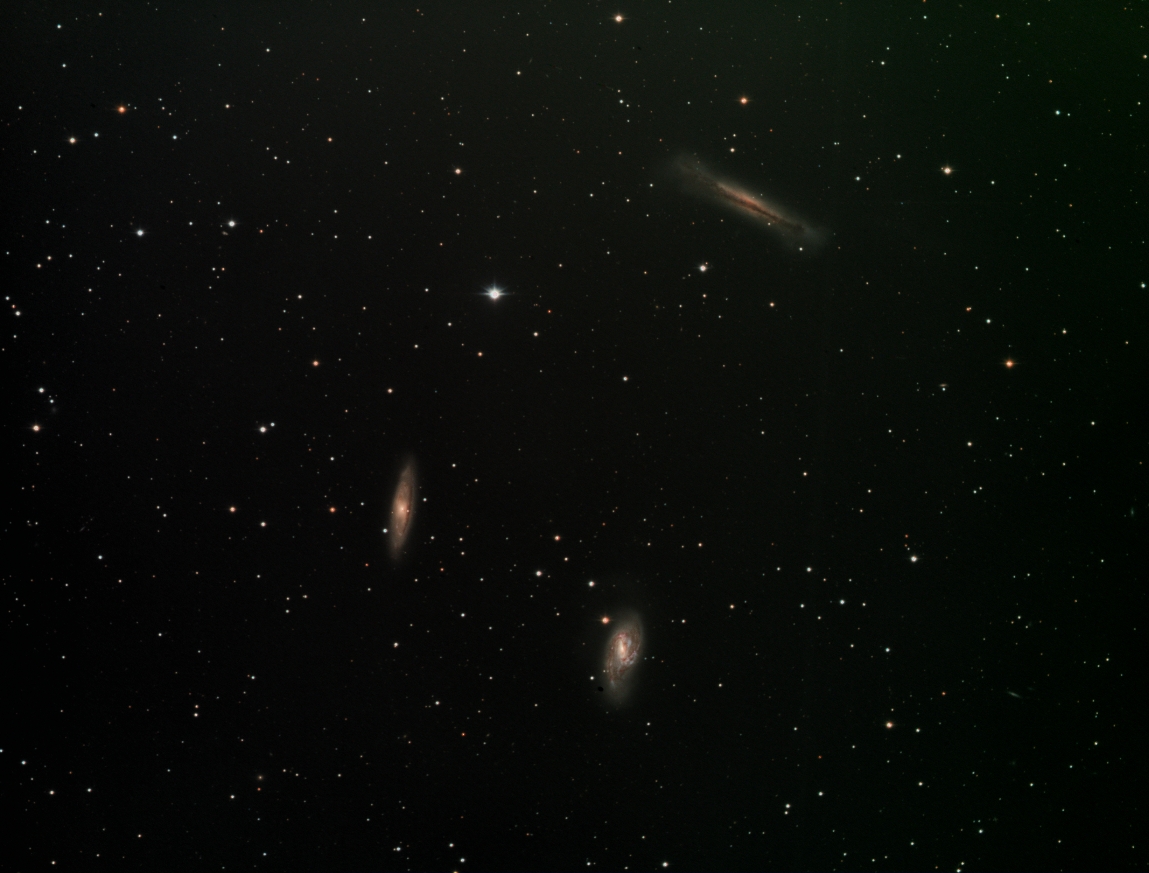
Final composite LLRGB color image ready for gradient removal, lumaince mask sharpening, and selective color mask adjustment.
 |
Copyright © 2012 MLUnsold Digital Imaging. All Rights Reserved.