Combine Image & Mosaic can be used to build a composite image by blending an H-alpha image with the red and luminance data from a color image. To preserve color H-alpha is blended with red from the color image using Lighten (max) blend.
The H-alpha data is then converted to a luminance image and layered on top of the RGB color and H-alpha blend using the Luminosity blending mode. The luminance blending technique is also called luminance layering.
Combine Image & Mosaic allows direct modification of each image layer and its mask to perfect the composite image blend.
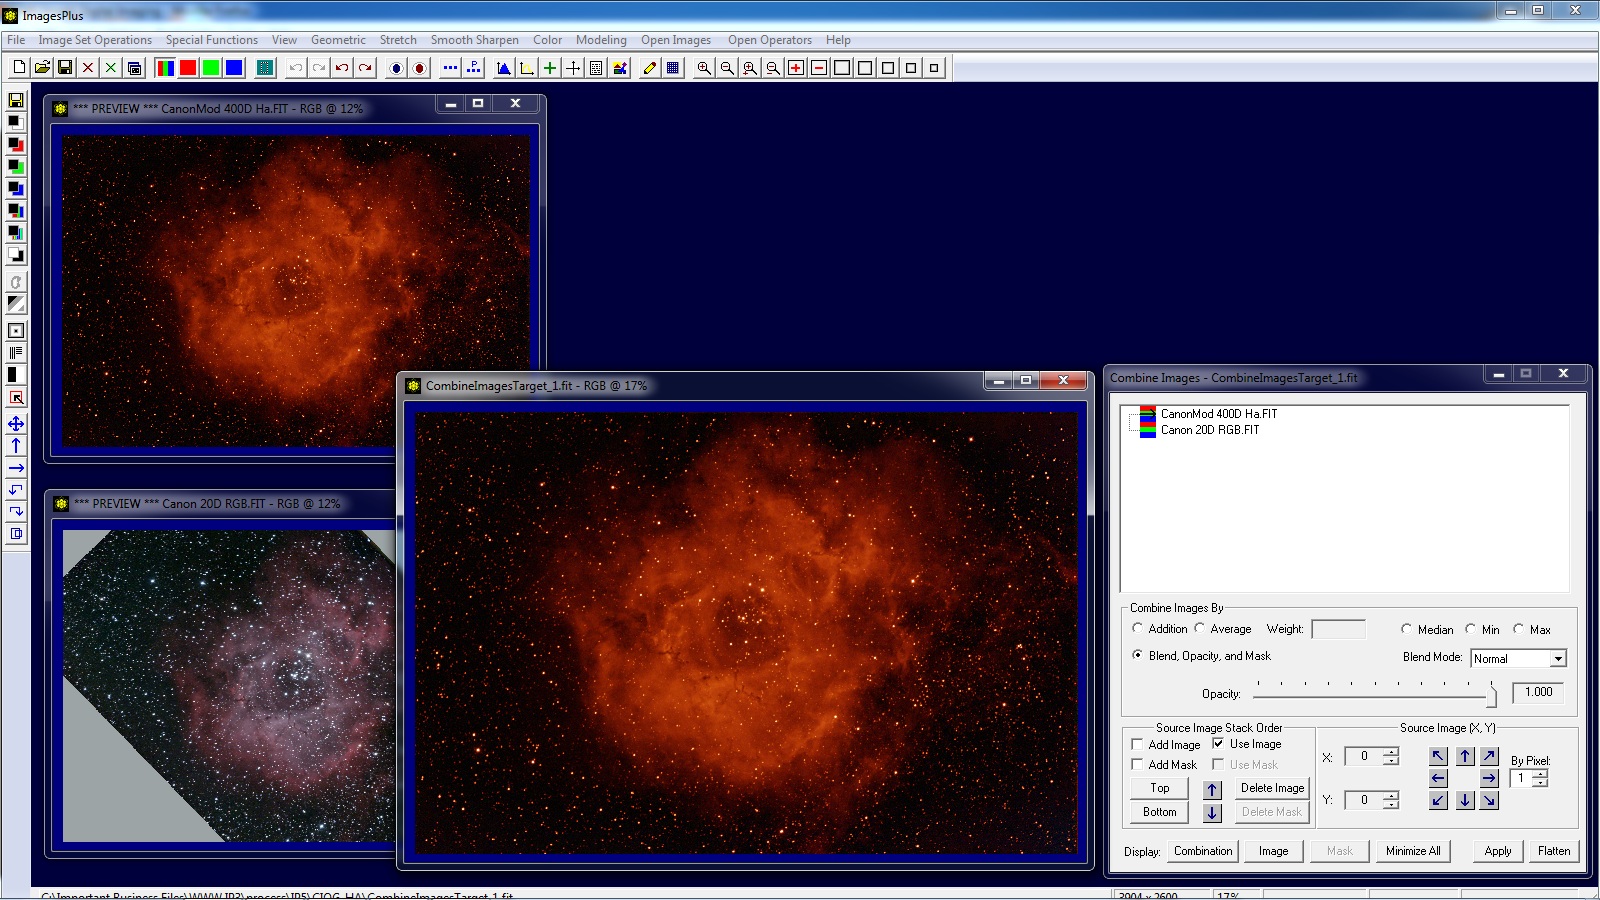
Initial 50 x 120 second RGB image from Canon 20Da left and 30 x 360 second H-alpha image from modified Canon 400D right using an Epsilion 180.
The 20Da RGB image is rotated since it was taken a year before the 400D H-alpha with very different camera orientation.
 |
Step 1) Digital Development Brightness Increase
The brightness of each image is increased using HDR digital development. The H-alpha image right is DDP stretched a little less than the RGB image on left.
 |
Step 2) Add Image Layers to Combine Image & Mosaic Tool
To add both images to the image layer tree of Combine Image & Mosaic use the Special Functions | Combine Images Using | Blend, Opacity, and Mask main menu option.
Use the Up and Down arrows in the Source Image Stack Order group of Combine Image & Mosaic to place the 20Da RGB image as the bottom layer and H-alpha image at the top layer.
 |
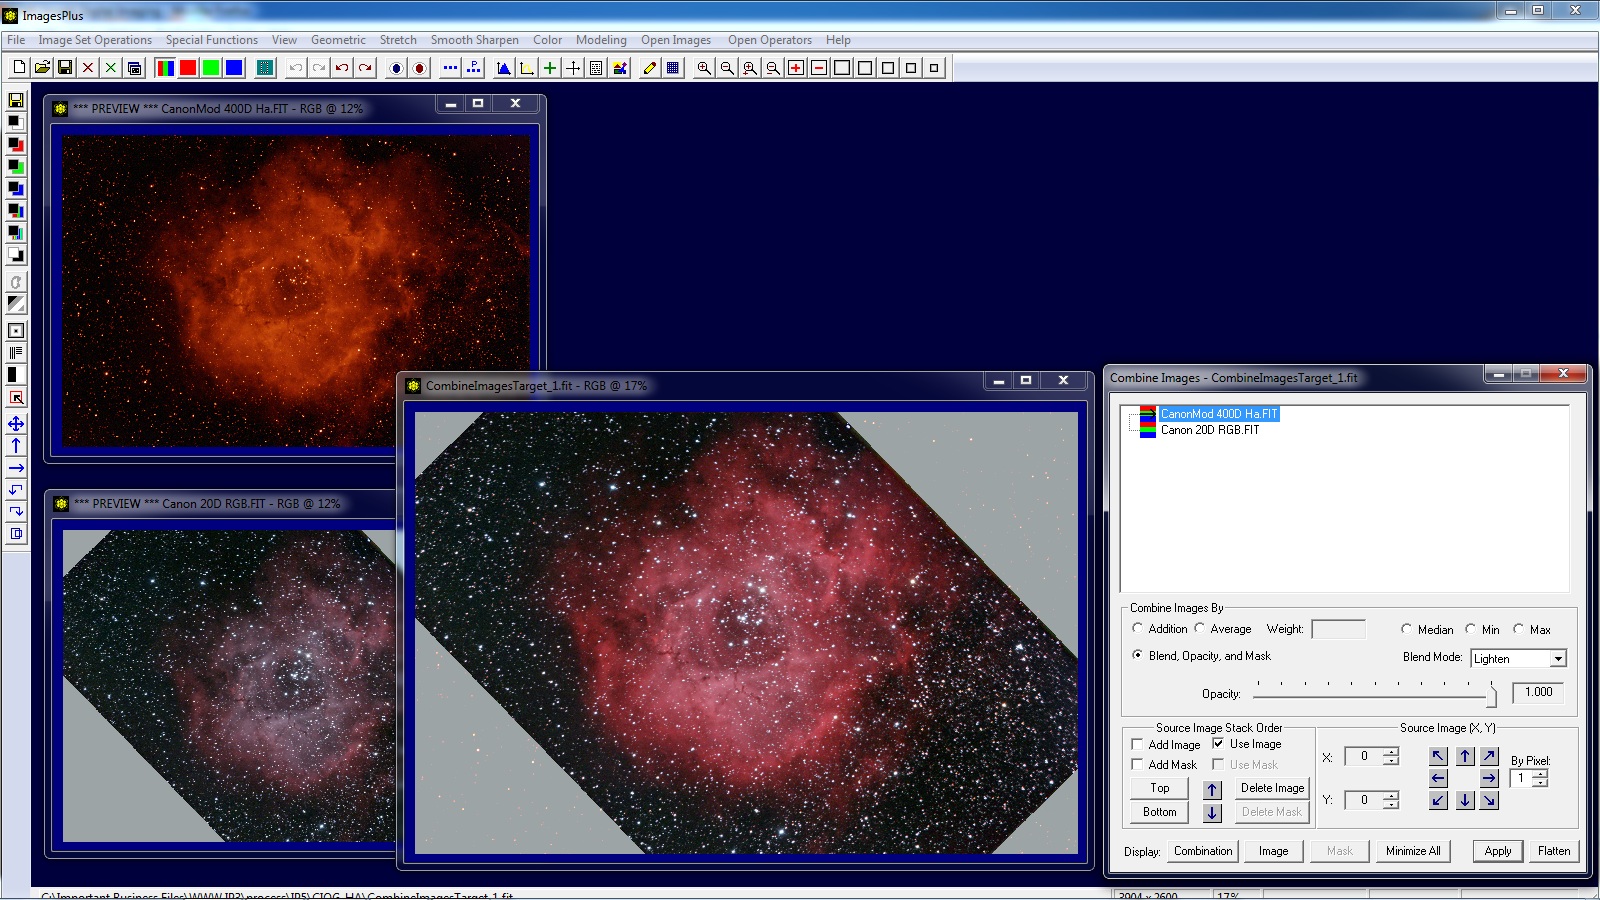
Step 3) Blend H-alpha with Red
Select the H-alpha top layer in the layer tree then set the layer blend mode to Lighten. Red detail is enhanced and color is preserved.
 |
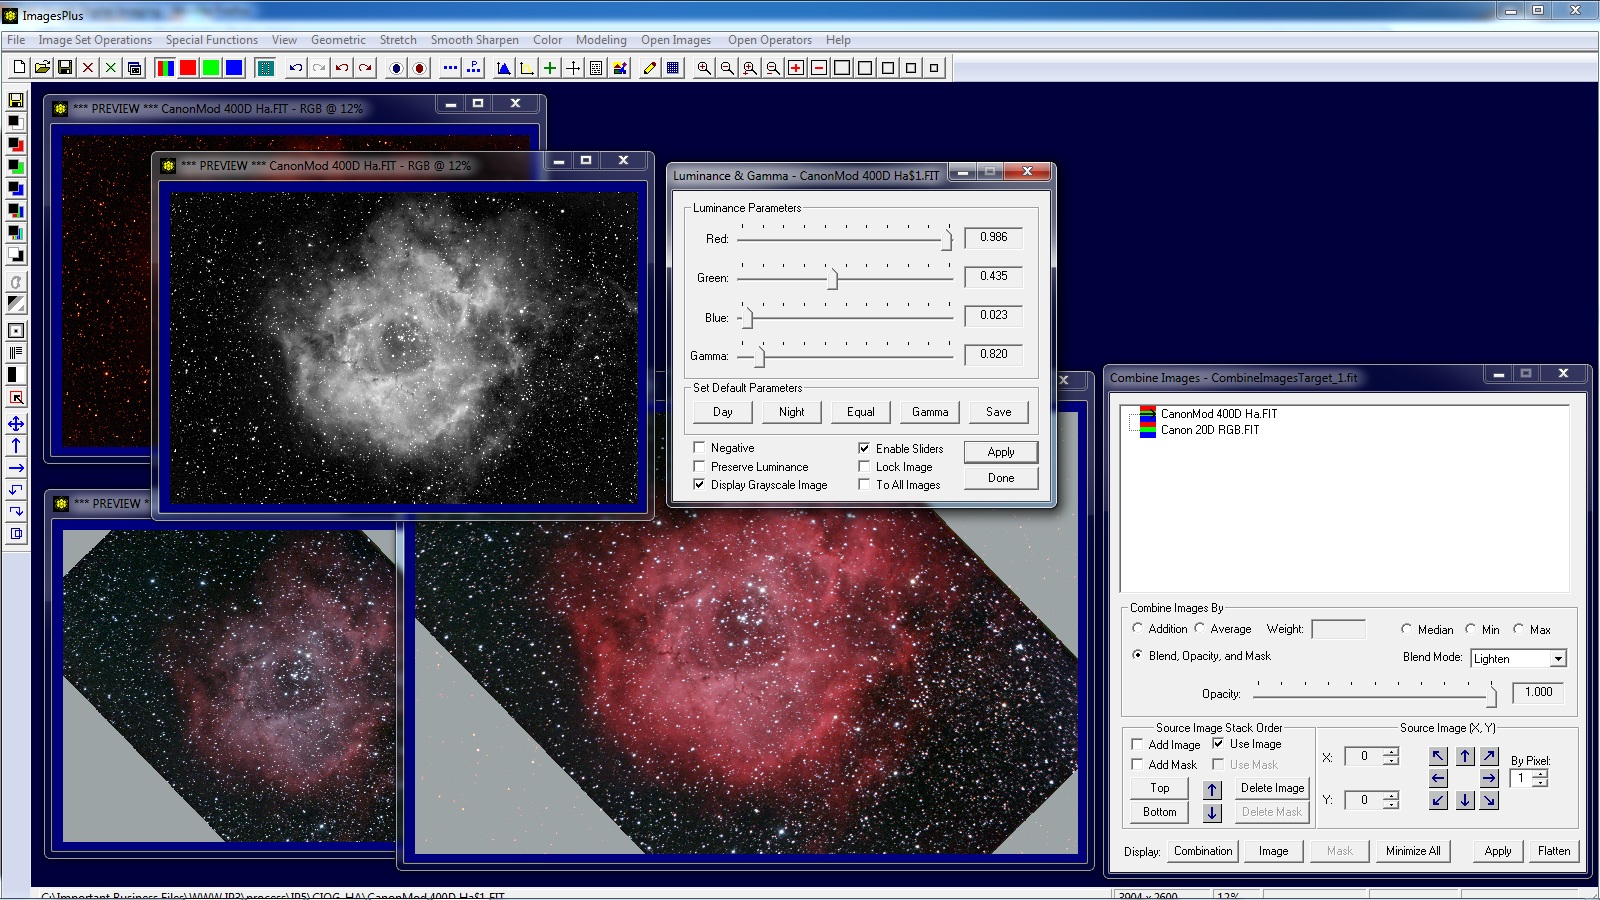
Step 4) Create Luminance Layer From H-alpha
Select the top H-alpha layer in the layer tree then press the Image button on Combine Image & Mosaic to display and activate the H-alpha image. Press the Custom Luminance button on the left vertical toolbar to create a luminance image from the H-alpha image.
Adjust the red, green, and blue sliders on the Luminance tool to maximize the luminance image.
 |
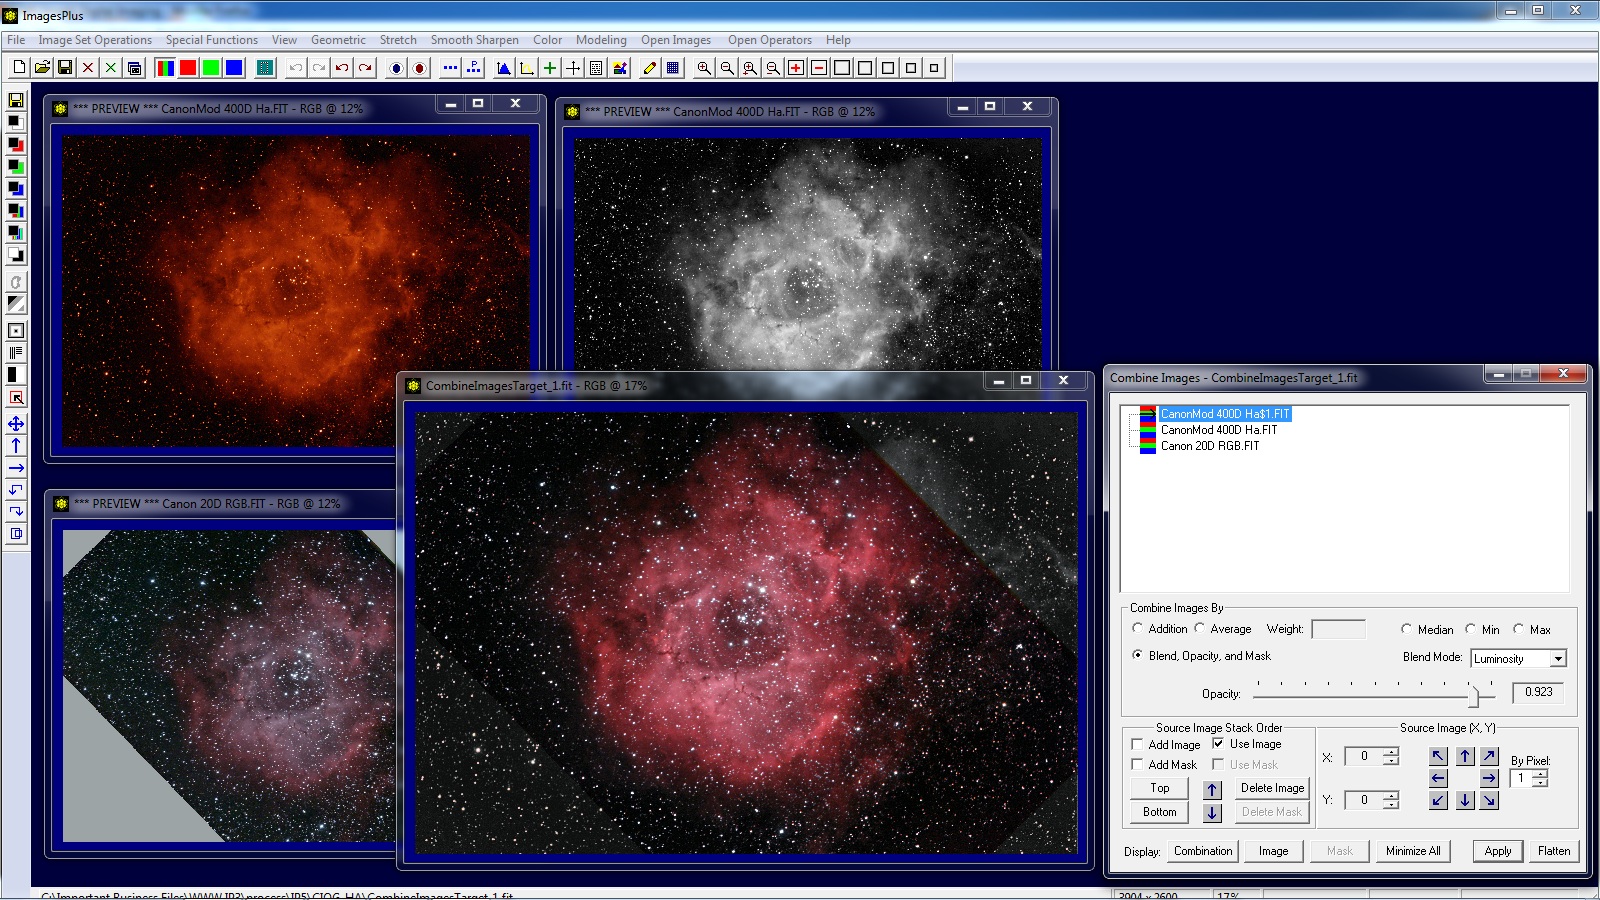
Step 5) Add Luminance Layer
Close the Luminance & Gamma tool. Check the Add Image box on Combine Image & Mosaic then left click on the H-alpha luminance image to add it to the top of the layer tree.
Set the blend mode of the top luminance layer to Luminosity. If opacity is set to 1.0 then the luminosity of the RGB and H-alpha red image is replaced 100% with the luminosity of the top layer. Reduce opacity to blend the luminosity of the top layer with the luminosity of the layers below.
This technique is called luminance layering.
 |
Step 6) Flatten Composite Layers for Further Processing
Press the Flatten button on Combine Image & Mosaic to close the tool. Close the RGB, H-alpha, and H-alpha luminance images. Place the composite in the upper left corner of the compter screen and use the + toolbar button to adjust display of the composite.
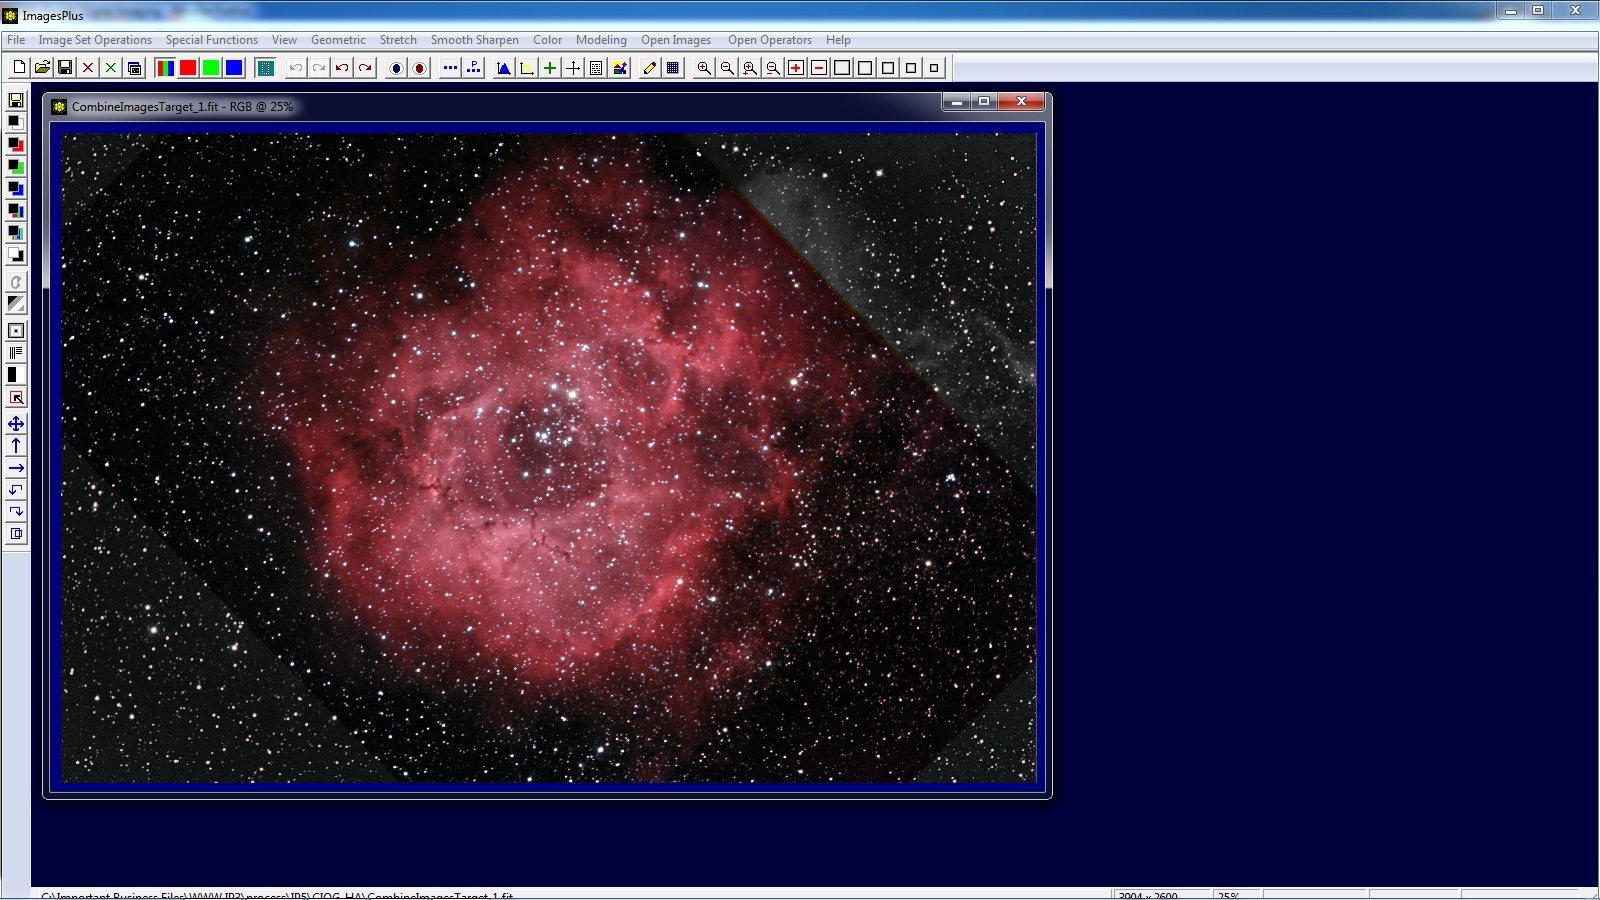 |
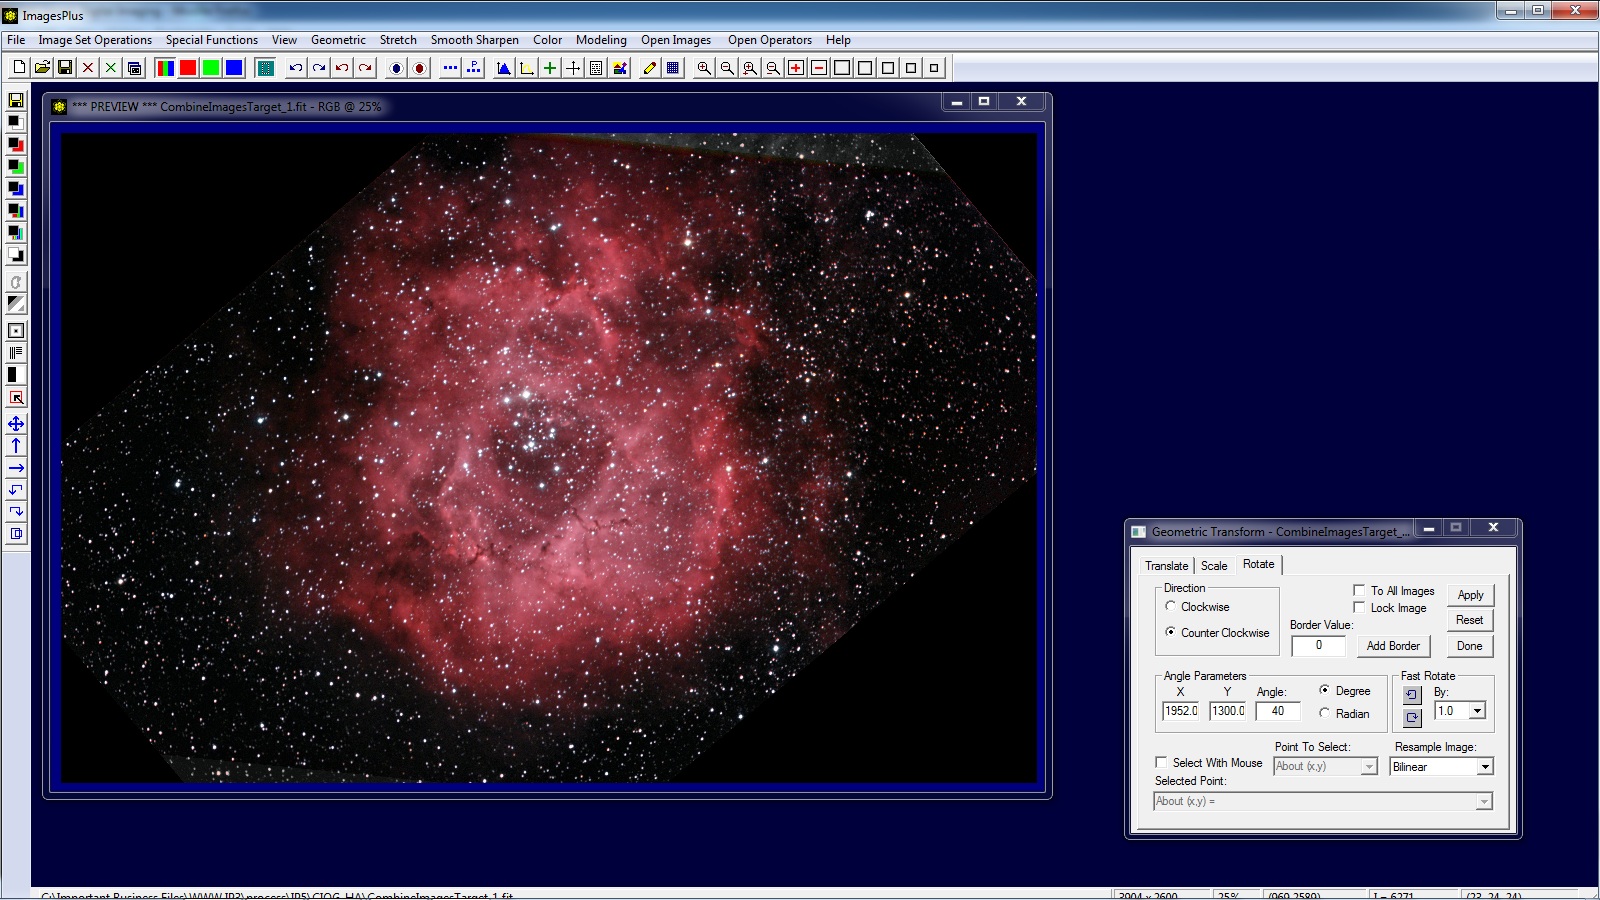
The Geometric | Transform | Rotate tool can be used to rotate the composite.
 |
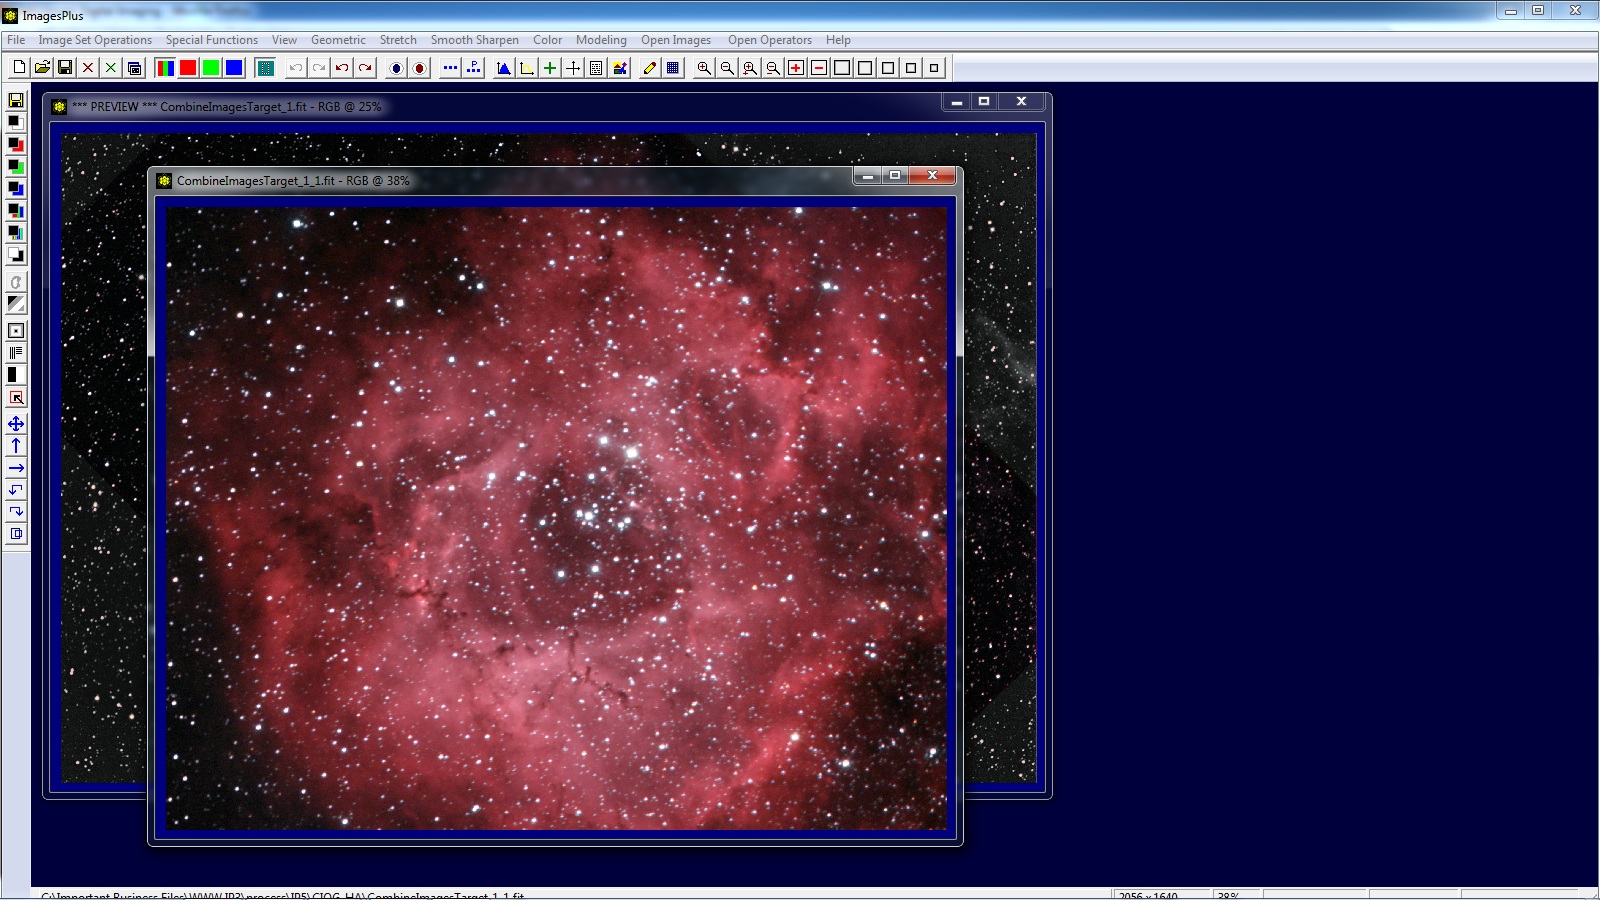
Step 7) Crop Composite
Press the Crop Image button on the top toolbar then left click and drag a rectangle on the composite to define the crop image.
 |
Crop image is created and displayed.
 |
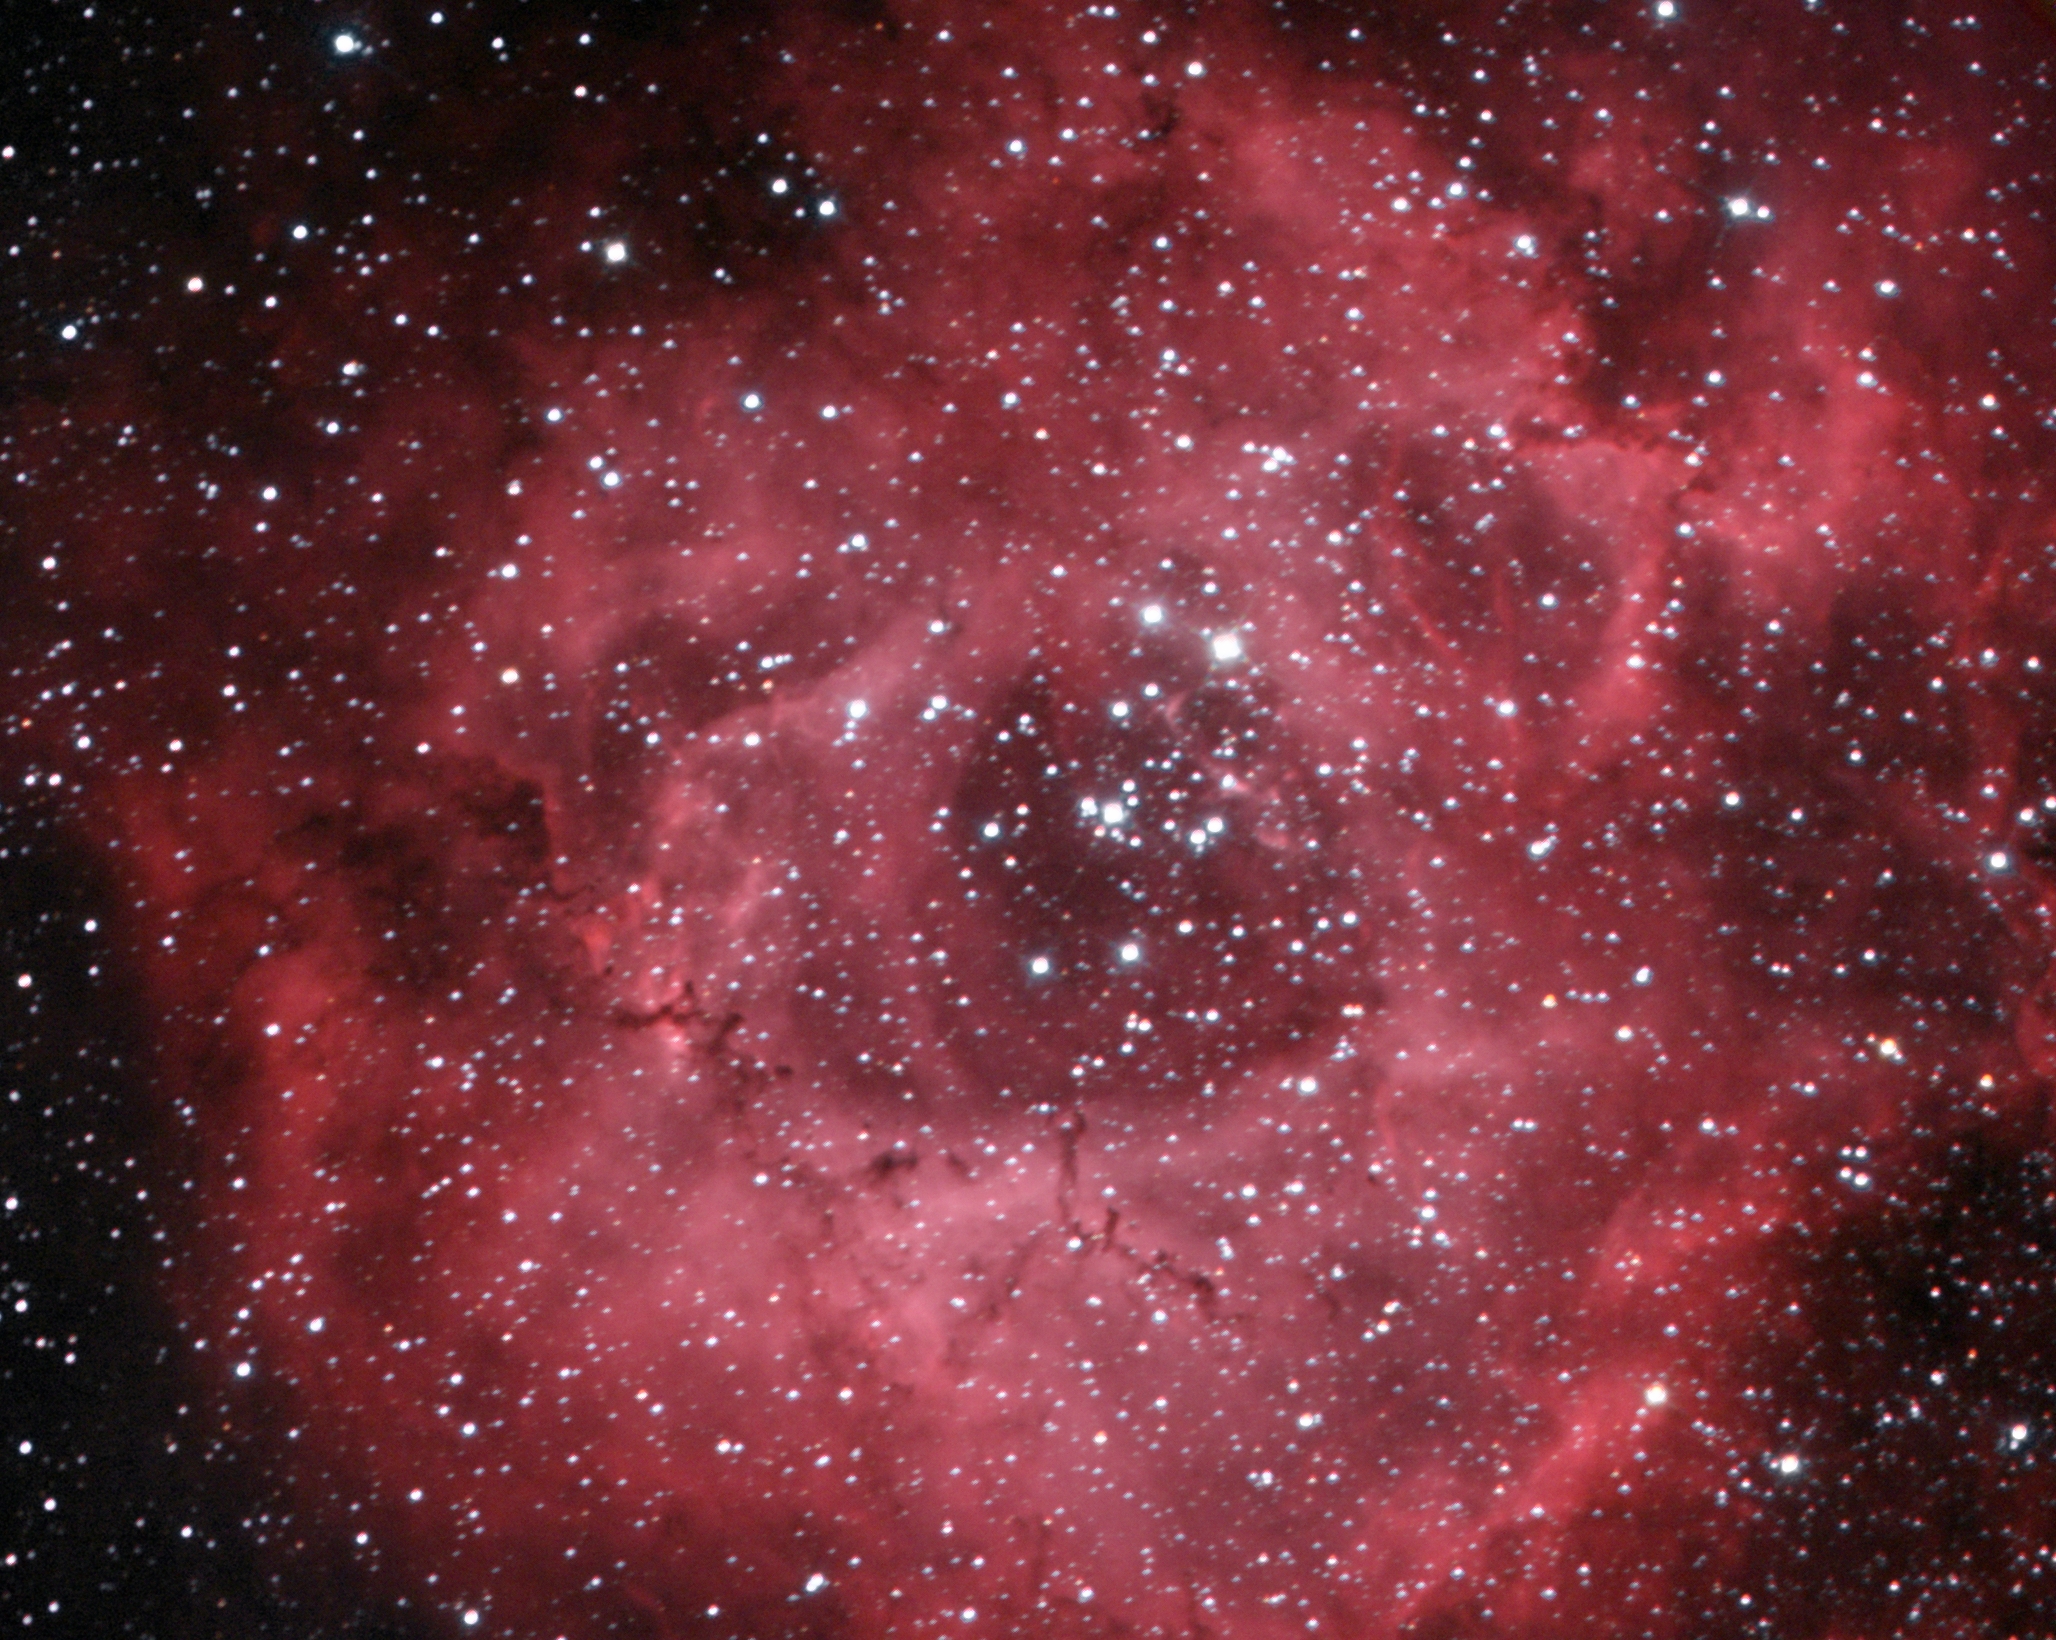
Final composite image with lighten blend of H-alpha with red and H-alpha luminance layer.
 |
Copyright © 2012 MLUnsold Digital Imaging. All Rights Reserved.