Building a Mosaic
The Combine Image & Mosaic tool can be used to build a mosaic from two or more images. The mosaic component images are first aligned using the Mosaic option of Align TSR. Next the mosaic is built from the aligned components using Combine Image & Mosaic.
The components are then processed so that they blend togehter to form the mosaic.
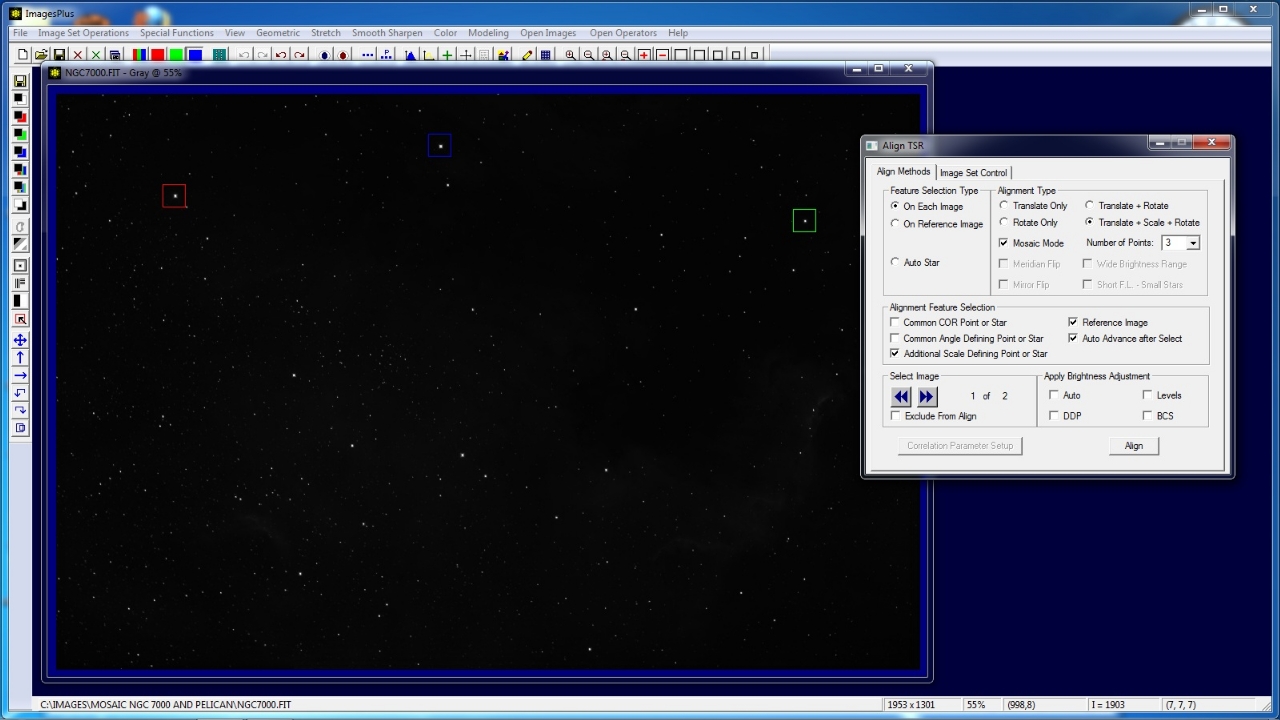
Step 1) Align Images using Image Set Operations | Align TSR Mosaic Mode
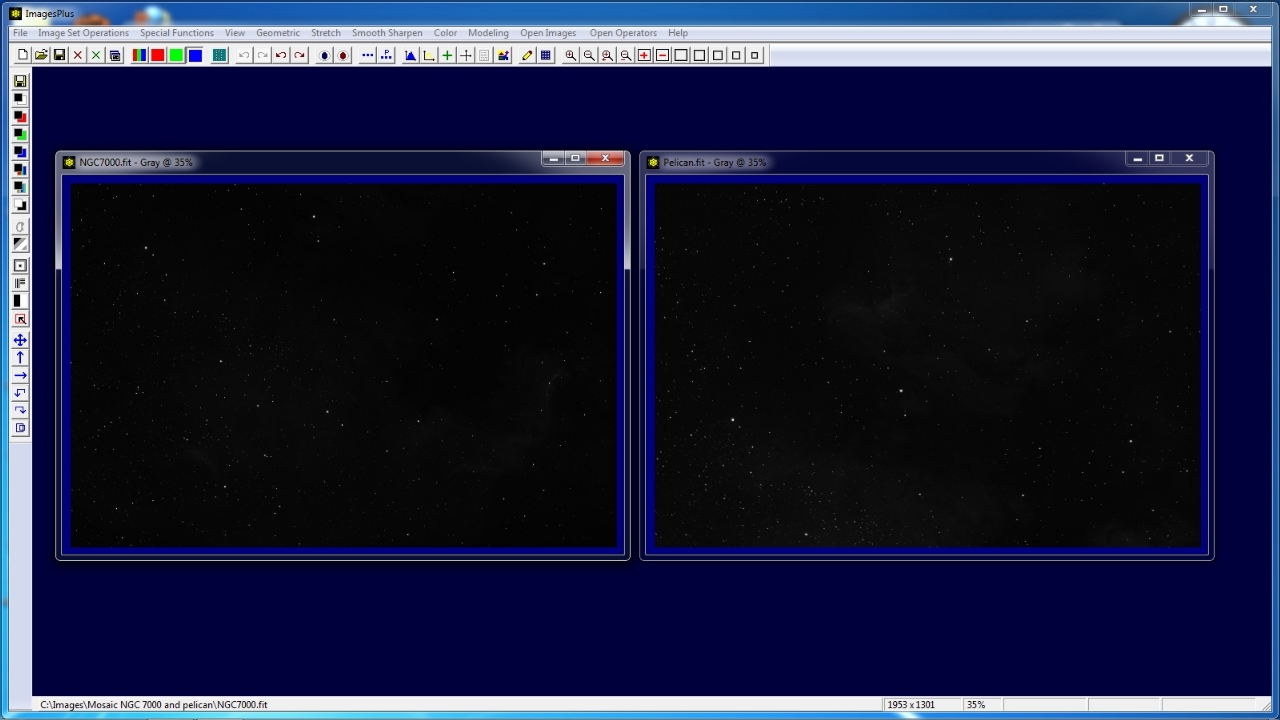
Two component images that will be built into a mosaic. North American Nebula left and Pelican Nebula right. Note the large common overlap of the top third of the North American image and bottom third of the Pelican image.
 |
The two images are selected in Image Set Operations | Align File | Align TSR. On Align TSR select the On Each, 3 star Translate+Scale+Rotate, and Mosaic Mode options. Now select the same 3 stars common to both images. Press the
Align button to align the two images. The Mosaic Mode option will resize both images so that they combine into one image that contains both components.
 |
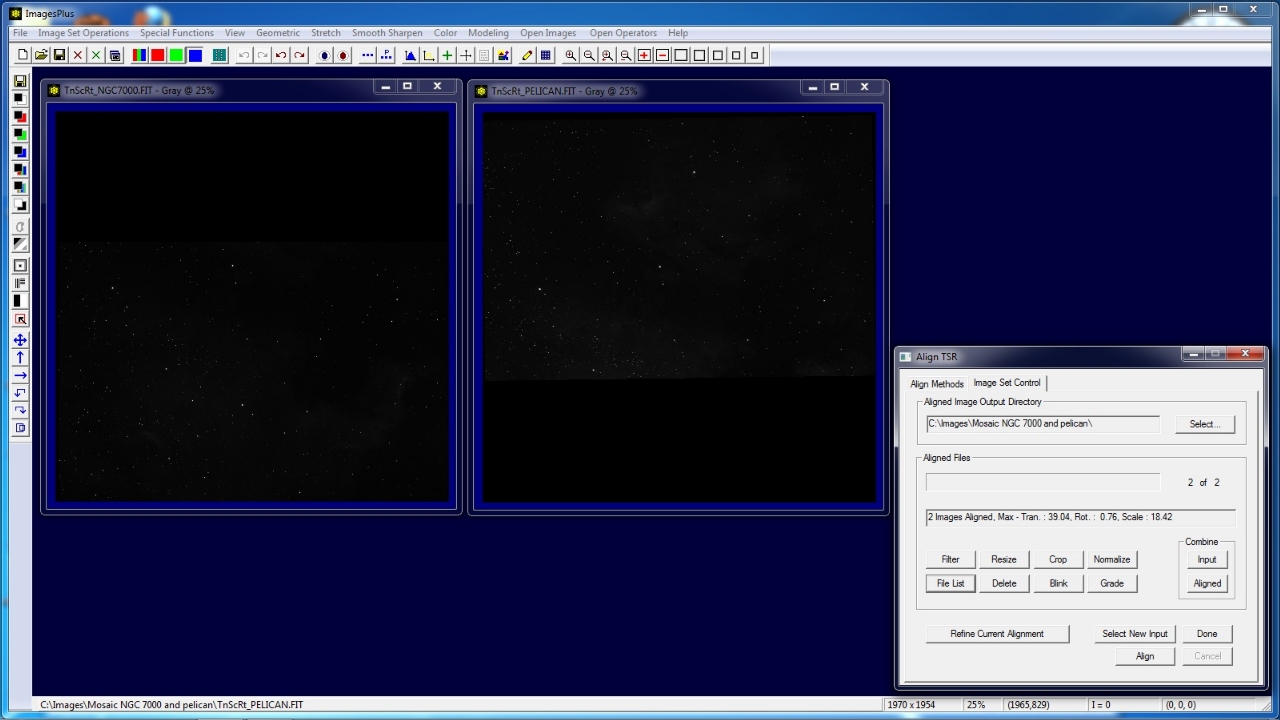
After alignment is finished the File List button will display an input and aligned output file list. Click on the aligned files in the output list to display.
Note the addition of a black area at the top of the North American image and at the bottom of the Pelican image so that the two images combine easily into one image of the correct size.
 |
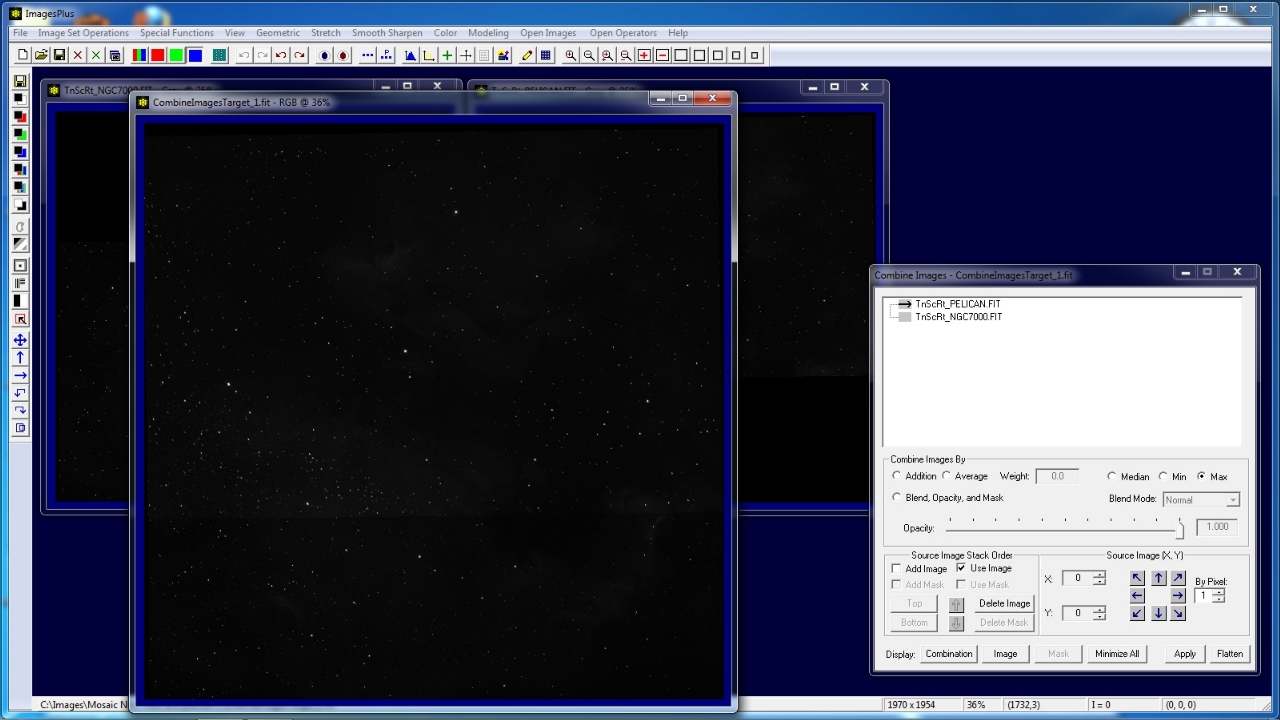
Step 2) Build Mosaic
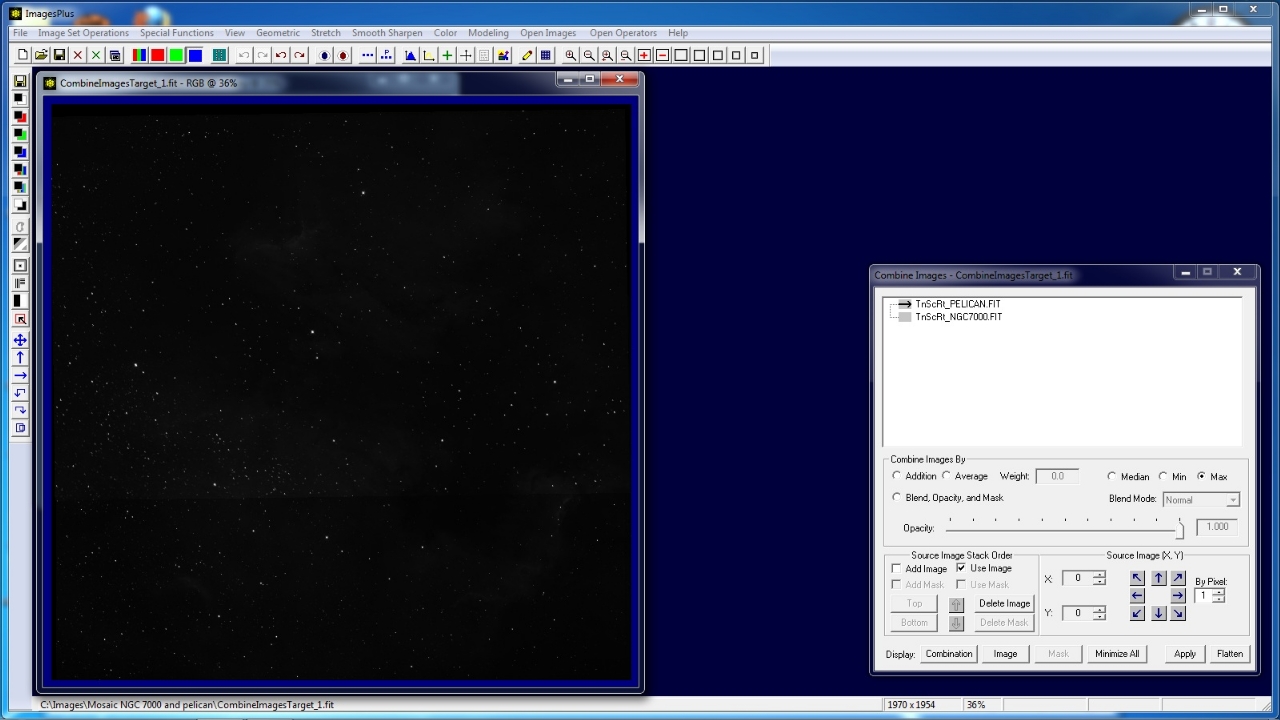
Use the Special Functions | Combine Images Using | Maximum menu option to automatically build the mosaic image. Maximum is used as the combination method to blend the two images.
Many other blending operation can be used with the Blend, Opacity, and Mask option of Combine Images & Mosaic.
 |
The Open Images | Stack menu option is used to arrange the mosaic image window and two component image windows on top of each other for easy management. The Display Combination or Apply buttons on Combine Images & Mosaic are used to display the mosaic image.
The Image and Mask buttons are used to display the selected mosaic component image and mask pointed to by a right arrow in the image layer tree of Combine Images & Mosaic.
 |
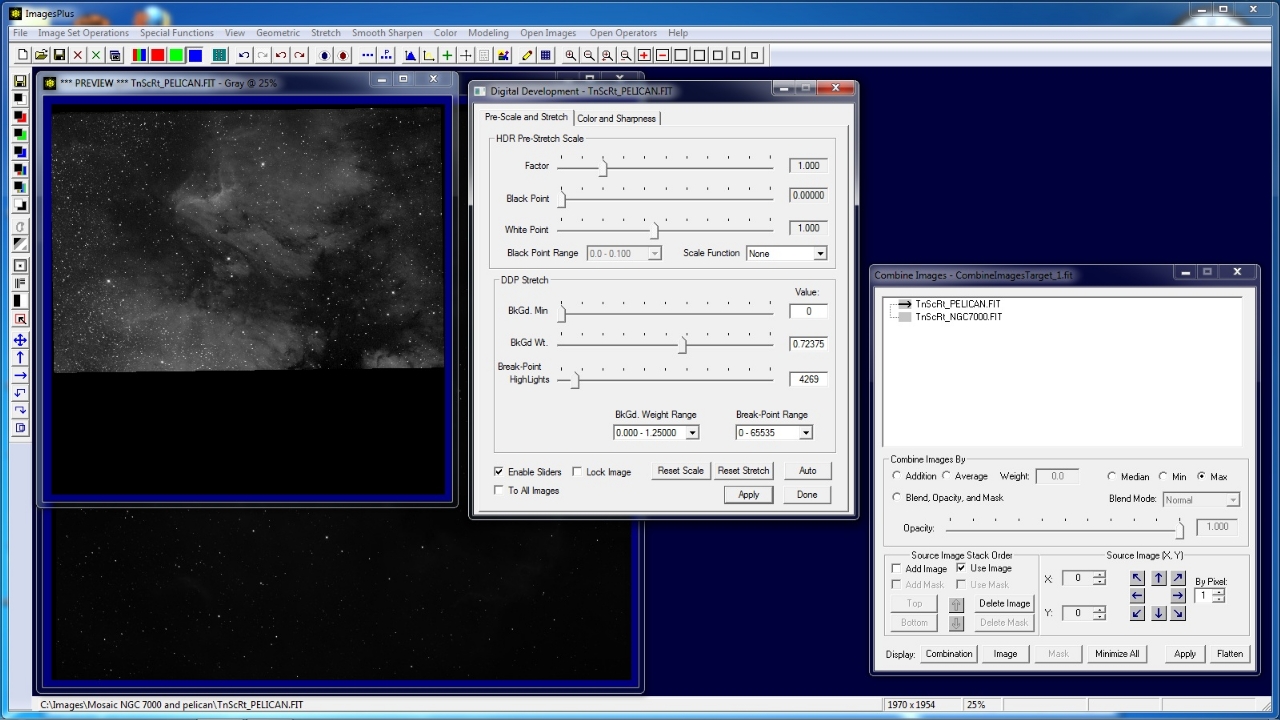
Step 3) Stretch Mosaic Components
Left click on the Pelican Nebula image in the layer tree of Combine Image & Mosaic to make it the current mosaic component then push the Image button to display the Pelican image.
Use digital development or other tool from the Stretch main menu to increase brightness and contrast of the Pelican image.
 |
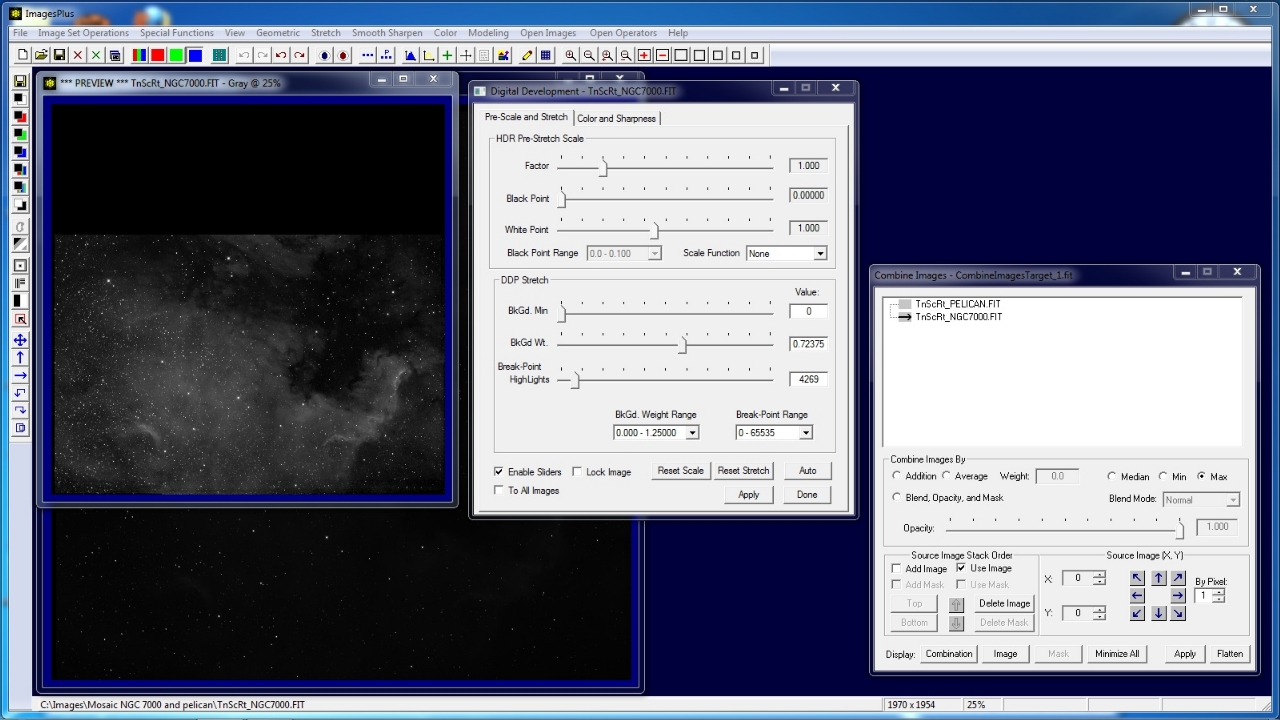
Left click on the North American Nebula image in the layer tree of Combine Image & Mosaic to make it the current mosaic component then push the Image button to display the North American image.
Use digital development or other tool from the Stretch main menu to increase brightness and contrast of the North American image.
 |
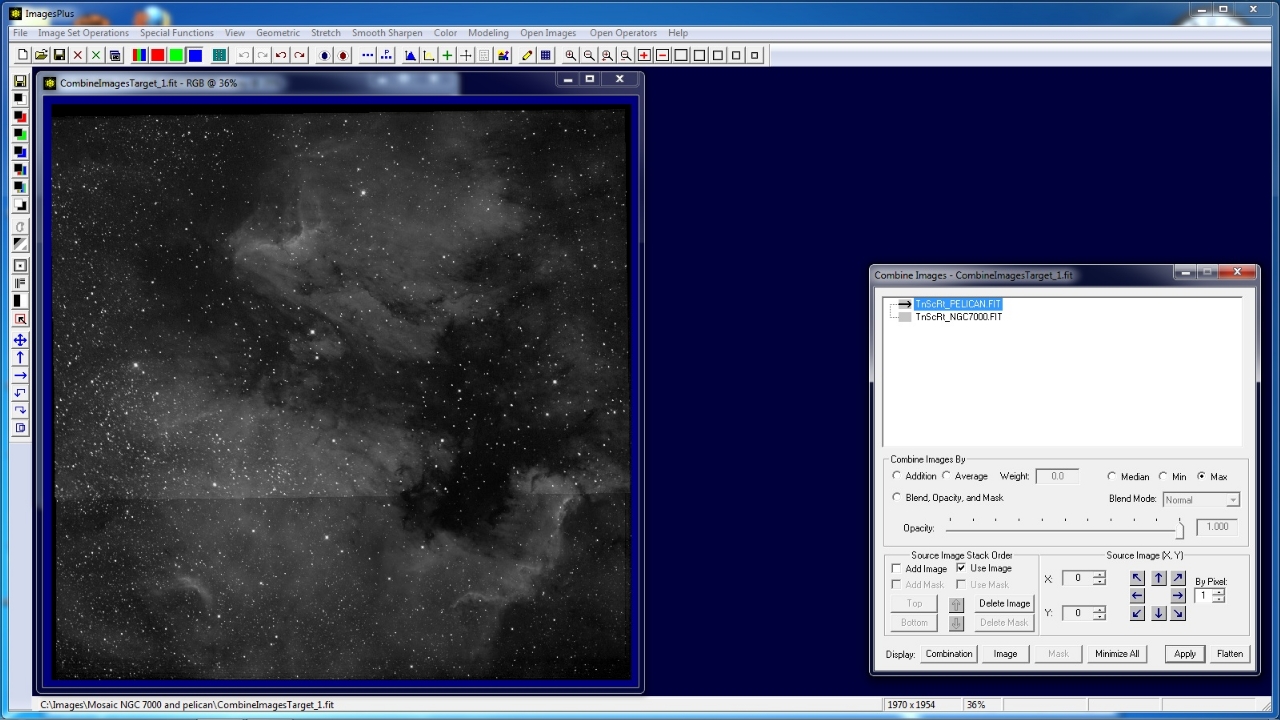
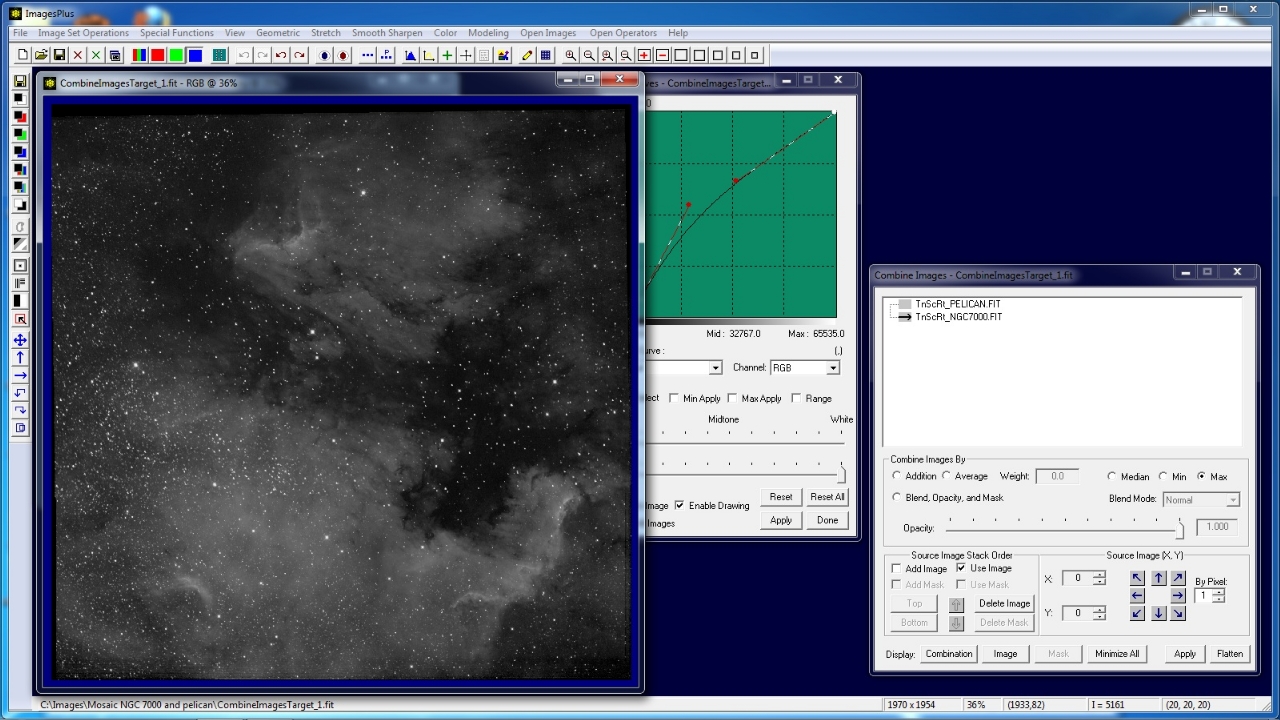
Press Apply on Combine Image & Mosaic to build and display the mosaic image using the stretched component images.
 |
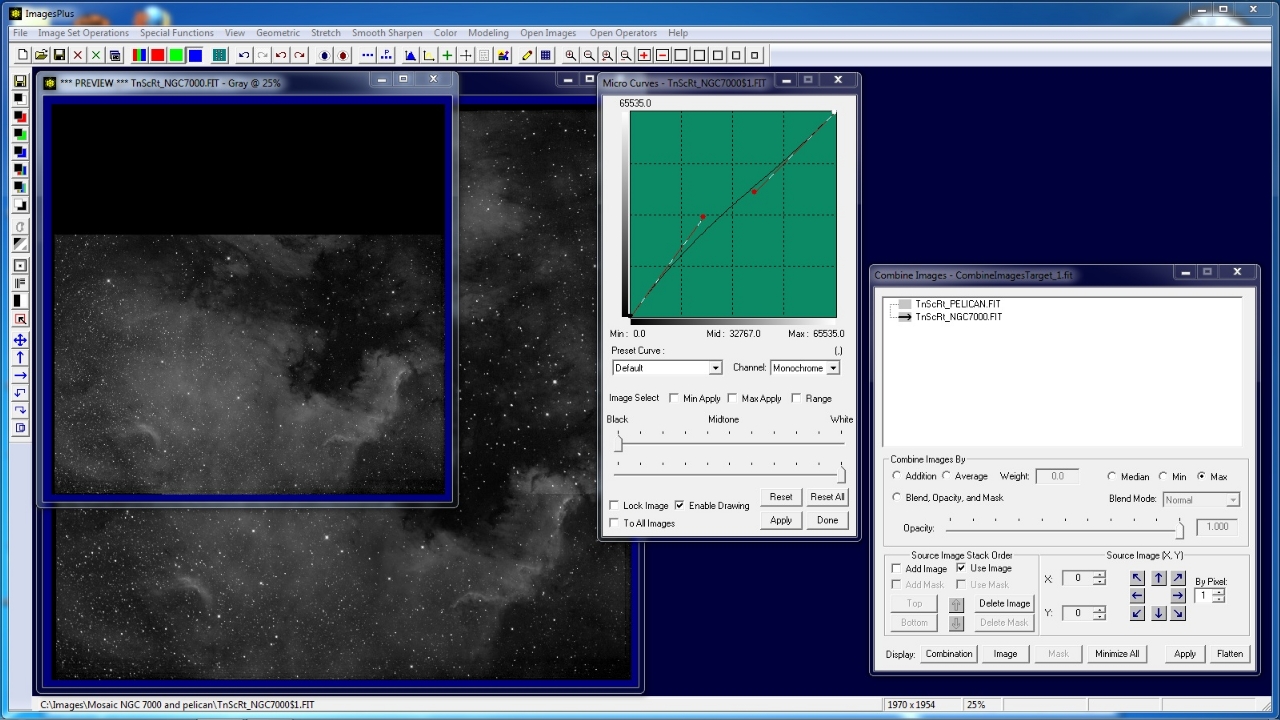
Step 4) Balance Mosaic Components
The North American image needs to be a little brighter to blend correctly in the mosaic. With the North American image selected in the layer tree press the Image button on Combine Image & Mosaic to display the component image.
Micro Curves is used to brighten the North American image.
 |
Press Apply on Combine Image & Mosaic to build and display the mosaic image using the modified component images.
 |
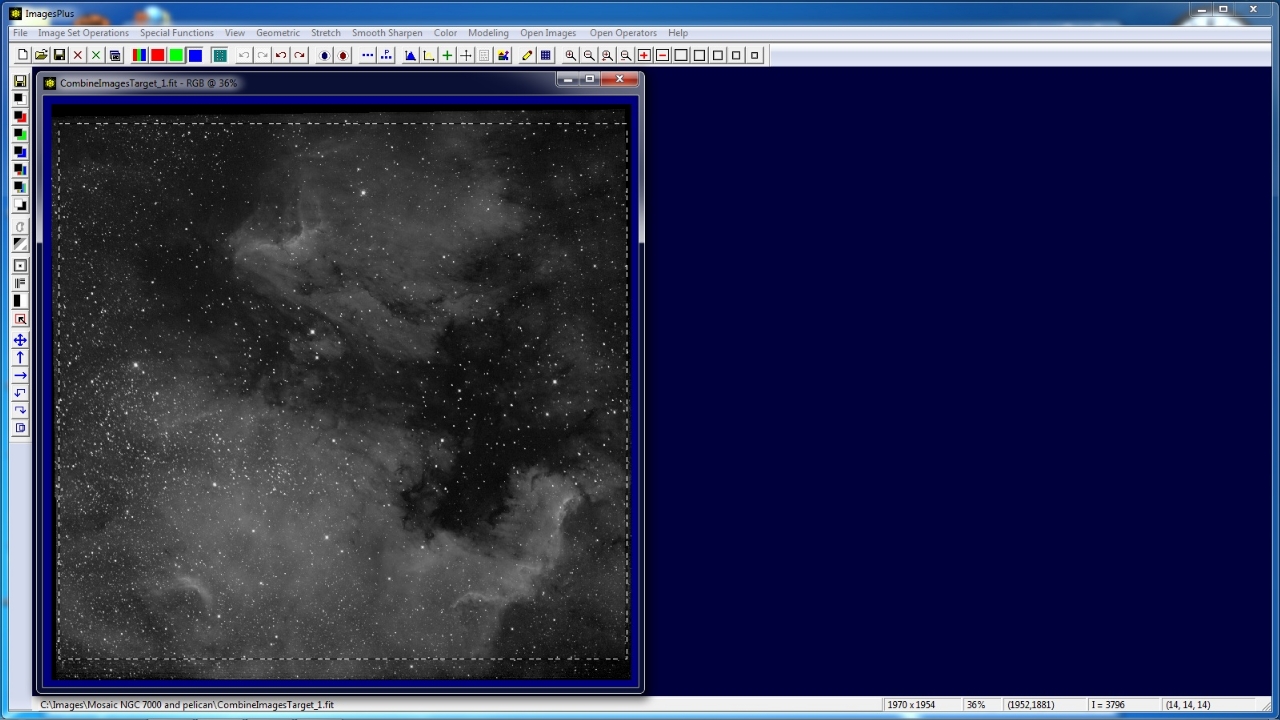
Step 5) Crop & Process Mosaic
Press the Flatten button on Combine Images & Mosaic to close the tool. Close Micro Curves and the two component images.
The mosaic image is now ready for further procressing. To crop the mosaic image press the Crop Image button on the top toolbar then left click and drag a crop rectangle on the mosaic image.
 |
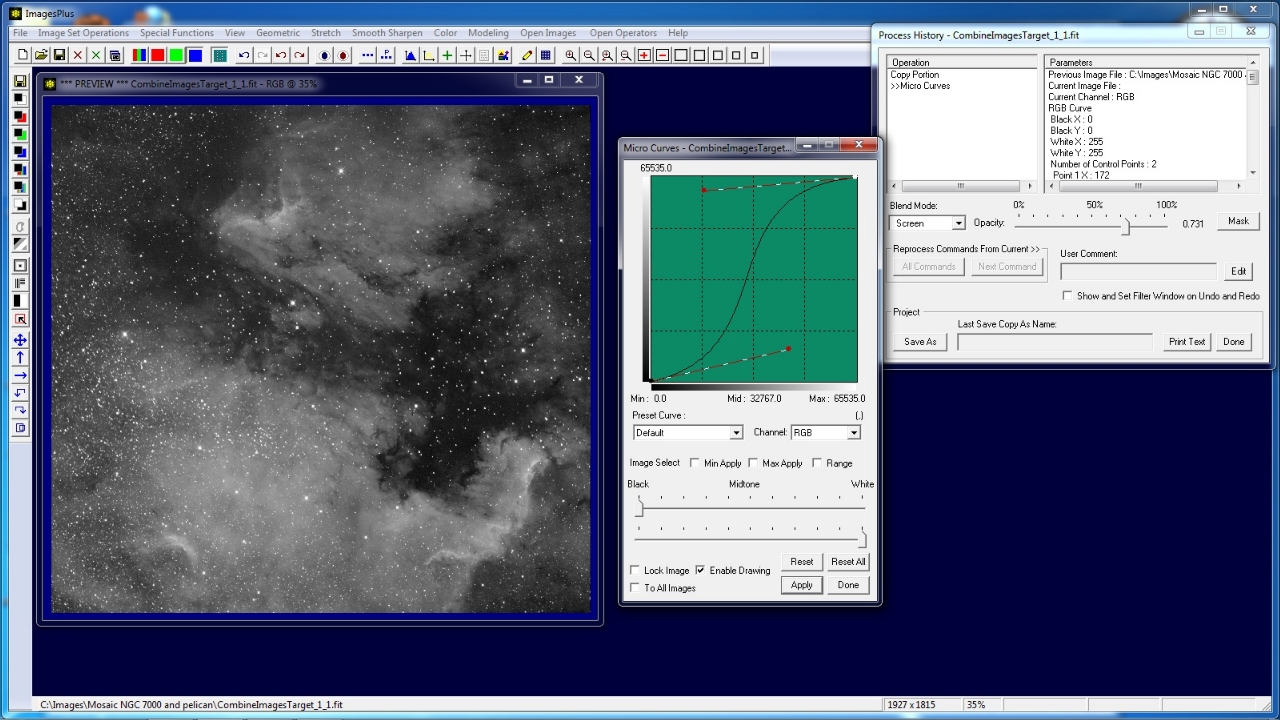
The cropped mosaic image is displayed for further processing. Micro Curves with screen blend mode and opacity = 0.731 is applied to the mosaic.
 |
Copyright © 2012 MLUnsold Digital Imaging. All Rights Reserved.