This tutorial explains how to convert a control point mask created using the Mask Surface tool to an image mask that can be modified using the paint, smoothing, and other image processing tools.
The image mask can then be assigned to a filter in the Process History layer list or to a layer in the Combine Image & Mosaic tool.
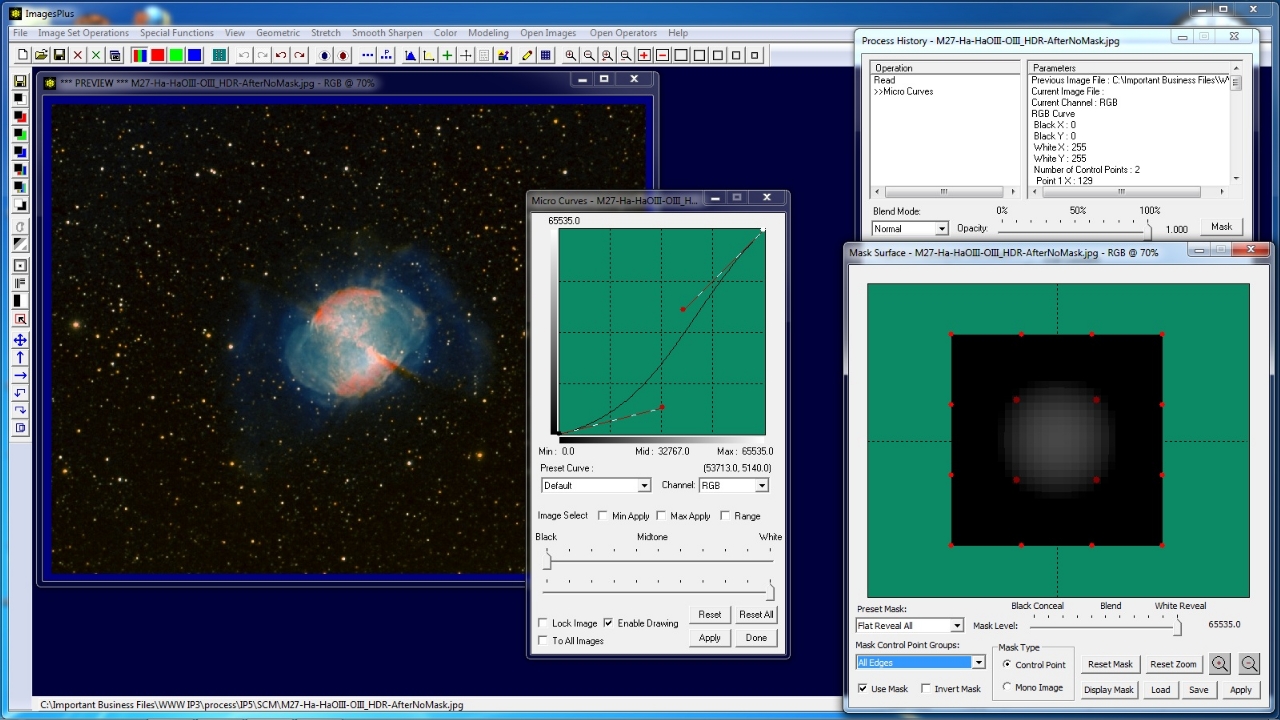
Step 1) Create Control Point Mask
Control point mask shown on the Mask Surface window created by moving the red control points. Additional smoothing, brightness, or paint operations can be applied if the control point mask is converted to an image mask.
 |
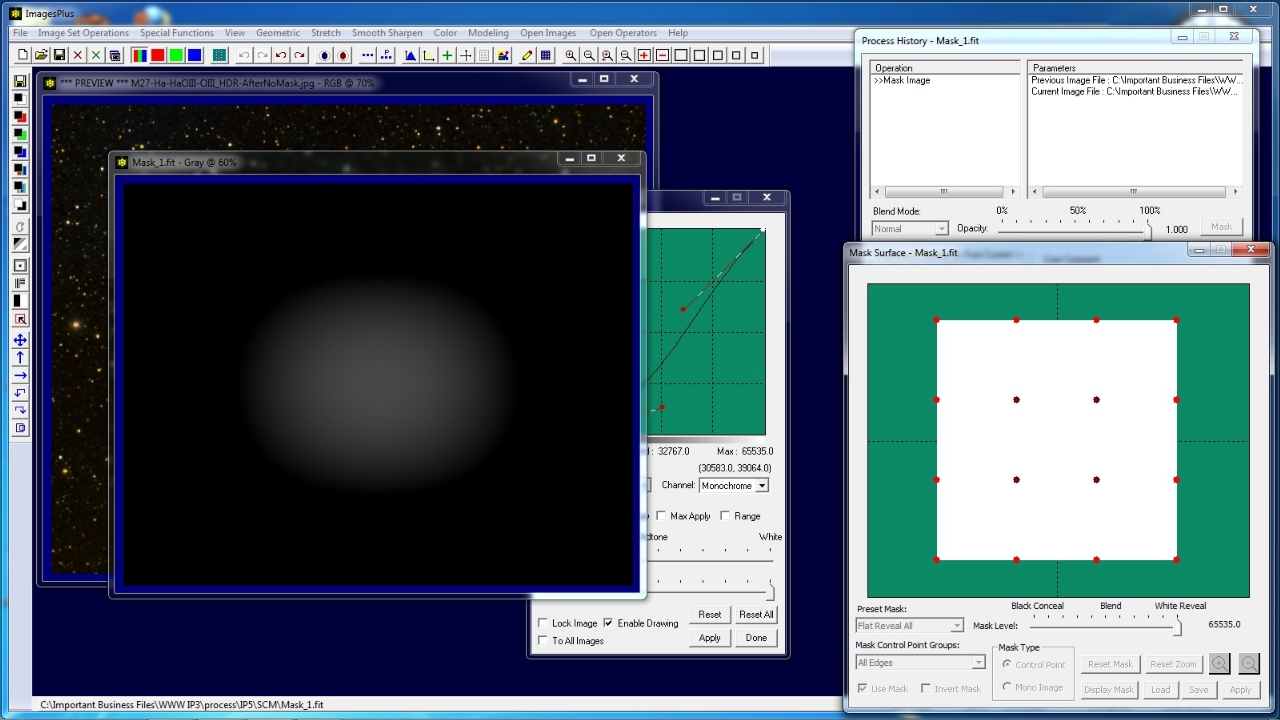
Step 2) Convert Control Point Mask to Image Mask
Press the Display Mask button on the Mask Surface window to display the control point mask as an image mask. The image mask can now be modified and used with either the Process History or Combine Image & Mosaic layers.
 |
Copyright © 2012 MLUnsold Digital Imaging. All Rights Reserved.