Auto focus uses the inside and outside slope and correction parameters setup by auto focus training for a given telescope, camera, focuser, and ASCOM absolute position focus motor.
- Select the training parameters from the auto focus setup window that match your current telescope optics, camera, ISO, focuser, and ASCOM focus motor.
- Use autoguiding when using auto focus so that the test star is not lost.
- Use an isolated fainter star that is not overexposed or saturated. A good star for auto focus use has a minimum or in focus half flux diameter ( HFD ) between ~ 1.7 and 4.0.
- A star with in focus HFD ~2.0 with 1 second exposure is ideal.
A detailed step-by-step example using auto focus with a Canon 400D, 130mm TMB F6 APO, and RoboFocus follows.
An example of using auto focus training to parameterize your telescope, camera, focuser, and ASCOM absolute position motor can be found at
Canon and Nikon Auto Focus Training.
Step 1
- From the main ImagesPlus menu open Camera | Canon DSLR | 5D, 400D,.... and connect to the camera.
- From the main ImagesPlus menu open Focuser | ASCOM Focuser... and select your absolute position focuser.
- Set exposure parameters on the Setting tab of ImagesPlus Canon DSLR camera control. ISO should be set to the same value used by auto focus training.
- Set HFD as the focus metric and Single Focus Test on the Focus tab of ImagesPlus Canon DSLR camera control.
- Press the Release button on the Focus tab and a full resolution color image is displayed.
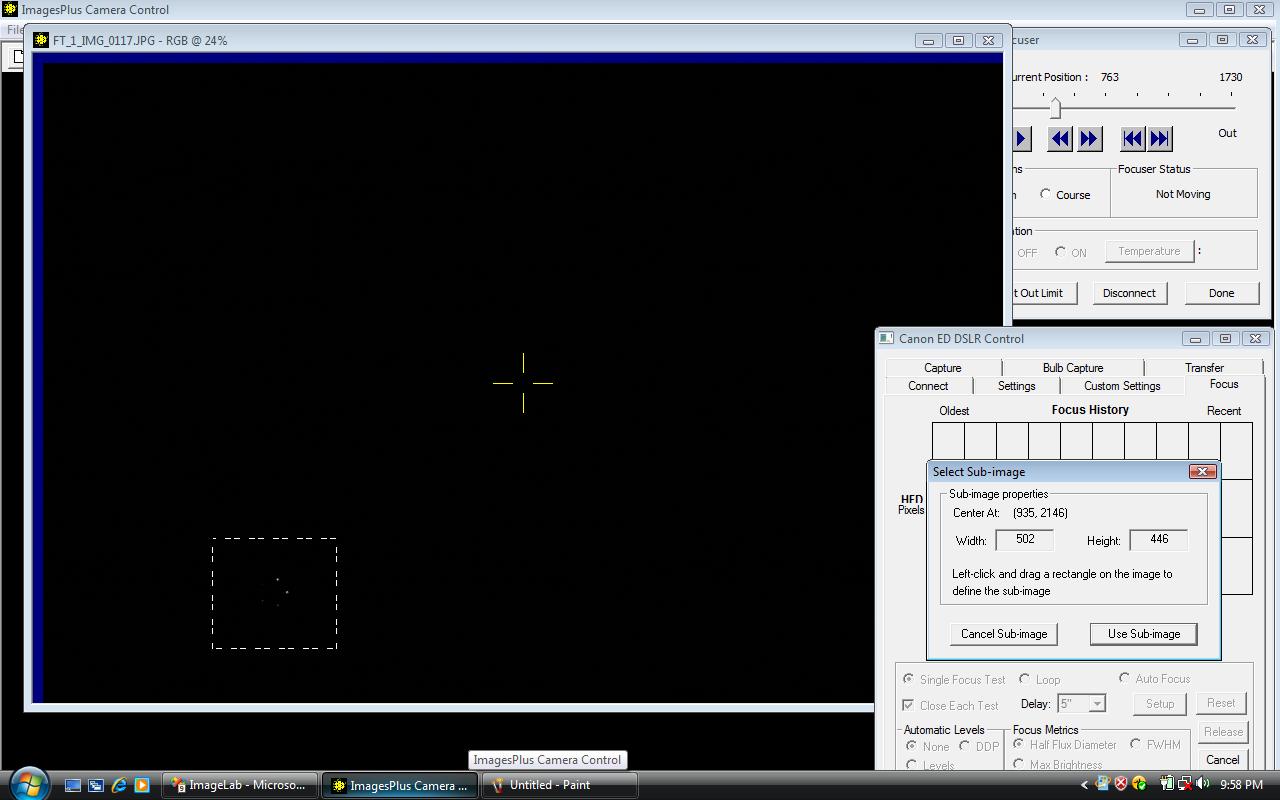
- Use the mouse to left-click and drag a rectangle around an isolated test star that is not overexposed or saturated.
- A fainter star with HFD <= ~10.0 or 12.0 is ideal for auto focus as shown by the image below.
- Press the Use Sub-image button and the subimage appears.
Select a subimage that contains an isolated test star with HFD <= ~ 10.0 or 12.0 that is not overexposed or saturated. The stars shown above in the rectangle are a good choice for auto focus.
 |
Step 2
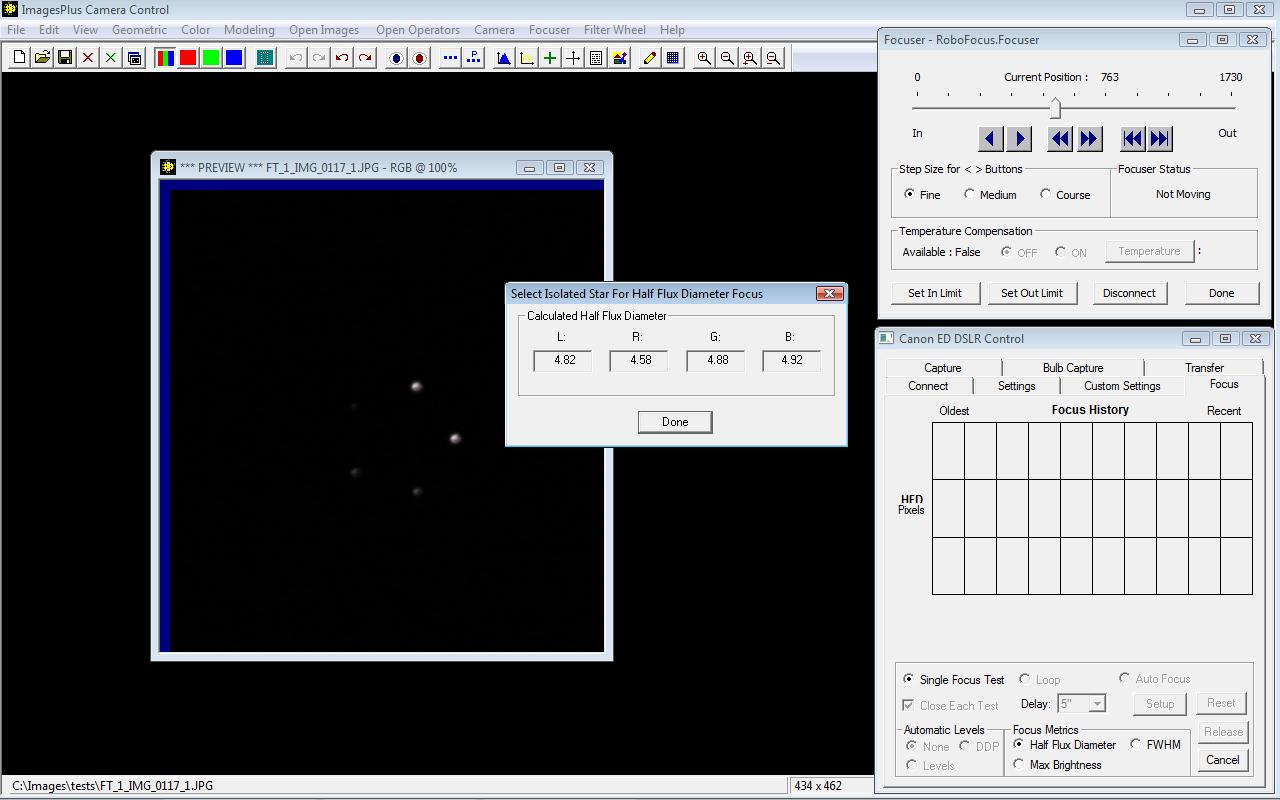
- Left-click on the center of a star in the subimage to select it for auto focus.
- The lower right star is used since it is not overexposed and has HFD <= ~ 10.0 - 12.0.
- Press the Done button and you are ready to start auto focus.
The lower right star is used for auto focus since it is not overexposed and has HFD <= ~ 10.0 - 12.0.
 |
Step 3
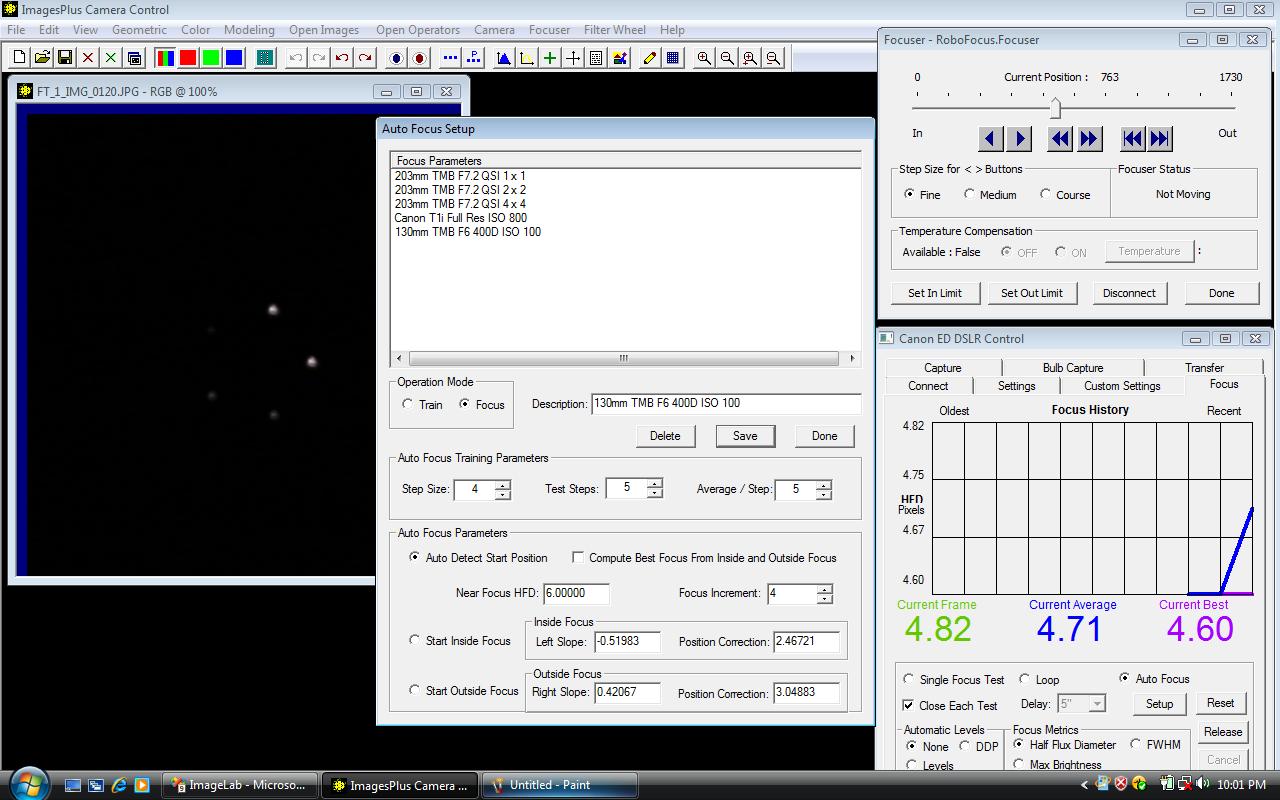
- Select Auto Focus on the Focus tab then press the Setup button.
- On the setup window select Focus as the operation mode then select training parameters that match your telescope, camera, ISO, focuser, and ASCOM focus motor.
- Press Save then Done on the setup window and you are ready to auto focus.
Select auto focus training parameters that match your telescope, camera, ISO, focuser, and ASCOM focus motor.
 |
Step 4
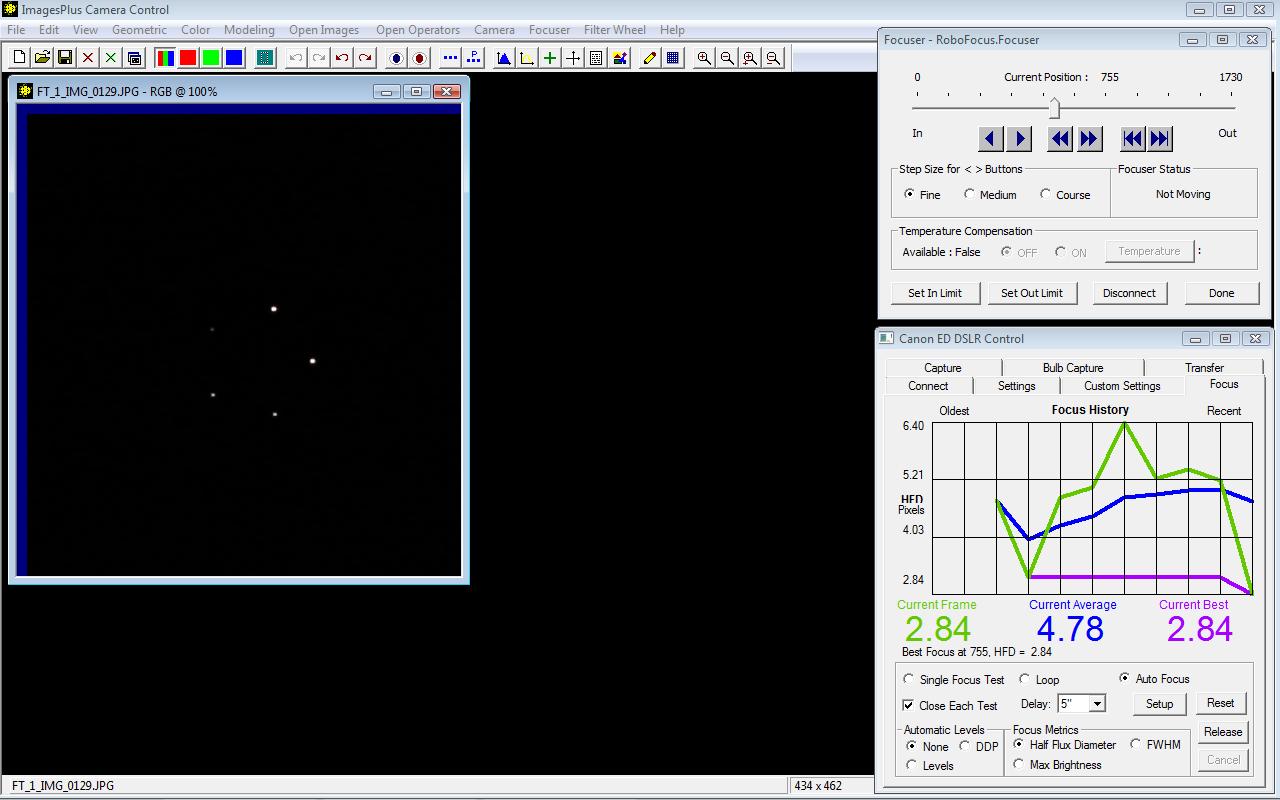
- Press Release on the Focus tab to start auto focus.
- A few images are taken inside and outside of focus then the focuser is moved to the best focus position and an image is displayed.
- If auto focus is cancelled by pressing the Cancel button on the focus tab then the focuser will return to its start position.
A few images are taken inside and outside of focus then the focuser is moved to the best focus position and the best focus image is displayed. The graph shows the 9 HFD measurements that were taken by auto focus to focus the telesope.
An example of using auto focus training to parameterize your telescope, camera, focuser, and ASCOM absolute position motor can be found at
Canon and Nikon Auto Focus Training.
 |
Copyright © 2010 MLUnsold Digital Imaging. All Rights Reserved.